

Pronto AI - User Guide
Watch Video
Here is the complete Login and Registration User Guide translated into English, maintaining your specific MDX structure and side-by-side image column layout.
Login
Watch Login
Authentication
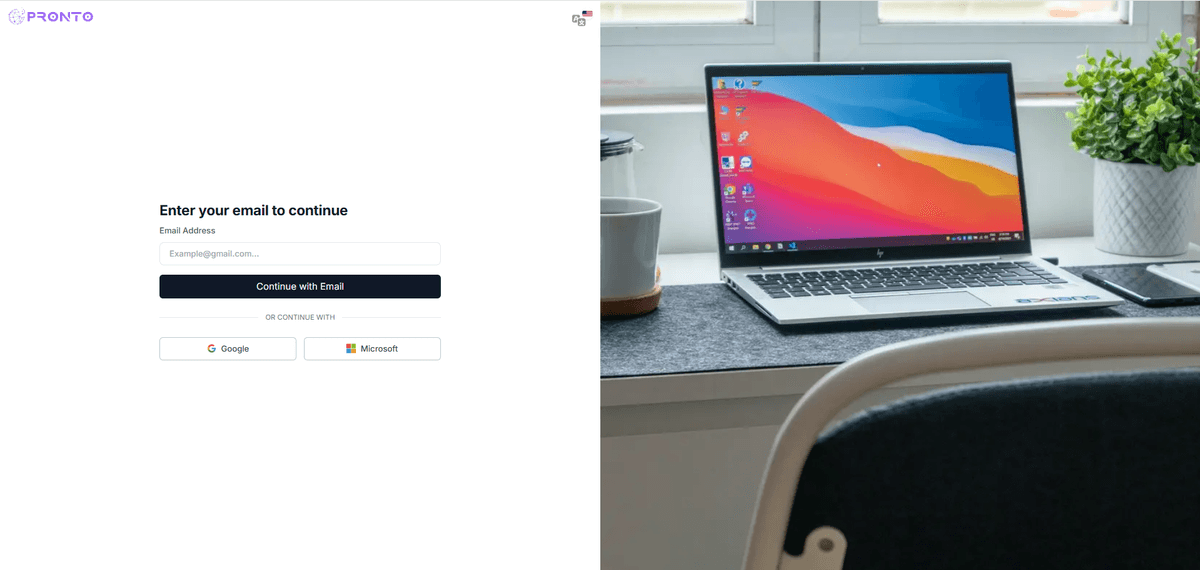
Email Verification:
- Go to the Login Page.
- Enter your registered Email Address.
- Click the "Continue with Email" button.
- You can also use alternate login options such as Google or Microsoft.
Tip: Always use the email address that was registered by your organization.
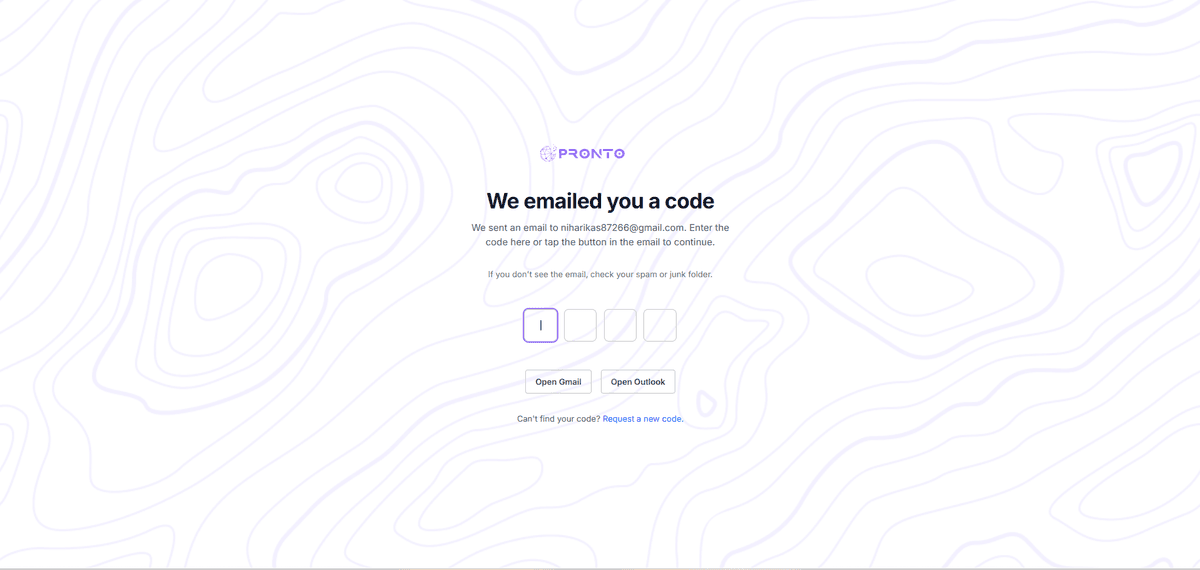
OTP Verification
- A 4-digit verification code will be sent to your email.
- Check your inbox (or spam folder) for the code.
- Enter the OTP in the boxes provided on the screen.
- If you do not receive the code, click on "Request a new code".
You can also use the "Open Gmail" or "Open Outlook" buttons to access your code directly.
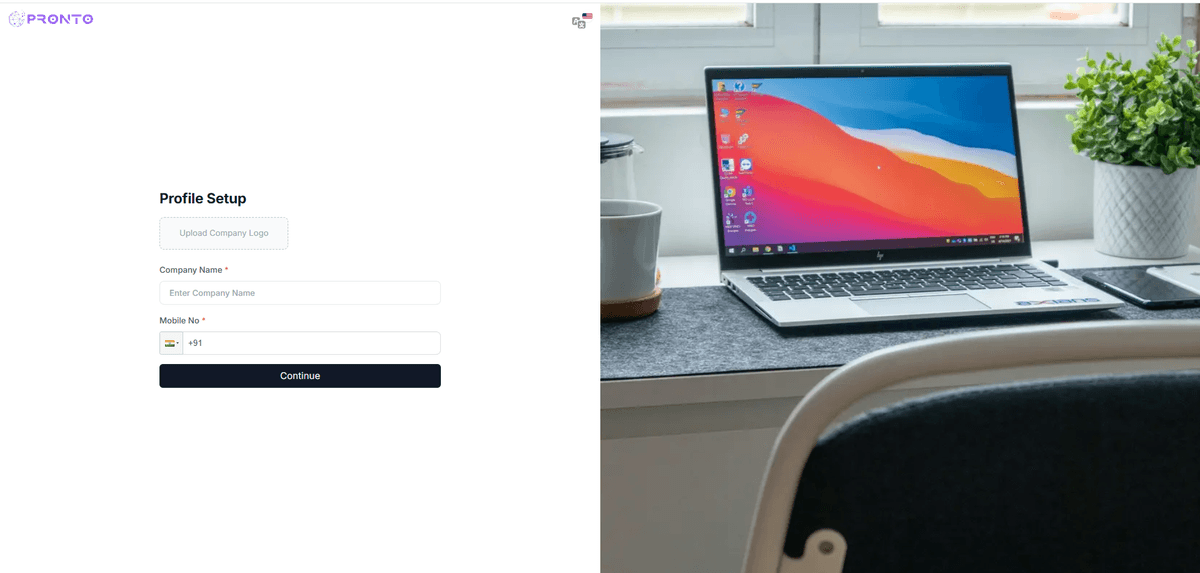
Profile setup
- A 4-digit verification code will be sent to your email.
- Check your inbox (or spam folder) for the code.
- Enter the OTP in the boxes provided on the screen.
- If you do not receive the code, click on "Request a new code".
You can also use the "Open Gmail" or "Open Outlook" buttons to access your code directly.
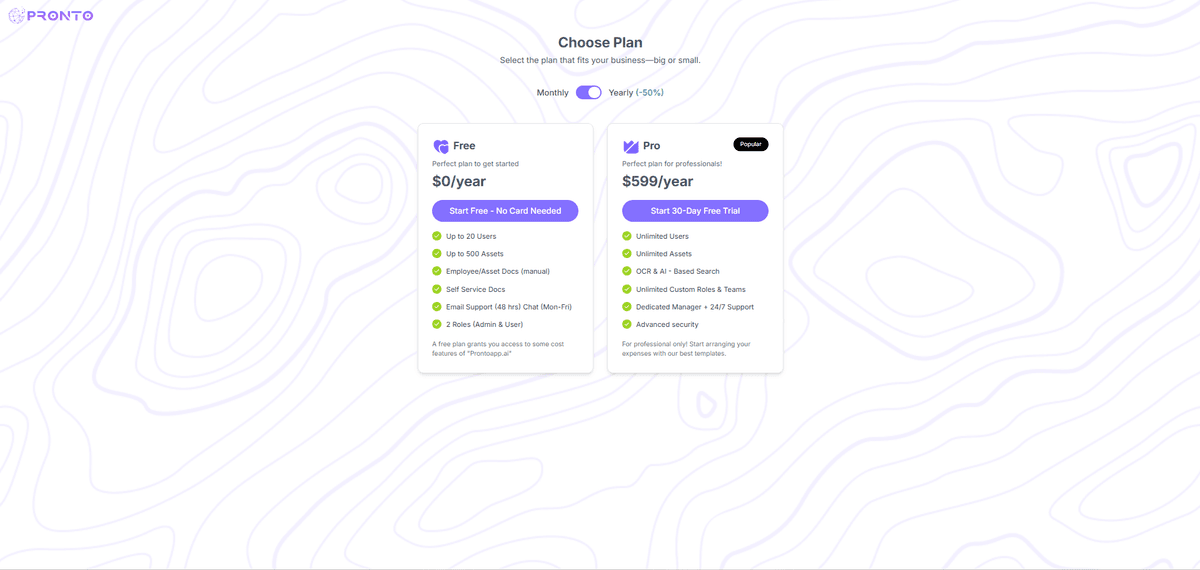
Plan Selection
- Monthly/Yearly Toggle: Use the toggle switch to select your billing cycle (Save up to 50% on Yearly plans).
- Choose Plan: Select either the Free or Pro plan based on your requirements.
- Start Free: Click the button to gain access to the dashboard.
Asset
Watch Video
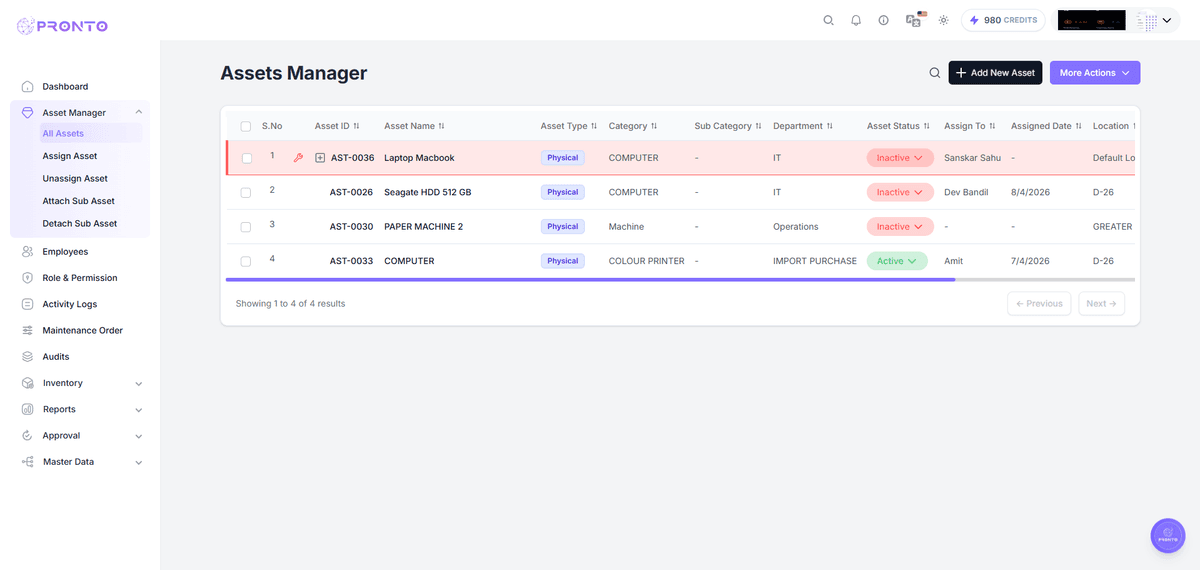
Assets Manager
The Assets Manager module allows users to view, manage, and track all organizational assets in one place. It provides details such as asset ID, type, category, status, and assignment information.
Asset List View
When you open an asset, the detail page is organized into multiple tabs:
- Asset ID – Unique identifier for each asset.
- Asset Name – Name or label of the asset.
- Asset Type – View depreciation values and financial lifecycle data.
- Category & Subcategory – View and download documents linked to the asset.
- Department – View a complete history of all past assignments for the asset.
- **Asset Status ** – View a complete history of all past assignments for the asset.
- Assign To – View a complete history of all past assignments for the asset.
- Assigned Date – View a complete history of all past assignments for the asset.
Each asset also features a unique QR Code that can be scanned for instant identification and quick access to its records.
To open an asset, click on its name from the All Assets list.
Assign Asset
The Assign Asset feature allows users to allocate assets to employees or team members. This helps in tracking asset usage, ownership, and accountability within the organization.
How to Assign an Asset
Follow these steps to assign an asset:
- Go to the Asset module from the left sidebar.
- Click on "Assign Asset" from the available actions.
- Fill in the required fields in the Assignment Details section:
1. Select Asset
- Choose the asset you want to assign from the dropdown list.
- Only available (unassigned or eligible) assets will be shown.
- This is a mandatory field.
2. Assign To
- Select the employee or team member to whom the asset will be assigned.
- The list includes all available users in the system.
- This is a mandatory field.
3. Assignment Date
- Displays the date when the asset is being assigned.
- By default, the current date is selected.
- You can change the date using the calendar picker if needed.
4. Notes (Optional)
- Add any additional details such as asset condition, special instructions, or temporary assignment details.
- Click "Assign Asset" to complete the process.
The asset will be linked to the selected employee and the assignment details will be updated in the system.
Click "Cancel" at any time to discard the process without saving any changes.
.png&w=1200&q=75)
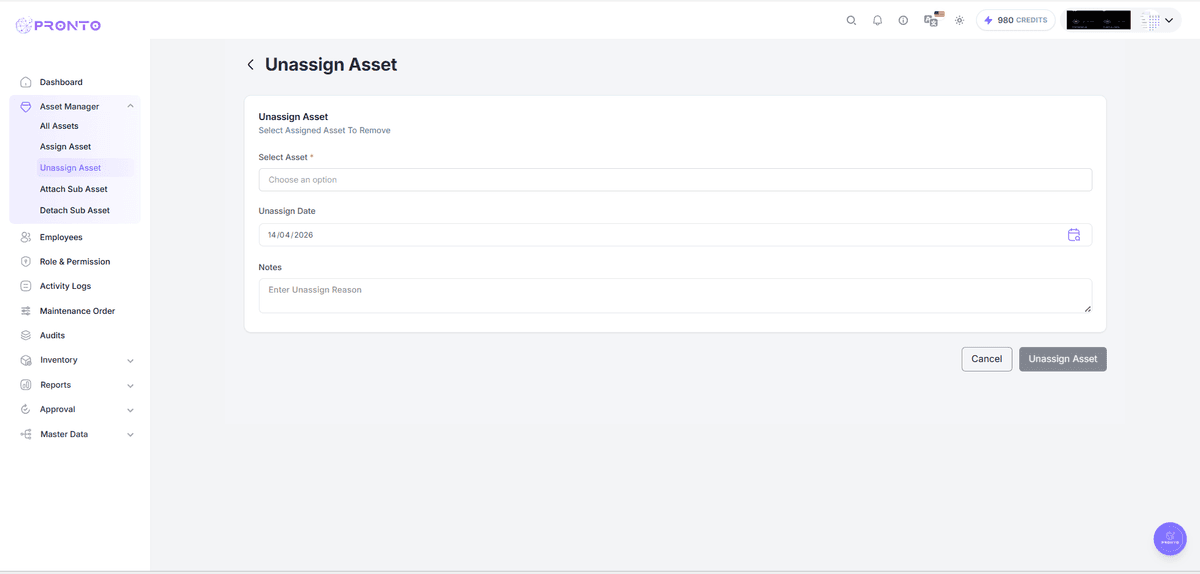
Unassign Asset
The Unassign Asset feature allows users to remove an assigned asset from an employee or team member. This is useful when an asset is returned, transferred, or no longer in use by the assigned person.
How to Unassign an Asset
Follow these steps to unassign an asset:
- Go to the Asset module from the left sidebar.
- Click on "Unassign Asset" from the available actions.
- Fill in the required fields in the Unassignment Details section:
1. Select Asset
- Choose the asset you want to unassign from the dropdown list.
- Only currently assigned assets will be displayed.
- This is a mandatory field.
2. Unassign Date
- Displays the date when the asset is being unassigned.
- By default, the current date is selected.
- You can modify the date using the calendar picker if required.
3. Notes (Optional but recommended)
- Enter the reason or additional details for unassigning, such as:
- Employee resignation
- Asset returned
- Asset transfer to another department
- Click "Unassign Asset" to remove the asset from the selected employee.
The asset will become available for reassignment and all assignment details will be updated in the system.
Click "Cancel" at any time to discard the process without saving any changes.
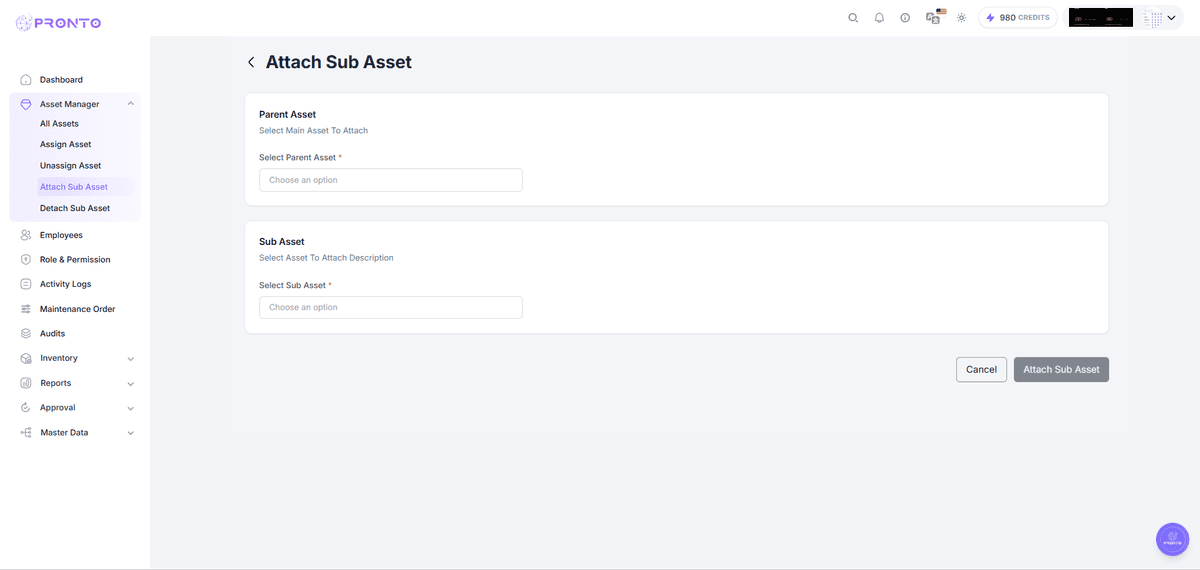
Attach Sub-Asset
The Attach Sub-Asset feature allows users to link a sub-asset to a main (parent) asset. This is useful for managing related components, accessories, or dependent items under a single primary asset.
How to Attach a Sub-Asset
Follow these steps to attach a sub-asset:
- Go to the Asset module from the left sidebar.
- Click on "Attach Sub-Asset" from the available actions.
- Fill in the required fields:
1. Select Parent Asset
- Choose the main asset to which you want to attach a sub-asset.
- This represents the primary asset (e.g., Laptop, Machine, Device).
- Only eligible assets will be displayed in the dropdown.
- This is a mandatory field.
2. Select Sub-Asset
- Choose the asset that will be attached as a sub-asset.
- This represents a dependent or associated item (e.g., charger, mouse, accessory).
- Only unlinked or available assets will be shown.
- This is a mandatory field.
- Click "Attach Sub-Asset" to link the selected sub-asset to the parent asset.
Note:
Once attached, the sub-asset becomes part of the parent asset and may no longer appear as an independent asset in certain views. The relationship will be reflected in the asset details.
Click "Cancel" at any time to discard the process without saving any changes.
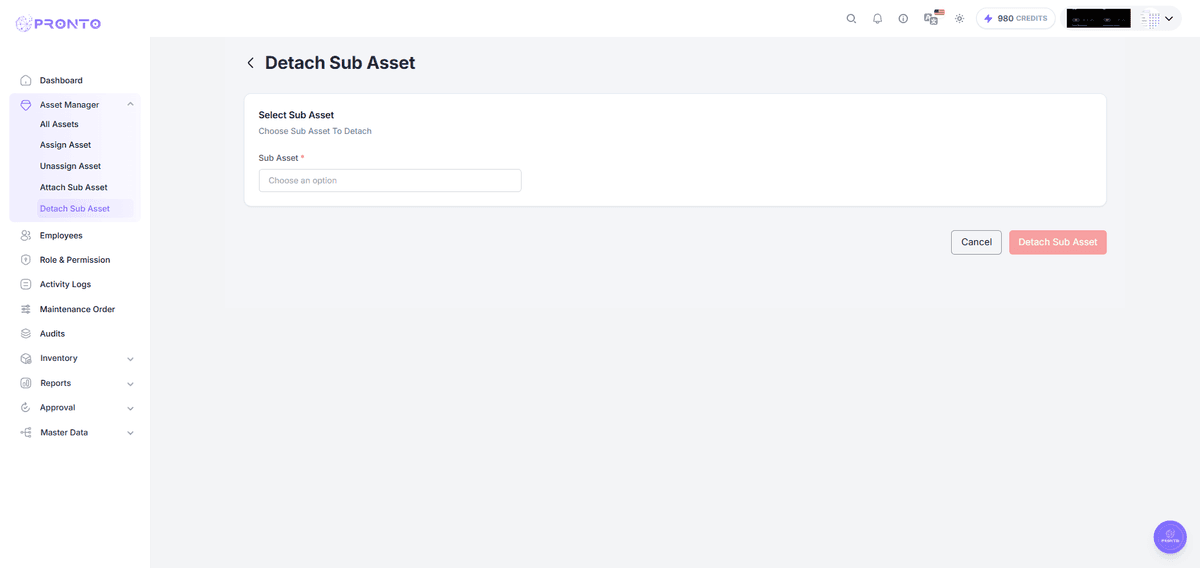
Detach Sub-Asset
The Detach Sub-Asset feature allows users to remove a sub-asset from its parent asset. This is useful when a component is no longer associated with the main asset or needs to be reassigned or managed independently.
How to Detach a Sub-Asset
Follow these steps to detach a sub-asset:
- Go to the Asset module from the left sidebar.
- Click on "Detach Sub-Asset" from the available actions.
- Fill in the required field:
1. Select Sub-Asset
- Choose the sub-asset you want to detach from the dropdown list.
- Only currently attached sub-assets will be displayed.
- This is a mandatory field.
- Click "Detach Sub-Asset" to remove the selected sub-asset from its parent asset.
Note:
Once detached, the sub-asset becomes an independent asset again and can be reassigned or attached to another parent asset. The relationship with the previous parent asset will be permanently removed.
Click "Cancel" at any time to discard the process without saving any changes.
View Asset
The View Asset feature allows you to review all information related to a specific asset in one place.
What You Can View
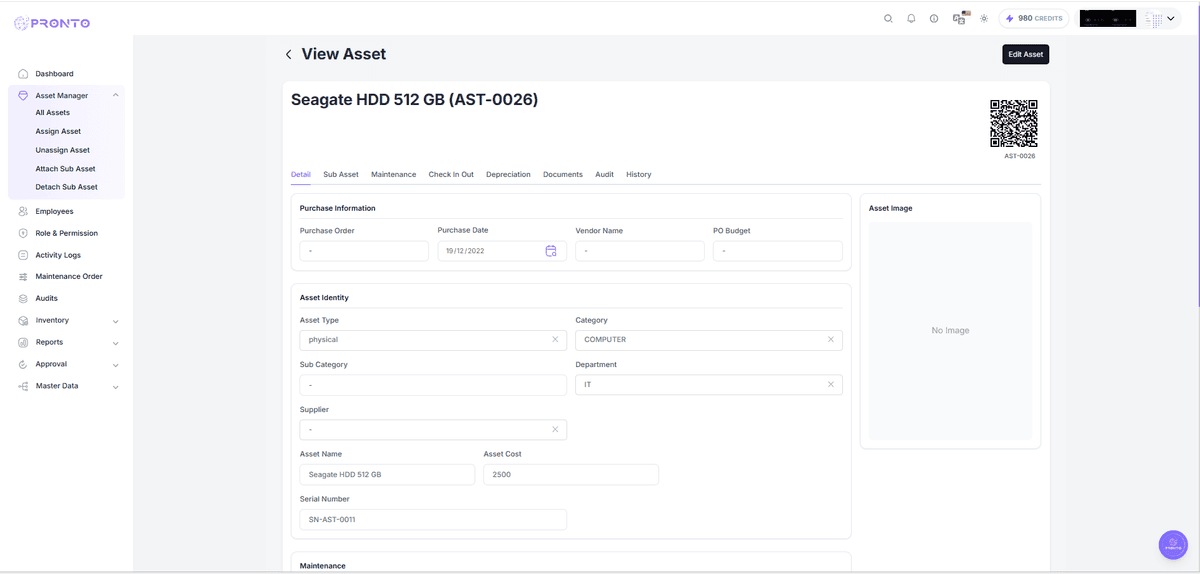
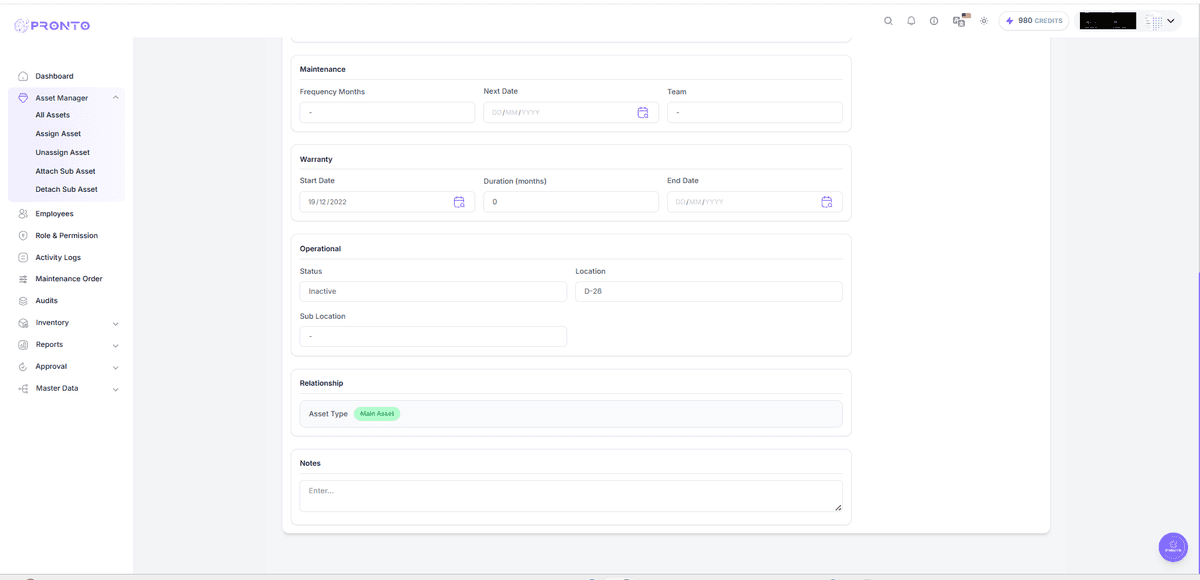
When you open an asset, the detail page is organized into multiple tabs:
- Detail – View the asset's name, unique ID, current status (e.g., Active, Under Maintenance), purchase details, and linked documents.
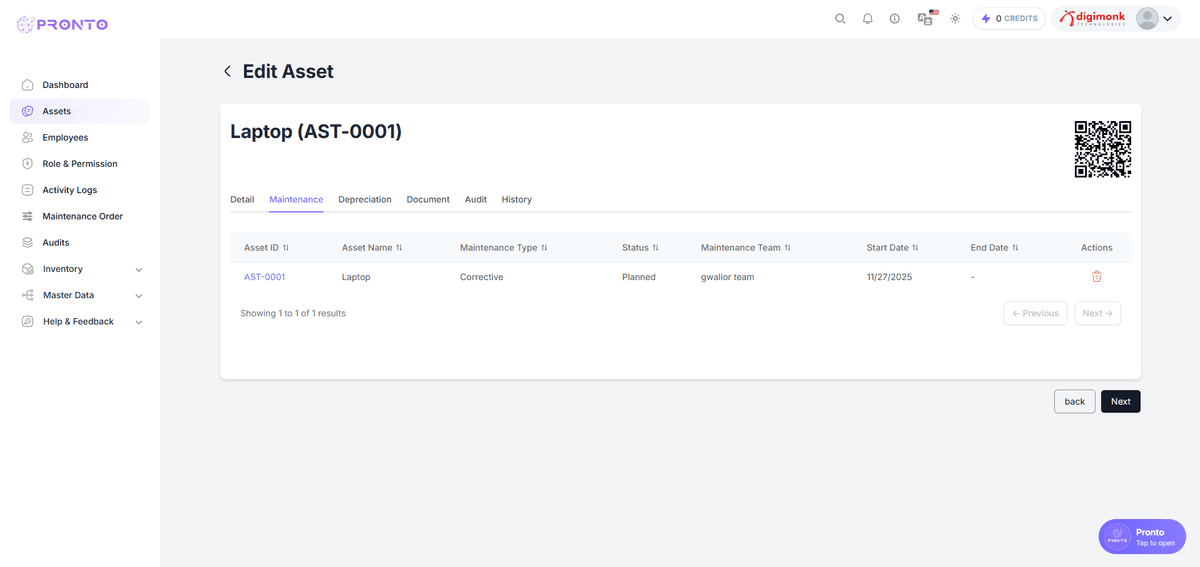
- Maintenance – View maintenance records and schedules for the asset.
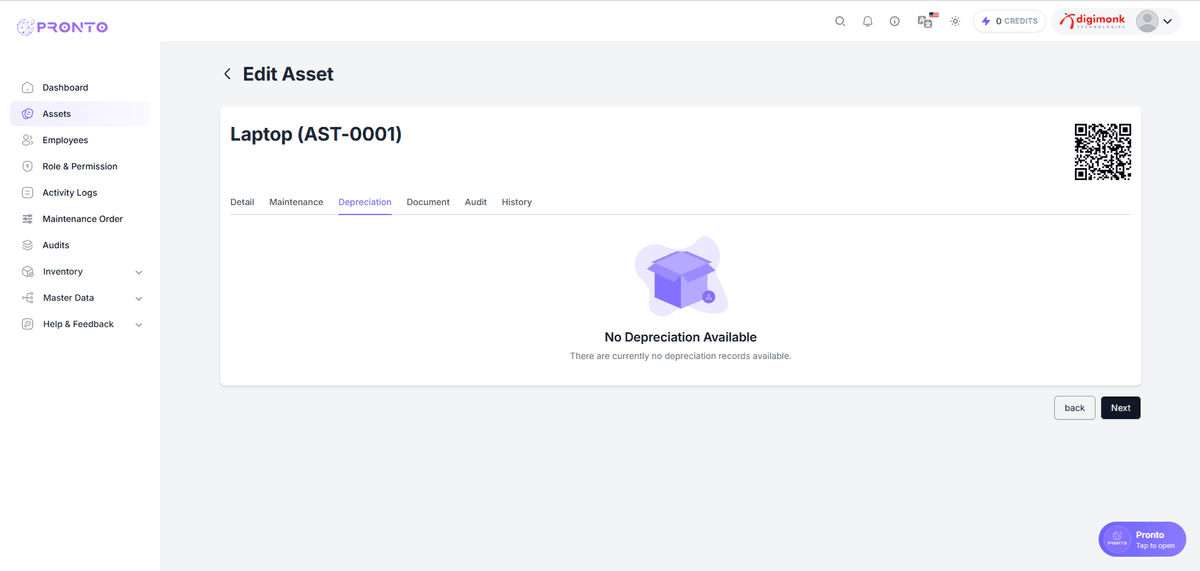
- Depreciation – View depreciation values and financial lifecycle data.
- Document – View and download documents linked to the asset.
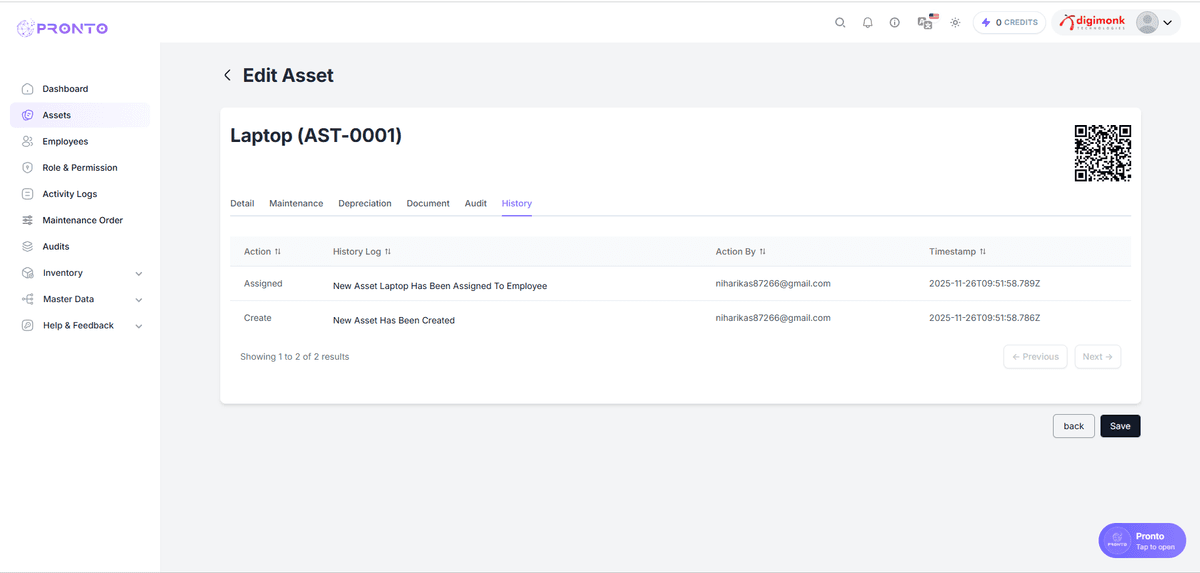
- History – View a complete history of all past assignments for the asset.
Each asset also features a unique QR Code that can be scanned for instant identification and quick access to its records.
To open an asset, click on its name from the All Assets list.
Maintenance Tab
Used to track all maintenance-related activities:
- Add service schedules and remarks.
- Monitor past or upcoming repairs.
Depreciation Tab
Manages the asset's financial depreciation:
- View depreciation rate/method.
- Track accumulated depreciation.
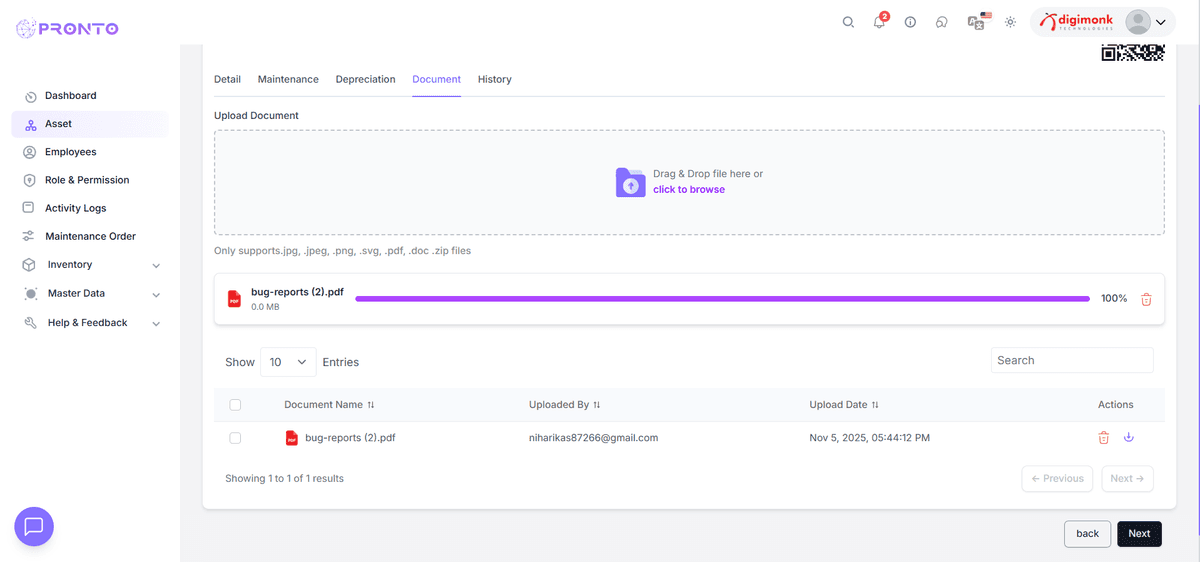
Document Tab
Stores invoices, warranty cards, or service reports.
History Tab
Tracks changes like:
- Who updated
- What changed
- When it was changed
Assets With Me
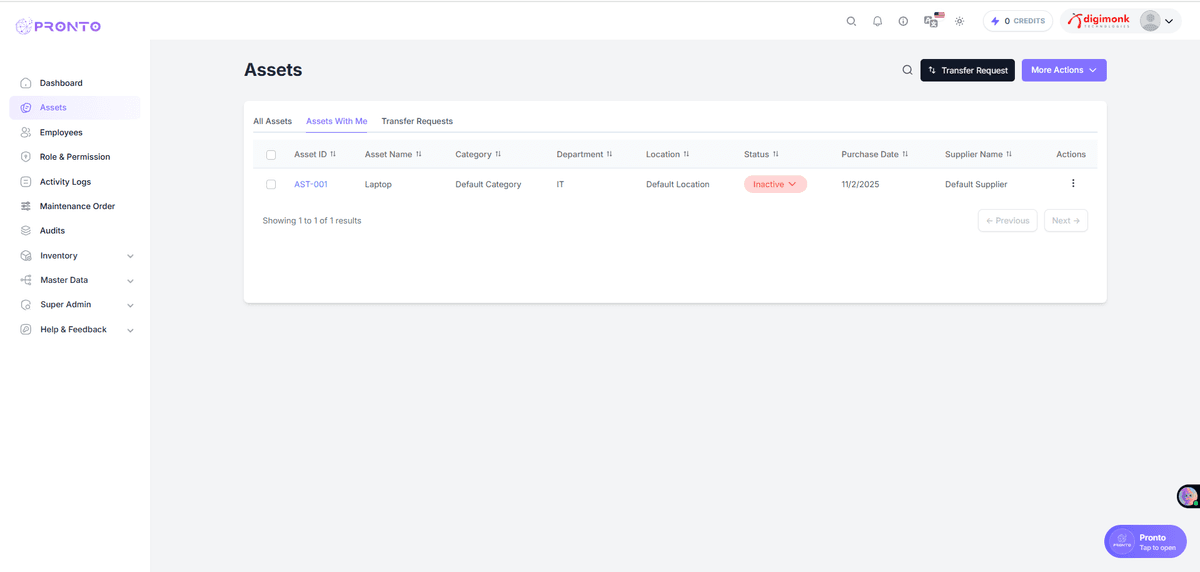
Navigation Path: Dashboard → Asset → Assets With Me
This page shows all assets currently assigned to the logged-in user.
Fields Description
- Asset ID - Unique asset code (clickable).
- Asset Name - Name of the asset.
- Category - Category (e.g., IT Equipment).
- Department - Linked department.
- Location - Physical location.
- Status - Active, Inactive, or Under Maintenance.
- Purchase Date - Date of purchase.
- Supplier - Vendor name.
- Actions - Edit, Delete, etc.
Asset Transfer Request
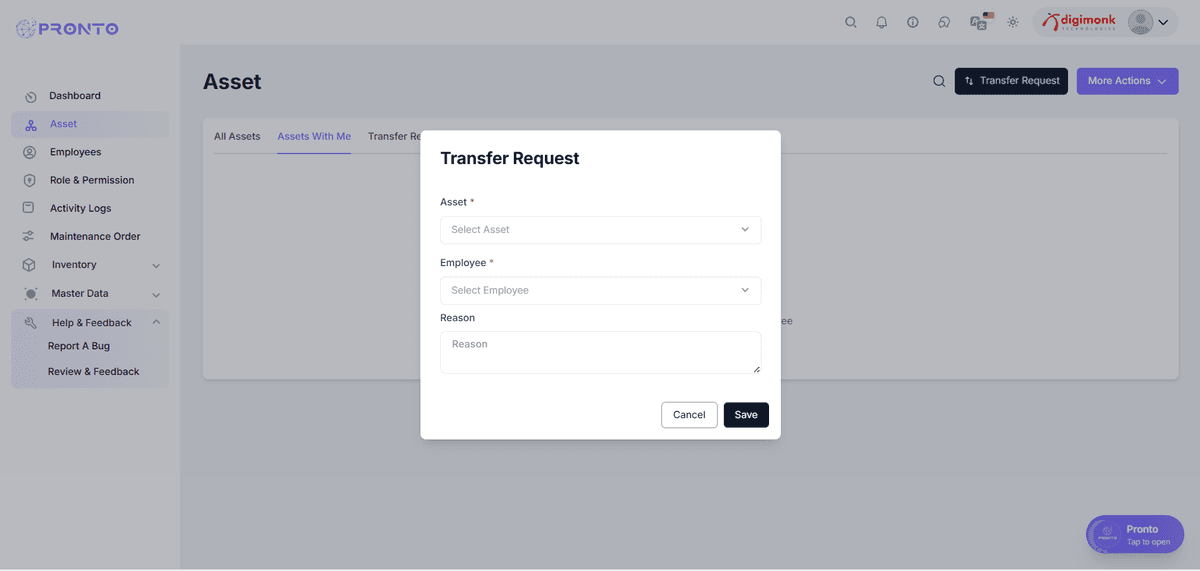
Allows employees to request transfer of assets to another employee or department.
Accessing the Request
- Go to Asset → Assets With Me.
- Click Transfer Request.
Fill the Form
Fields:
- Asset
- Employee
- Reason
Click Save or Cancel.
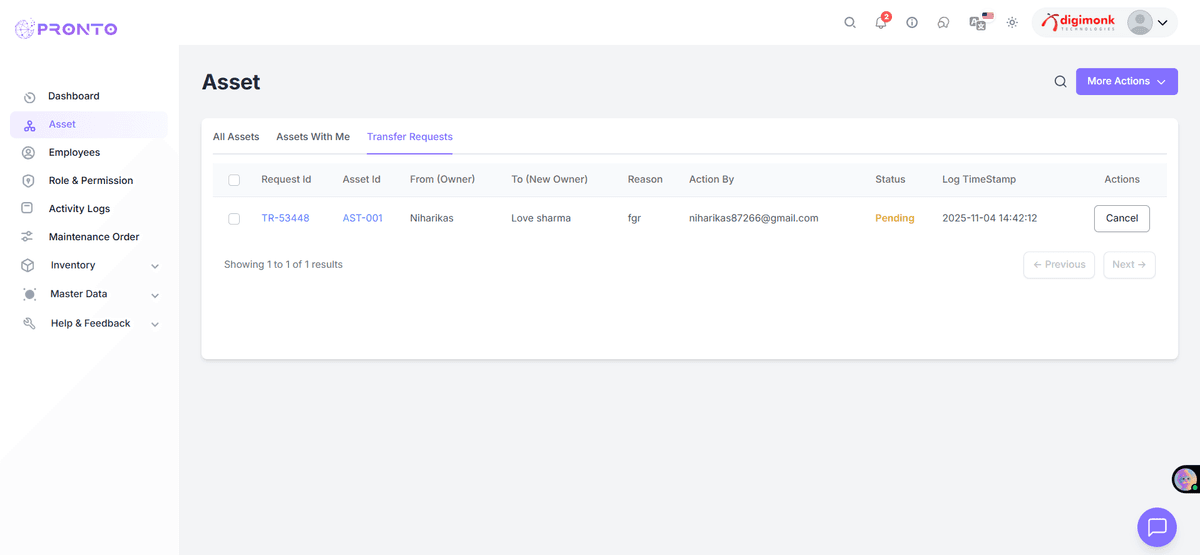
Status Flow
- Pending → Waiting approval
- Approved → Transfer done
- Rejected → Request denied
More Actions Menu
- The More Actions menu provides access to additional options, including editing, deleting, and managing various administrative functions.
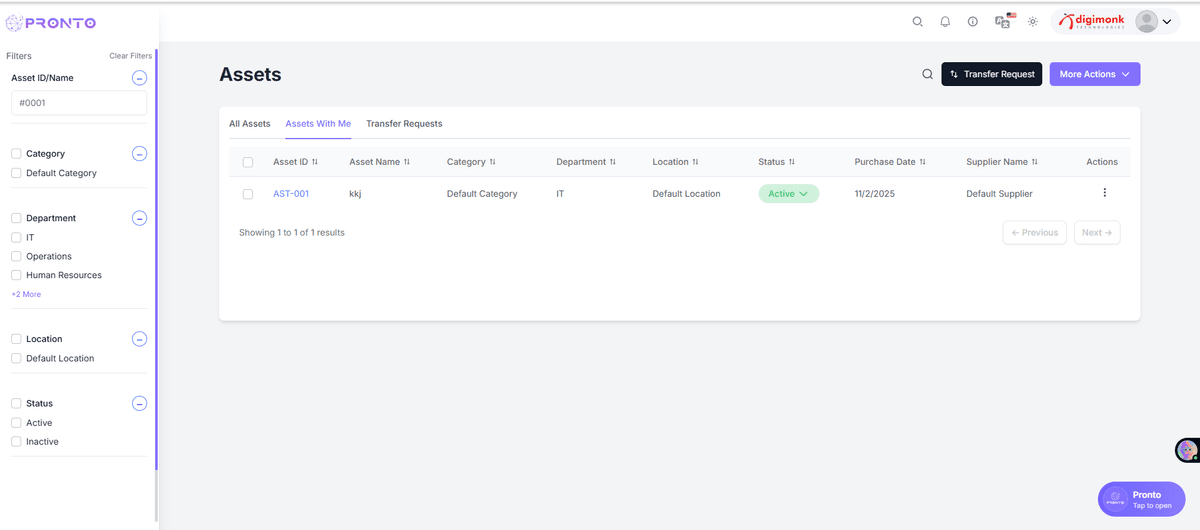
Filters
Filter assets by category, department, location, or status.
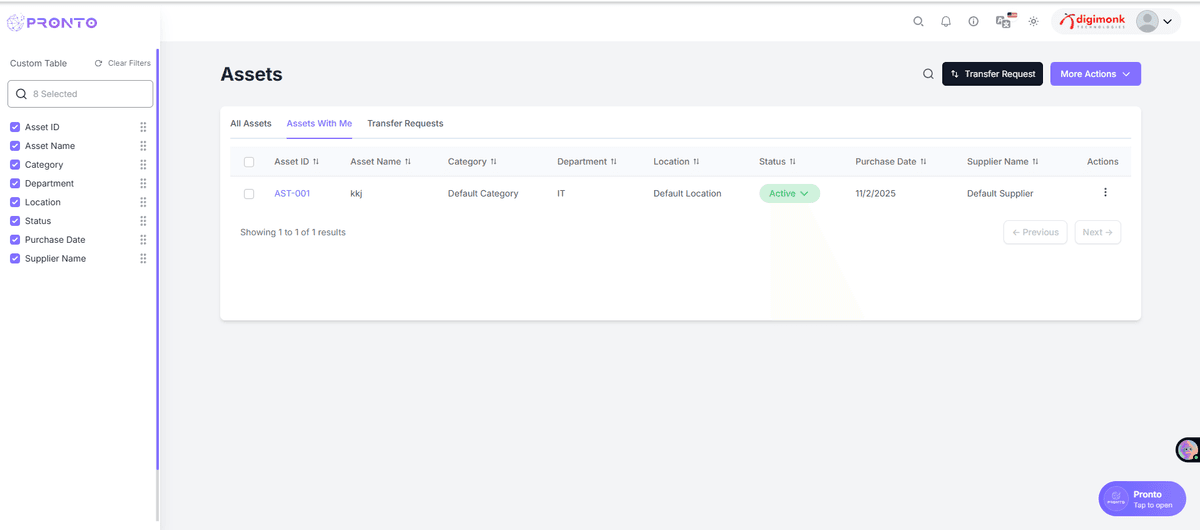
Custom Table
Show/hide or rearrange columns as needed.
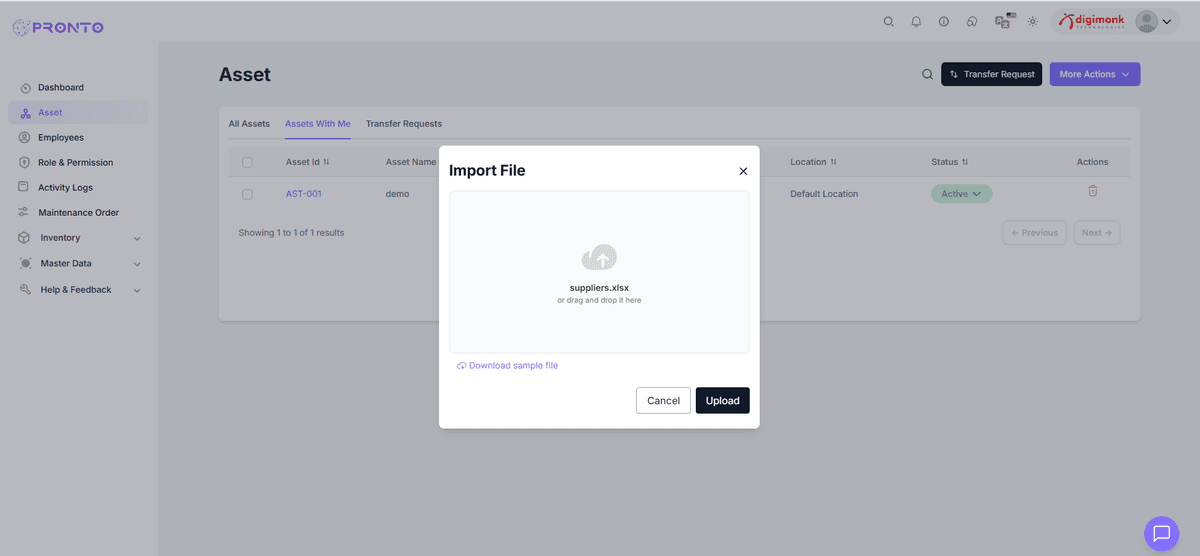
Import
Upload asset data from Excel or CSV.
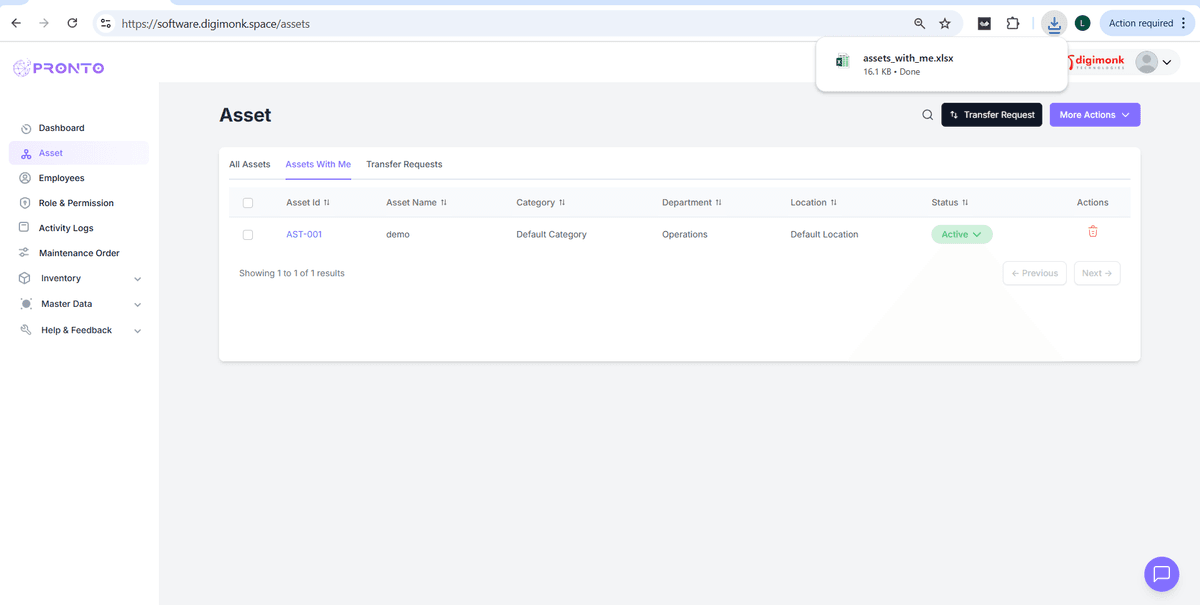
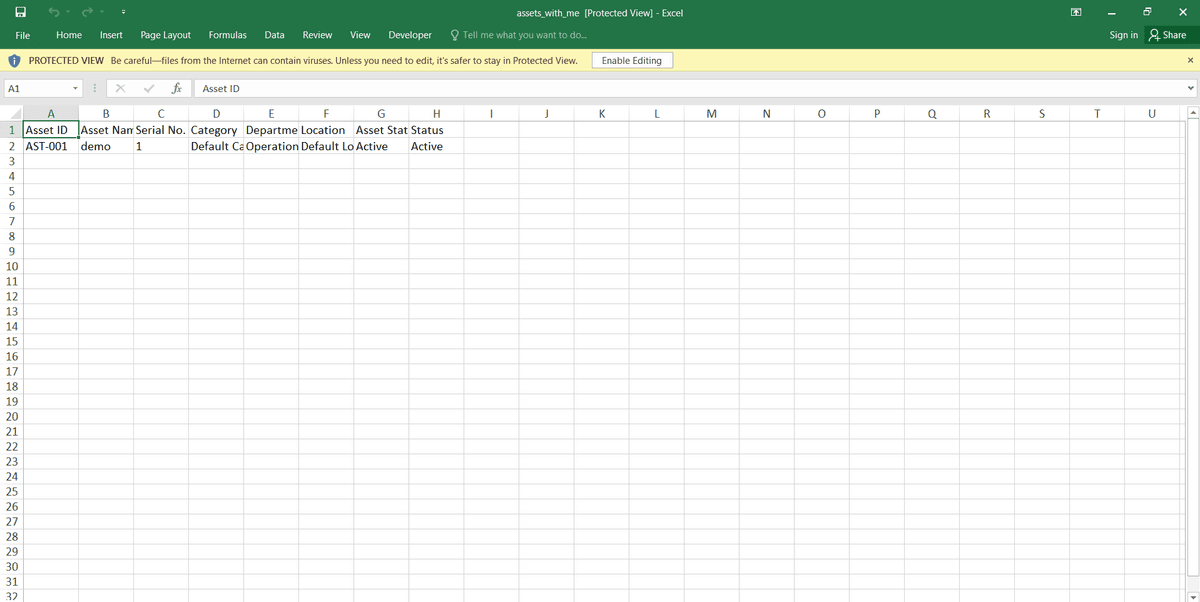
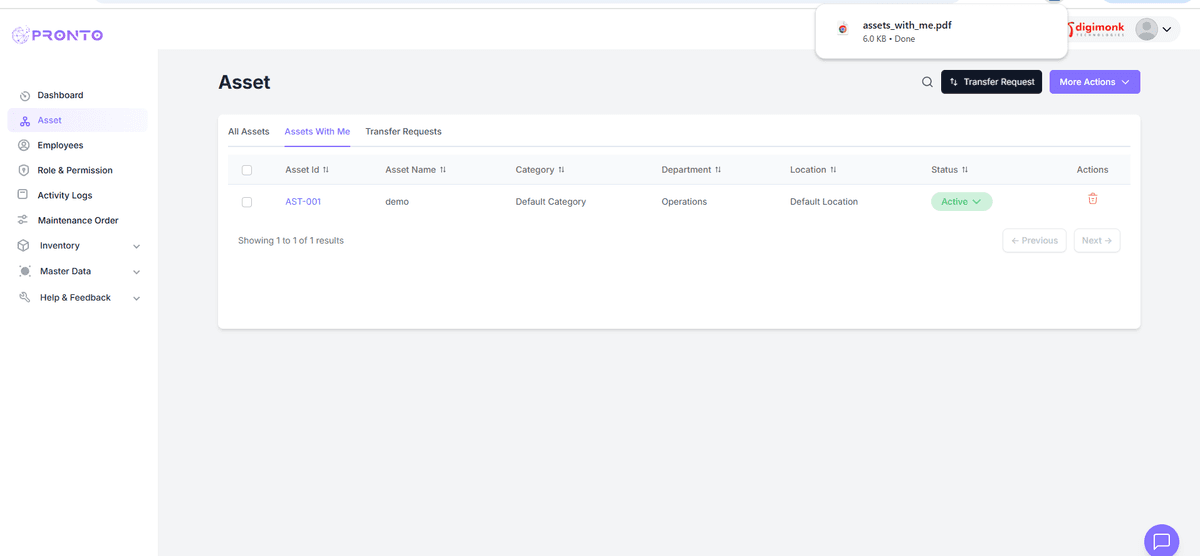
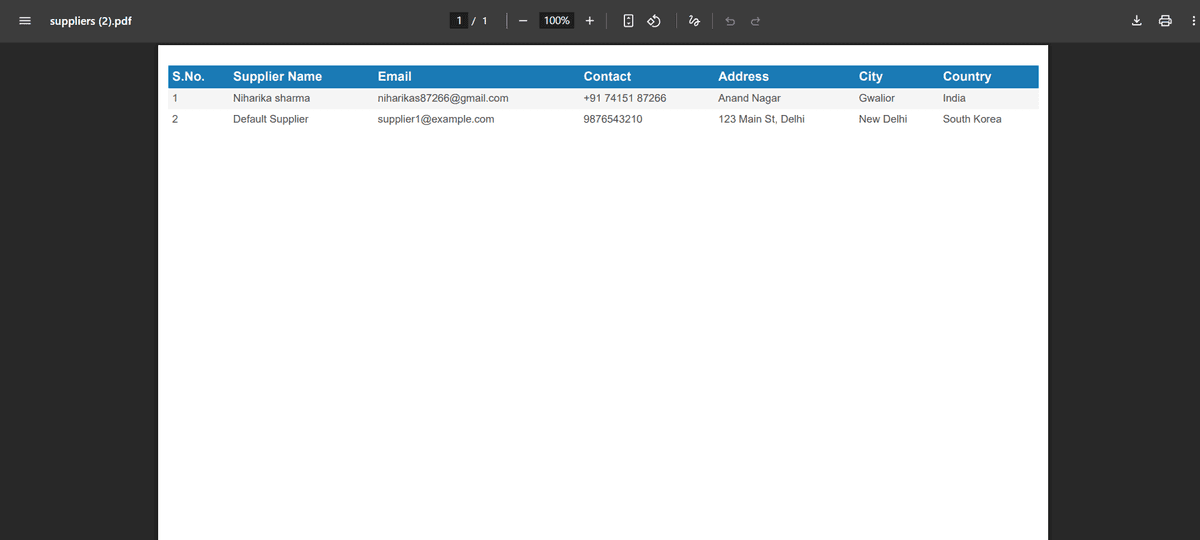
Export
- Excel: for offline record-keeping
- PDF: for printable reports
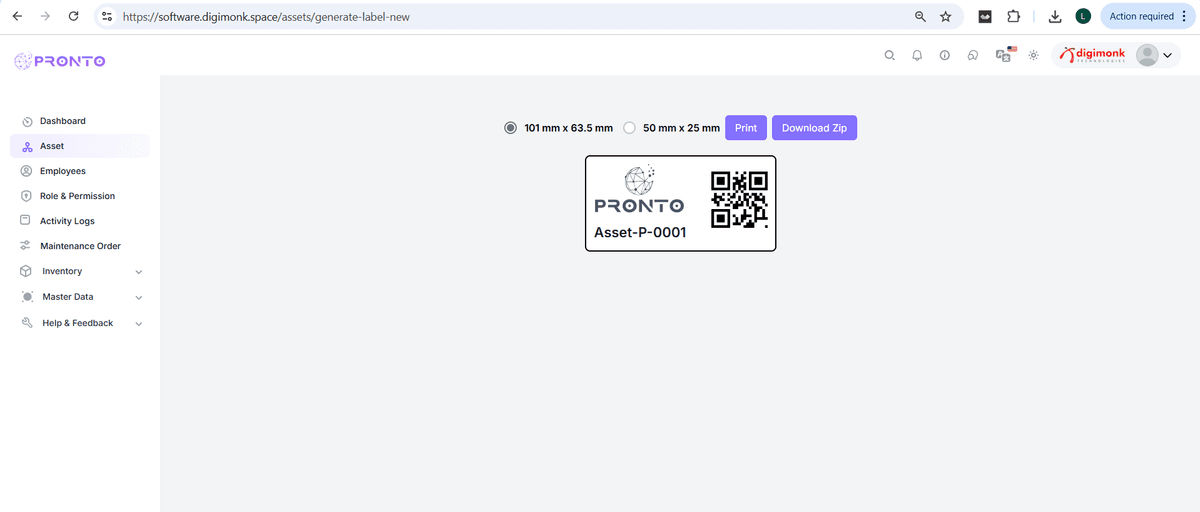
Generate Label
Create QR/barcode labels for physical tagging.
Delete / Inactive / Active
Manage asset status or remove records.
⚠️ Once deleted, records can't be recovered.
Employee
The Employees module allows HR/Admin users to manage employee information, work details, permissions, and assigned assets in one centralized place.
Watch Video
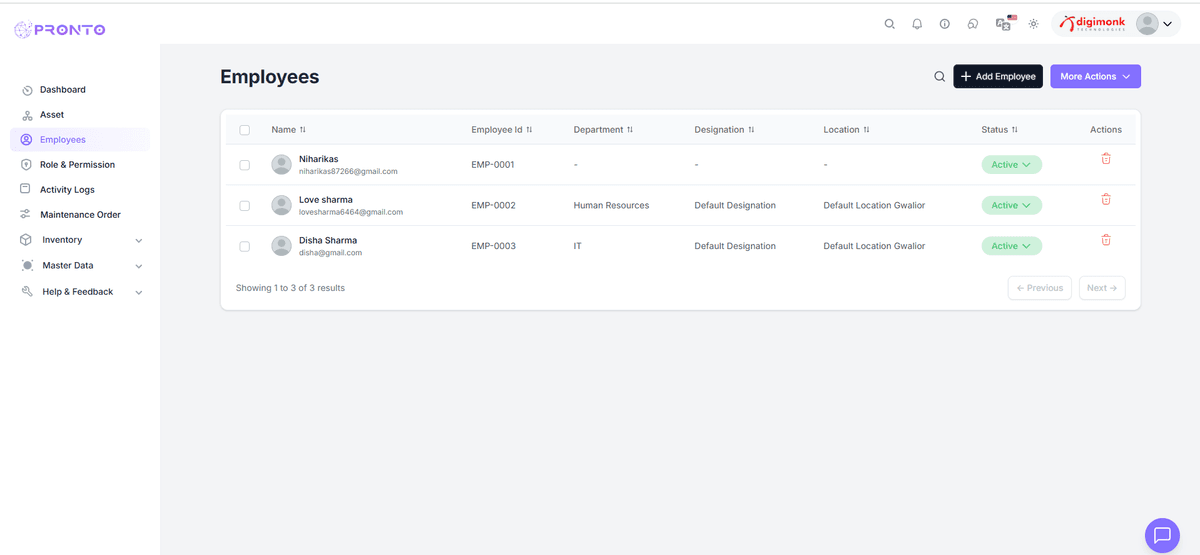
Accessing the Employee Section
- Log in to the PRONTO dashboard.
- From the left sidebar, click on Employees.
- You'll see the list of all employees registered in the system.
Adding a New Employee
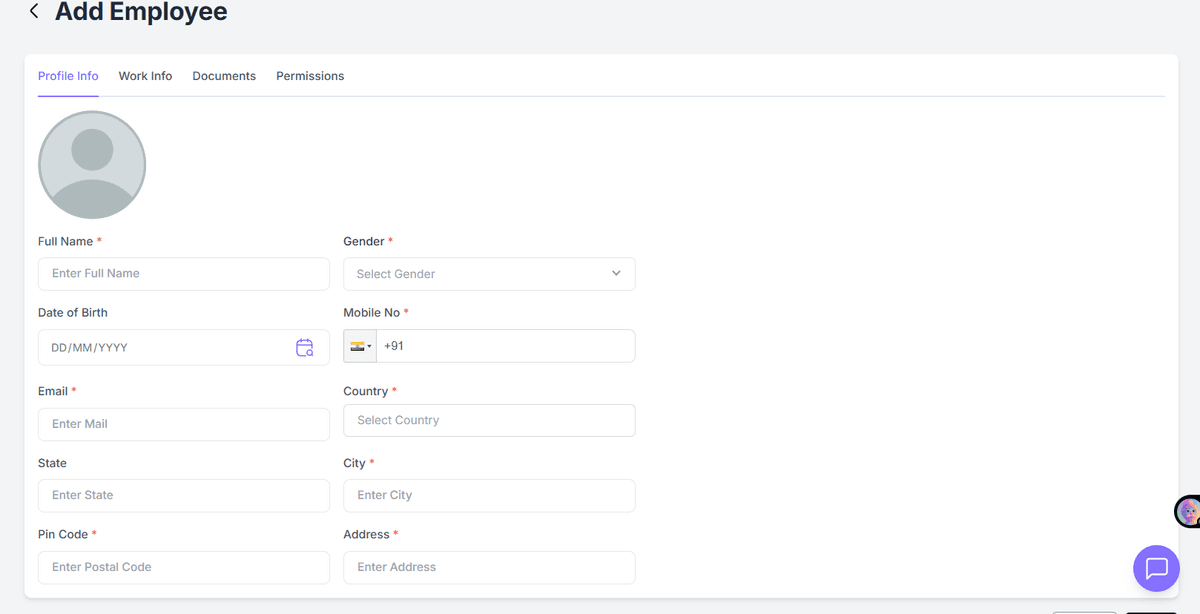
- Click on the Add Employee button (usually on the top-right).
- Fill in all required fields in the Profile Info tab:
- Full Name
- Gender
- Date of Birth
- Mobile Number
- Email Address
- Country, State, City
- Address and Pin Code
- Click Save to create the employee record.
Updating Employee Details
- Click on an employee's name from the list.
- You'll be taken to the Employee Detail page with multiple tabs:
Tabs
- Profile Info - Personal details (Name, DOB, Contact Info).
- Work Info - Job title, Department, Joining Date, Reporting Manager, etc.
- Documents - Upload ID proofs, resumes, or contracts.
- Permissions - Assign system roles or access levels.
- Assigned Asset - View or assign company assets (e.g., laptop, ID card).
- ORG Chart - Check the employee's position in the organization structure.
- History - View past updates or activity logs.
After making any edits, click Update / Save Changes.
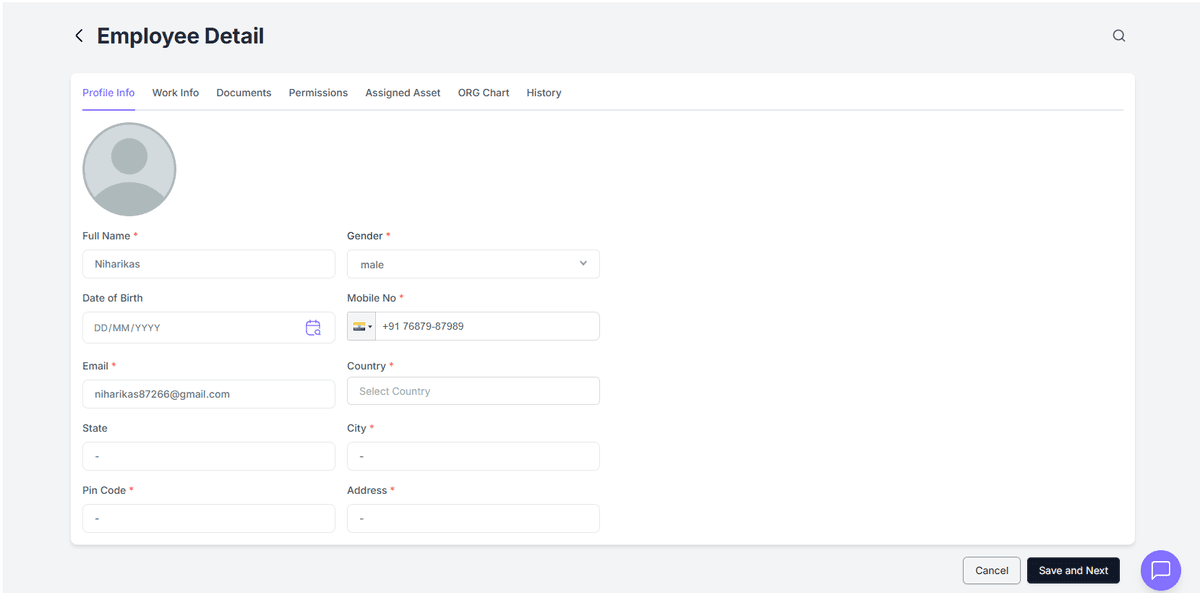
Profile Info
The Profile Info tab allows you to view and manage personal details of an employee.
All fields marked with an asterisk (*) are mandatory.
Fields Description
Enter the employee's complete name.
Select the employee gender from the dropdown.
Choose the birth date using the calendar icon.
Enter a valid 10-digit mobile number with country code.
Enter the official or personal email address.
Select the country of residence or work location.
Enter or select the state.
Provide the city name.
Enter the area's Postal (ZIP) code.
Enter the full address (house number, street, area, etc.).
(Optional) Upload a photo by clicking the image icon.
Action Buttons
Save and Next → Saves data and moves to next tab (Work Info).
Cancel → Cancels unsaved changes and returns to previous page.
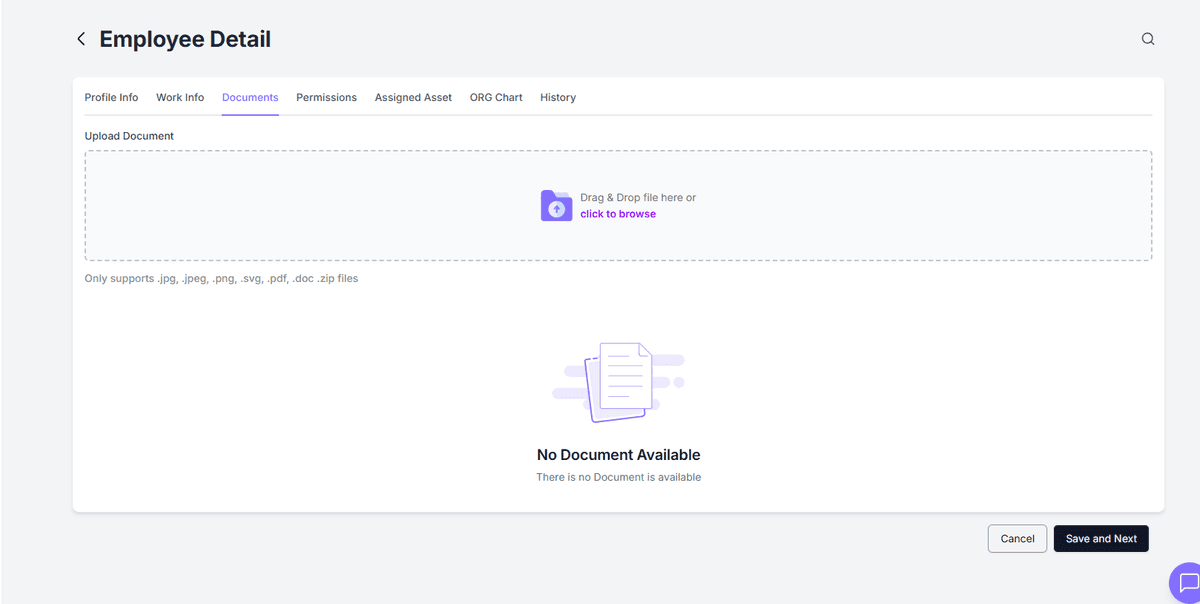
Uploading Employee Documents
- Go to the Documents tab.
- Click Upload Document.
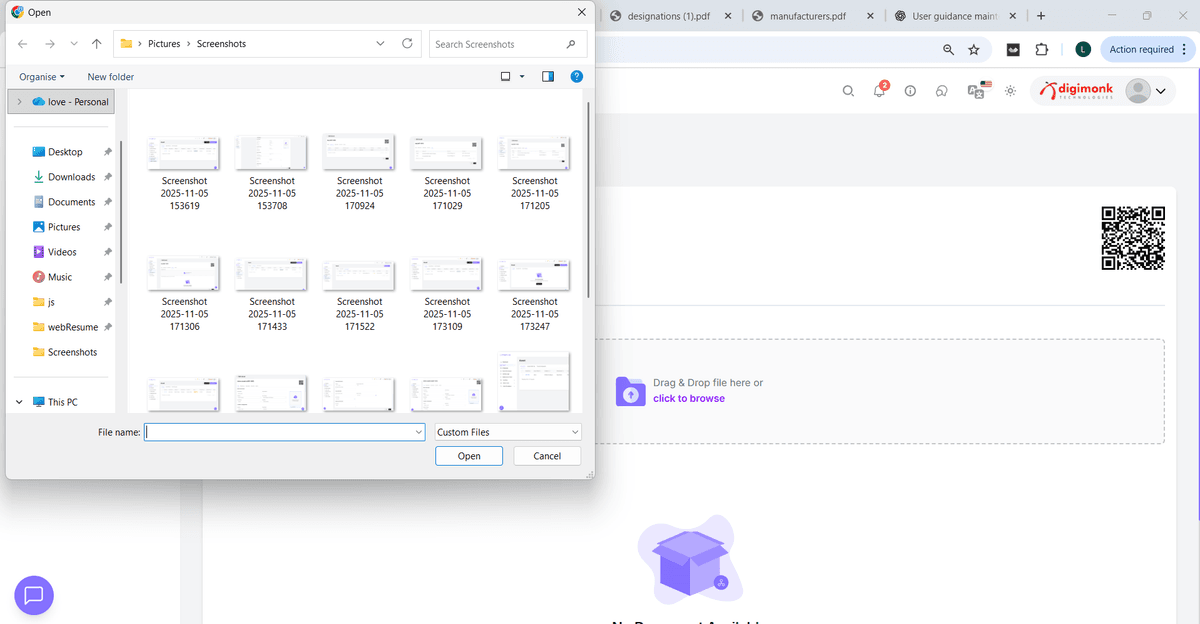
- Select the file (PDF, JPG, PNG, etc.) and upload it.
- Add a brief Document Name or Description (e.g., "Aadhar Card", "Offer Letter").
Managing Permissions
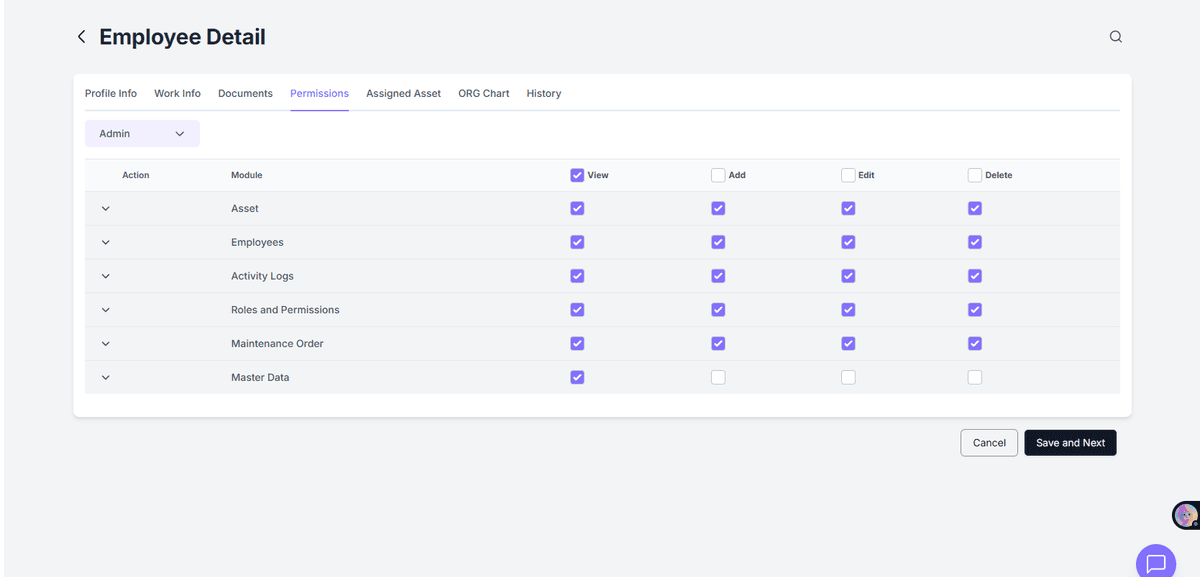
- Navigate to the Permissions tab.
- Assign a Role (e.g., Admin, HR, Manager, Employee).
- Define Access Rights such as:
- View Only
- Add/Edit
- Delete
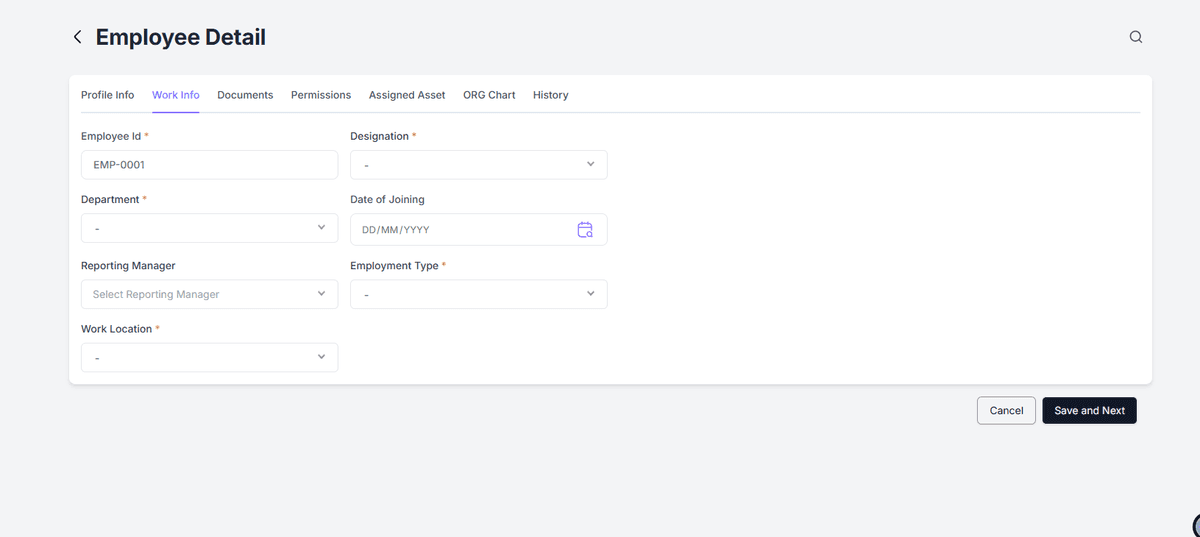
Viewing Work Information
- Click on the Work Info tab.
- Fill or view:
- Designation
- Department
- Date of Joining
- Reporting Manager
- Employment Type (Full-Time, Intern, etc.)
- Click Save when done.
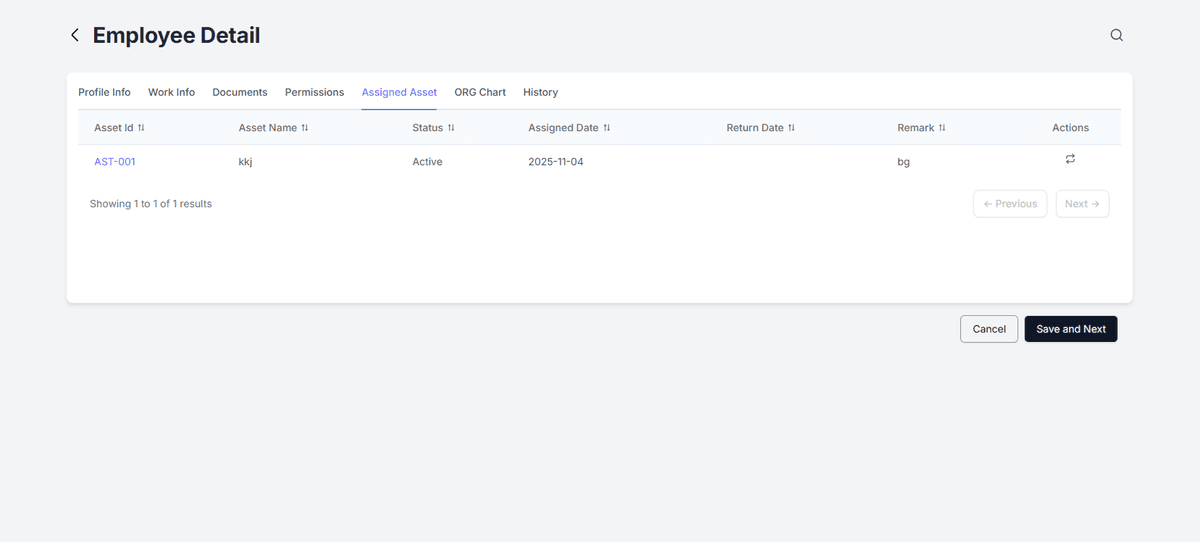
Checking Assigned Assets
- Open the Assigned Asset tab.
- View all items given to the employee.
- Click Assign New Asset to allocate new equipment.
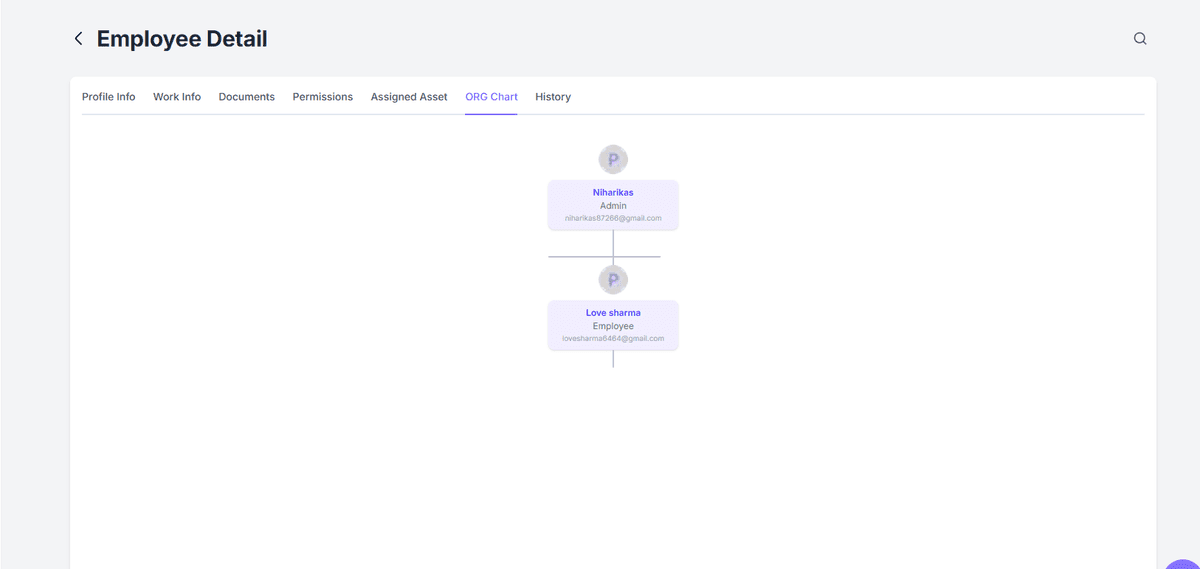
Understanding the ORG Chart (Organization Set)
- Go to the ORG Chart tab to view the employee’s position in the company hierarchy. Displays
- The employee’s position in the company structure
- Their reporting manager
- Team members reporting to them
How to Set Up the ORG Chart
- Open the Work Info tab of an employee.
- In the Reporting Manager field, select the correct manager or supervisor.
- After saving, the hierarchy will automatically reflect in the ORG Chart tab.
Chart Structure:
- Top Node → Senior roles (e.g., CEO, HR Head)
- Sub Nodes → Employees reporting to those roles
The ORG Chart helps visualize the company’s hierarchy clearly.
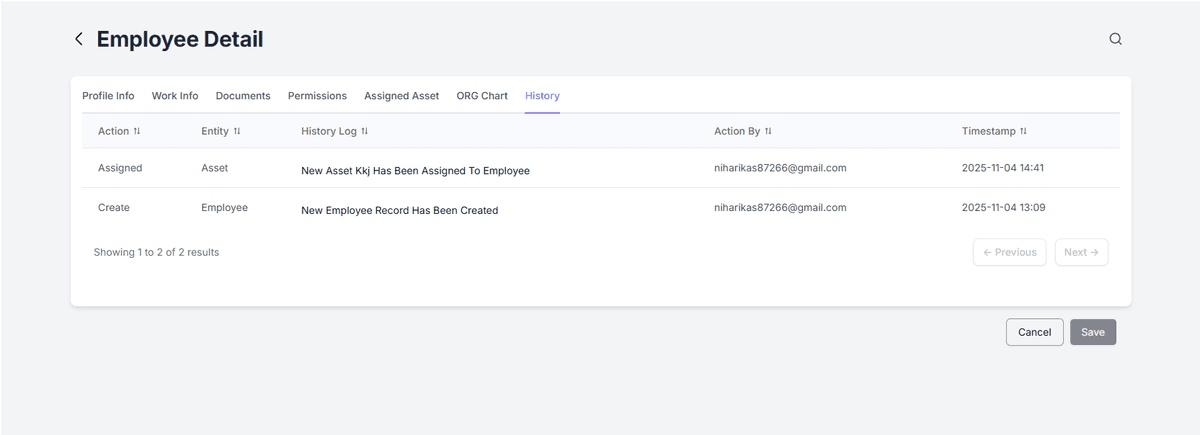
Viewing Employee History
- Open the History tab.
- Review all updates and changes made to the employee record.
- Helps maintain transparency and audit tracking.
More Actions Menu
- The More Actions menu provides additional administrative operations.
- The More Actions menu provides access to additional options, including editing, deleting, and managing various administrative functions.
Filters
Purpose: Quickly search and narrow down employee records.
Usage:
- Click Filters.
- Filter employees by department, designation, status (Active/Inactive), or location.
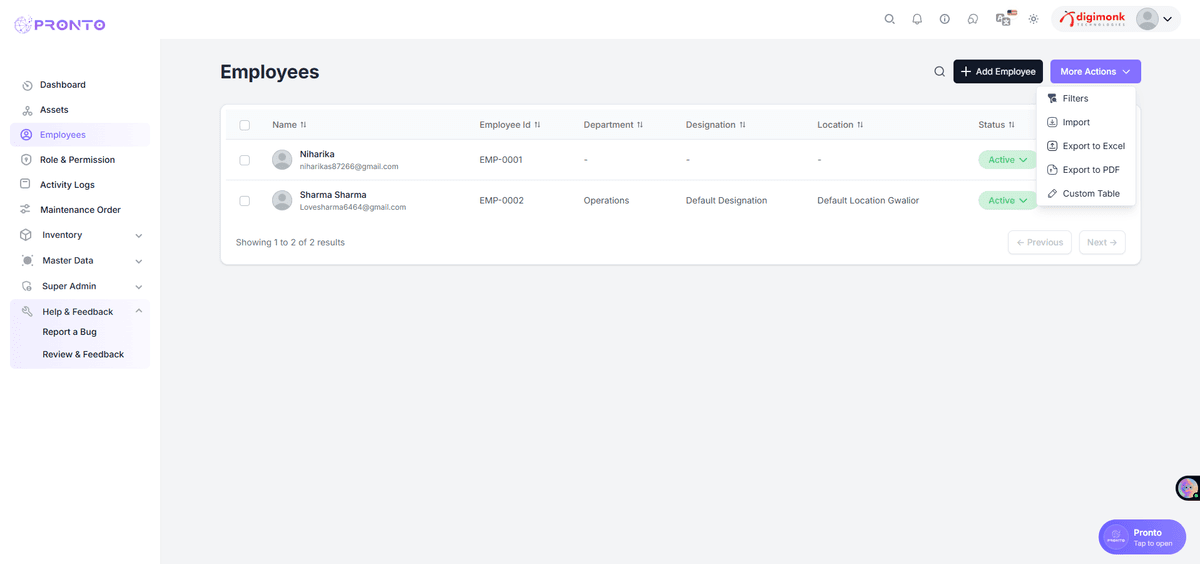
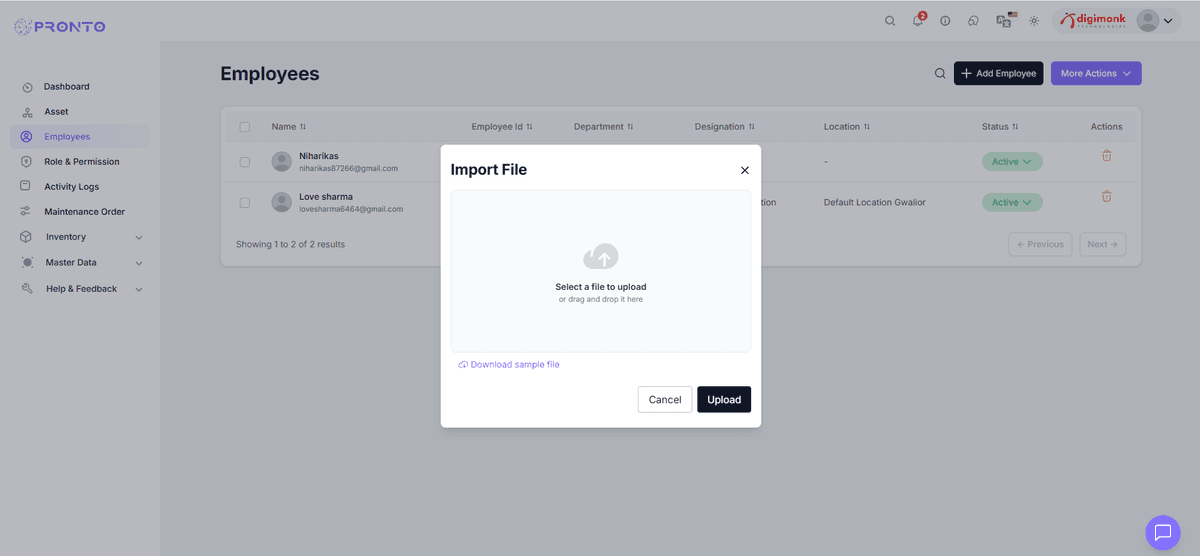
Import
Purpose: Bulk upload employee data from an external file (e.g., Excel or CSV).
Usage:
- Use for adding multiple employees at once.
- Ensure your file has correct column format (Name, Email, Department, etc.).
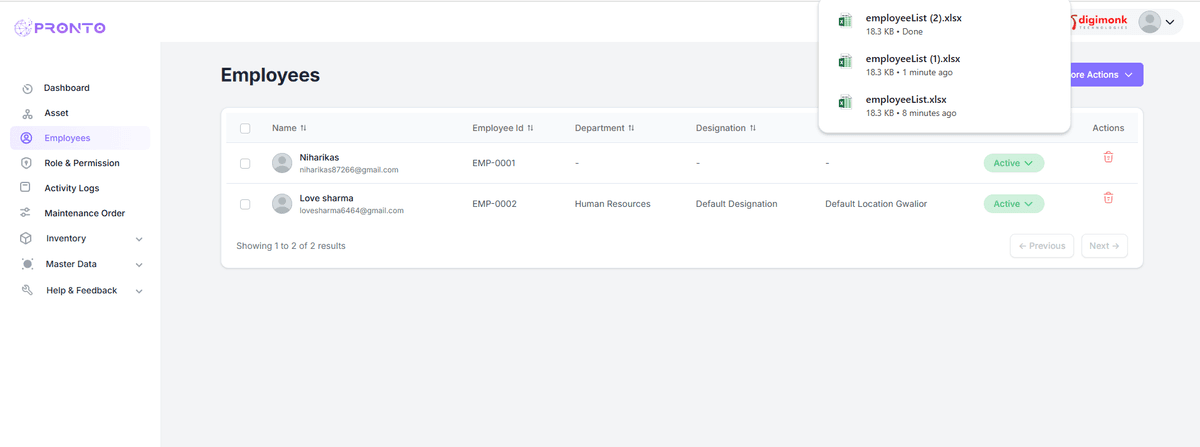
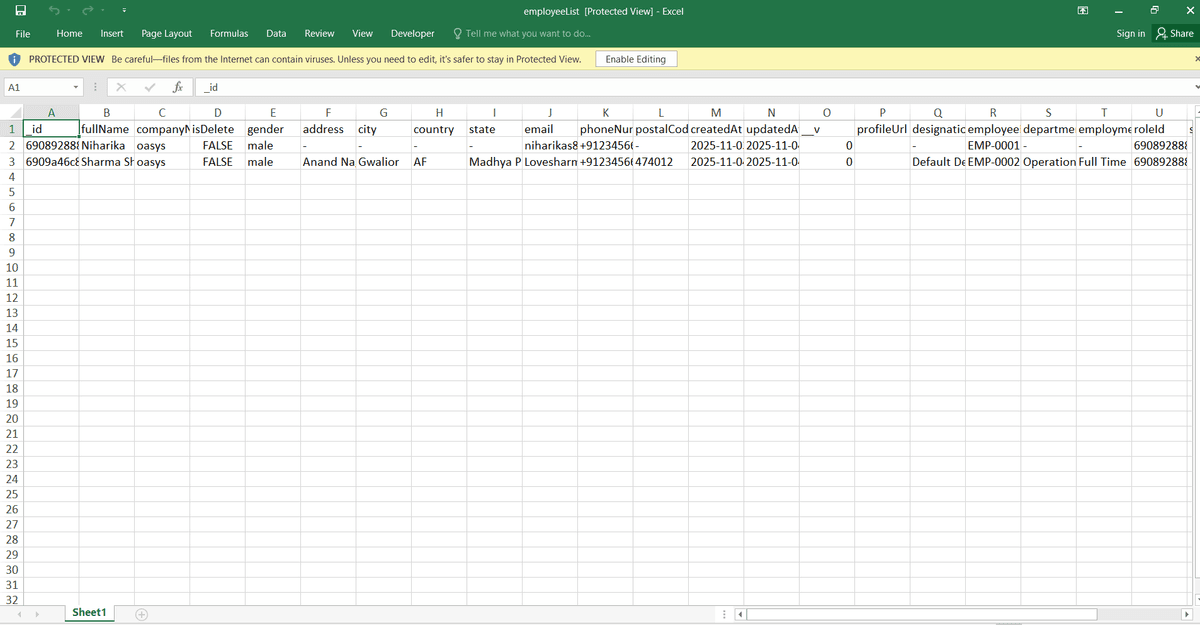
Export to Excel
Purpose: Download employee list in Excel format (.xlsx).
Usage:
- Click this to generate a detailed Excel sheet for HR reports, audits, or data backups.
Manufacturing
Watch Video
Manufacturing Overview
The Manufacturing module is designed to manage inventory items, stock movements, Bills of Materials (BOM), goods receipts, material requirements, and production orders. It combines inventory management, BOM management, and production planning into a single manufacturing workflow.
The Manufacturing section is organized into two areas:
- Inventory – Items, Stock Transfer List
- BOM – Bill of Materials, Goods Receipt, MRP Calculator, Production Orders
Basic flow:
Items → Bill of Materials → MRP Calculation → Production Order → Manufacturing → Stock Update
Items
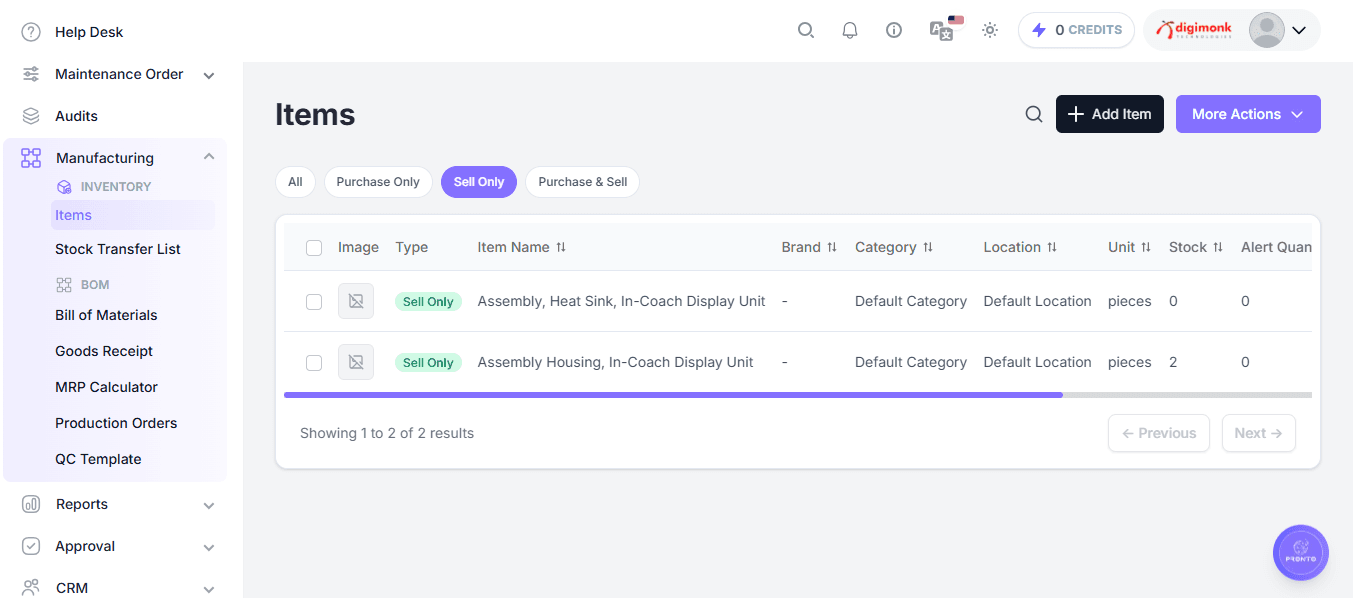
The Items page is used to manage all products, materials, components, and other inventory used within Manufacturing.
The page provides the following options:
- Add Item – Create a new inventory item.
- More Actions – Access additional item-related operations.
- Search – Search for a specific item.
- Filters – Filter items by usage.
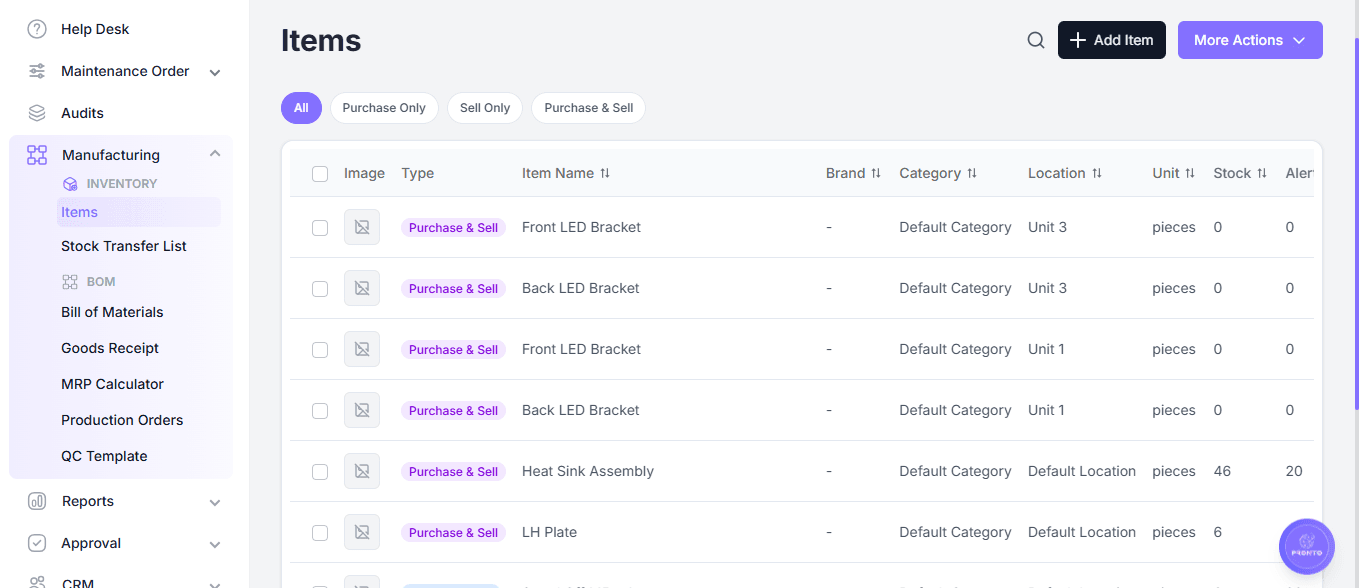
Add Item
To create a new item:
- Navigate to Manufacturing → Items.
- Click the Add Item button at the top-right corner.
- The item creation form will open.
- Enter the required item information.
- Save the item.
- Once saved, the new item will be added to the Items list.
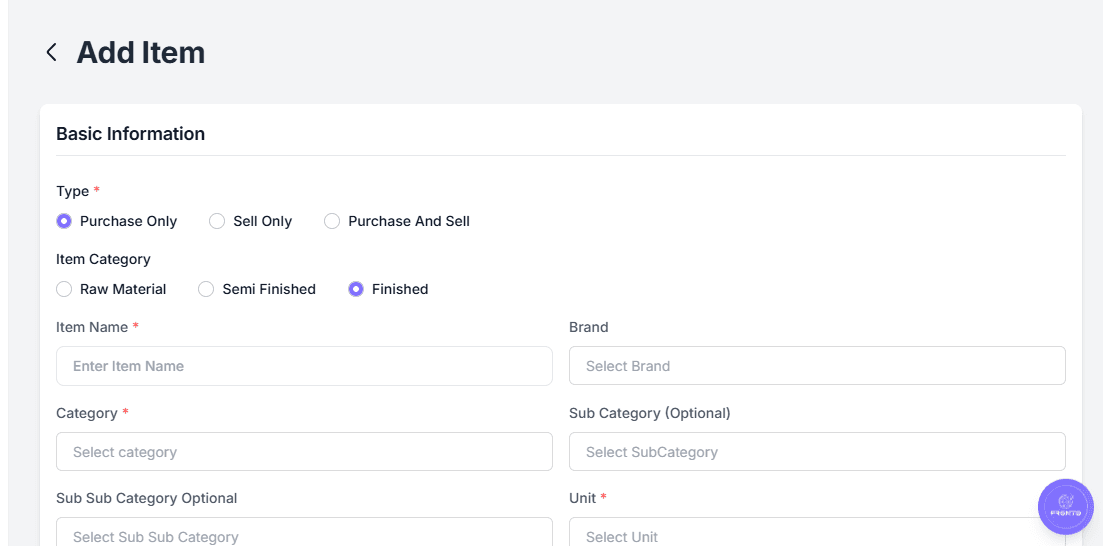
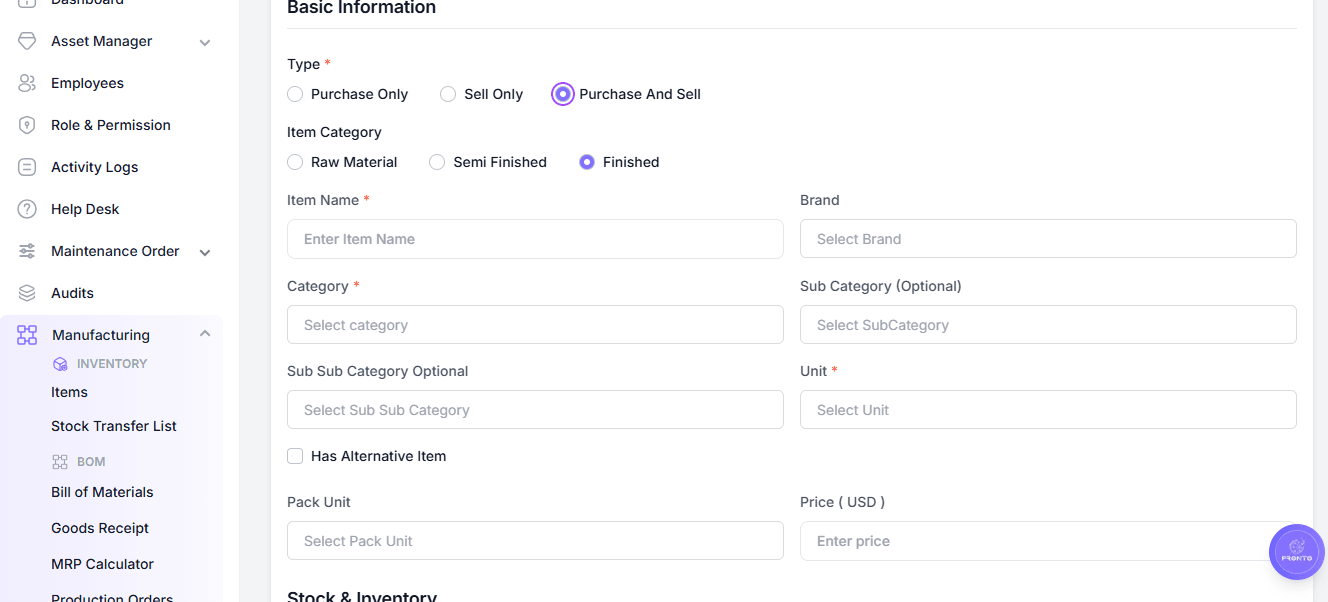
The Add Item feature is used to create and configure items that are purchased, sold, or both purchased and sold by the organization.
The item configuration is divided into:
- Basic Information – Defines the item type, category, name, brand, unit, and pricing information.
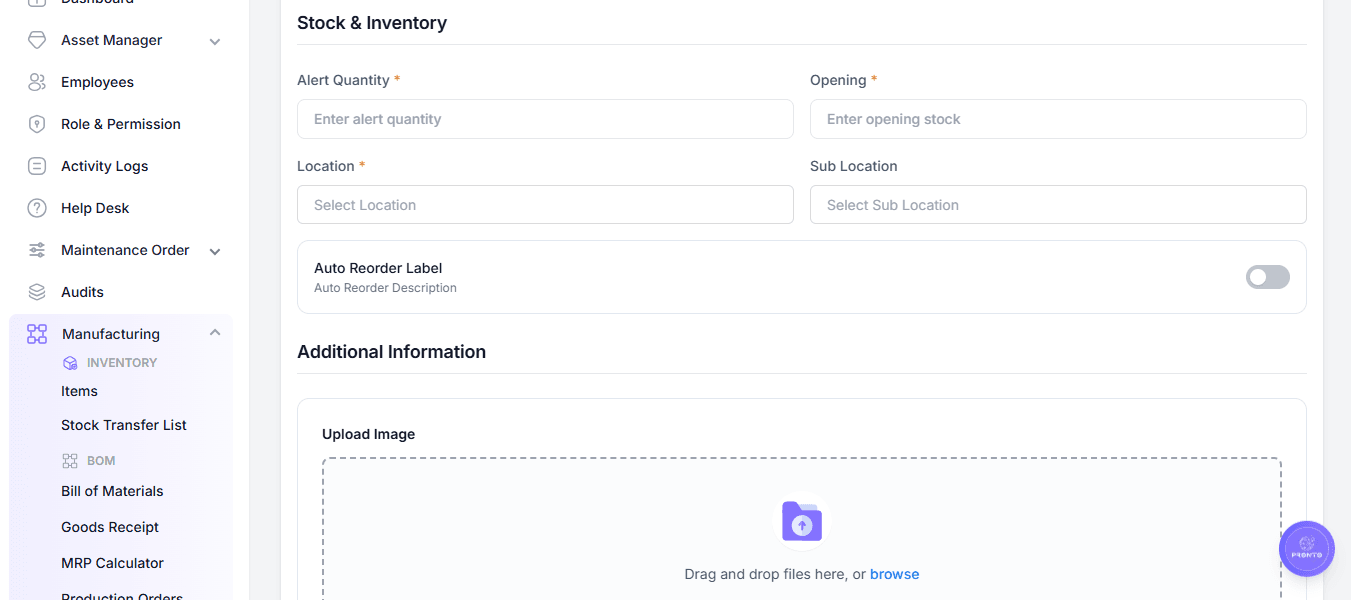
- Stock & Inventory – Defines inventory-related information such as alert quantity, opening stock, and location.
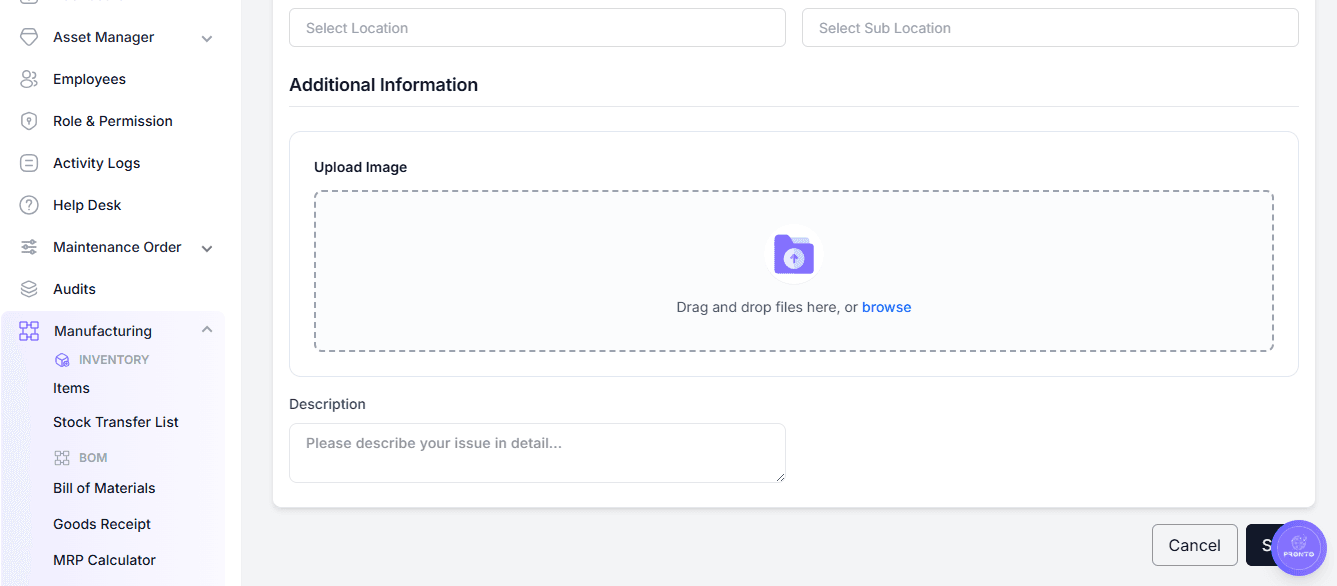
- Additional Information – Allows users to upload an item image and provide a description.
The fields displayed on the form depend on the selected Type.
Navigation: Manufacturing → Inventory → Items → Add Item
Item Type
The Type field determines how the item will be used in the system.
The available options are:
- Purchase Only – The item is intended to be purchased by the organization.
- Sell Only – The item is intended to be sold by the organization.
- Purchase And Sell – The item can be both purchased and sold.
The selected type controls which pricing and inventory-related fields are displayed during item creation.
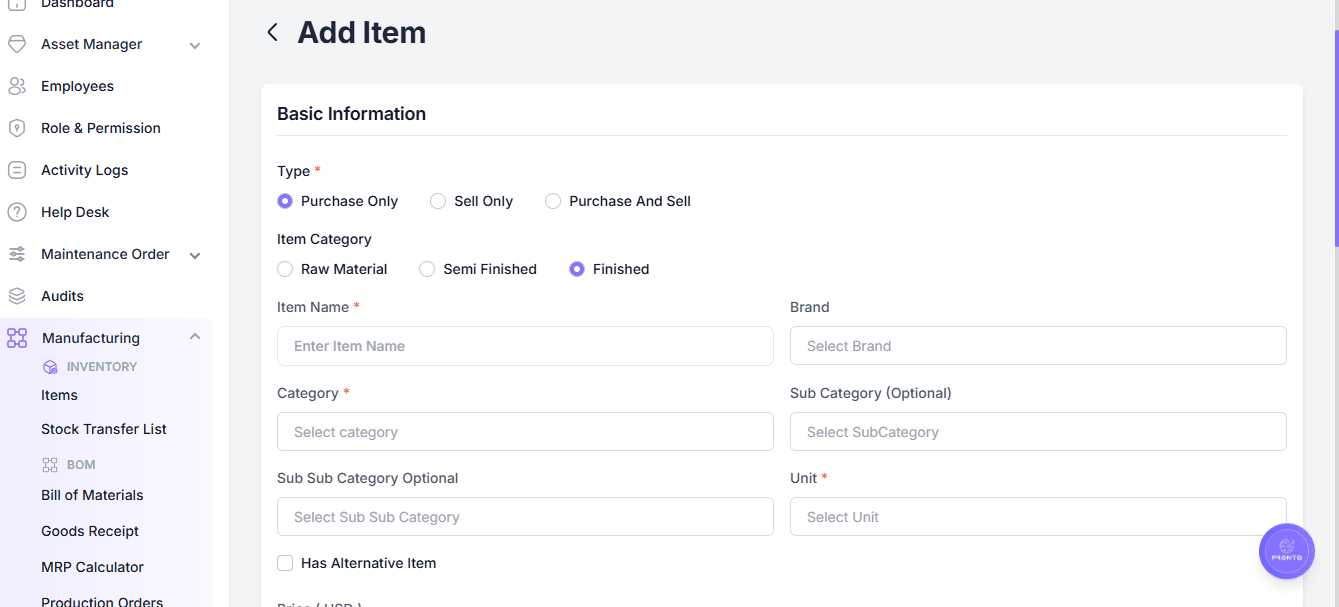
Item Category
The Item Category identifies the stage or nature of the item within the manufacturing process.
Available options are:
- Raw Material – Materials used as inputs in manufacturing or production.
- Semi Finished – Items that are partially processed and may require additional production.
- Finished – Completed items ready for sale, delivery, or further business processing.
Common Basic Information
The following fields are available as part of the item's basic configuration:
- Item Name – Enter the name of the item.
- Category – Select the item's main category.
- Sub Category (Optional) – Select a sub-category when applicable.
- Sub Sub Category Optional – Select a further category level when applicable.
- Unit – Select the unit used to measure the item.
- Has Alternative Item – Indicates whether an alternative item is available.
Fields marked with an asterisk (*) are required.
Purchase Only
When Purchase Only is selected, the item is configured specifically for purchasing.
Basic Information
The form provides:
- Type – Purchase Only.
- Item Category – Raw Material, Semi Finished, or Finished.
- Item Name.
- Brand – Select the applicable brand.
- Category.
- Sub Category (Optional).
- Sub Sub Category Optional.
- Unit.
- Has Alternative Item.
- Price (USD) – Enter the purchase price of the item.
Stock & Inventory
The following inventory fields are available:
- Alert Quantity – Defines the quantity used for inventory alert purposes.
- Opening – Specifies the opening stock quantity.
- Location – Select the item's location.
- Sub Location – Select the applicable sub-location.
- Auto Reorder Label – Defines the label related to automatic reorder information.
- Auto Reorder Description – Provides additional information about the automatic reorder configuration.
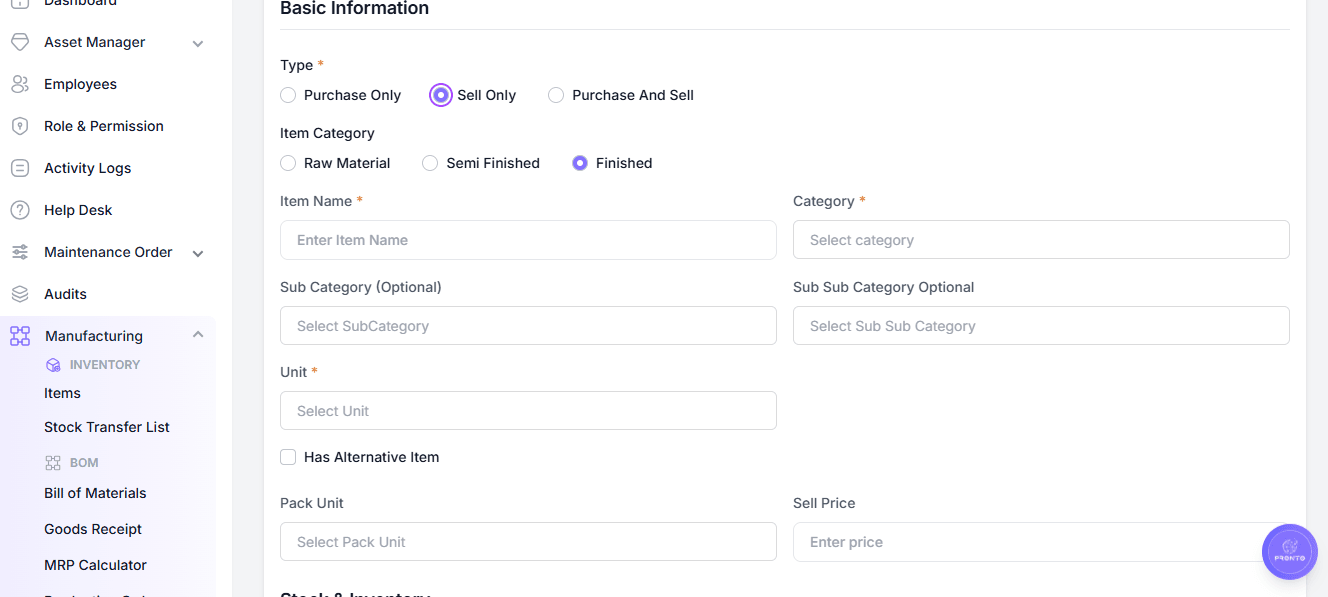
Sell Only
When Sell Only is selected, the item is configured specifically for selling.
Basic Information
The form provides:
- Type – Sell Only.
- Item Category – Raw Material, Semi Finished, or Finished.
- Item Name.
- Category.
- Sub Category (Optional).
- Sub Sub Category Optional.
- Unit.
- Has Alternative Item.
- Pack Unit – Select the applicable packing unit.
- Sell Price – Enter the selling price of the item.
Stock & Inventory
The following inventory fields are available:
- Alert Quantity – Defines the quantity used for inventory alert purposes.
- Opening – Specifies the opening stock quantity.
- Location – Select the item's location.
- Sub Location – Select the applicable sub-location.
Purchase And Sell
When Purchase And Sell is selected, the item can be used in both purchasing and selling processes.
Basic Information
The form provides:
- Type – Purchase And Sell.
- Item Category – Raw Material, Semi Finished, or Finished.
- Item Name.
- Brand – Select the applicable brand.
- Category.
- Sub Category (Optional).
- Sub Sub Category Optional.
- Unit.
- Has Alternative Item.
- Pack Unit – Select the applicable packing unit.
- Price (USD) – Enter the purchase price of the item.
Stock & Inventory
The following inventory fields are available:
- Alert Quantity – Defines the quantity used for inventory alert purposes.
- Opening – Specifies the opening stock quantity.
- Location – Select the item's location.
- Sub Location – Select the applicable sub-location.
- Auto Reorder Label – Defines the label related to automatic reorder information.
- Auto Reorder Description – Provides additional information about the automatic reorder configuration.
Stock & Inventory
The Stock & Inventory section is used to define the initial inventory information and stock monitoring settings.
Available fields include:
- Alert Quantity – Specifies the quantity at which inventory monitoring or alerts may apply.
- Opening – Defines the opening quantity of the item.
- Location – Specifies the primary location where the item is stored.
- Sub Location – Specifies a more specific storage location.
- Auto Reorder Label – Provides a label for automatic reorder information when available.
- Auto Reorder Description – Provides additional information about the automatic reorder configuration.
The availability of automatic reorder fields depends on the selected item type.
Additional Information
The Additional Information section allows users to provide supporting information for the item.
Upload Image
Users can upload an image for the item by:
- Dragging and dropping a file into the upload area.
- Clicking browse to select a file from the device.
Description
The Description field can be used to provide additional information about the item.
Purchase and Selling Configuration
The item type determines the commercial information available during item creation.
| Item Type | Brand | Pack Unit | Price Field | Auto Reorder |
|---|---|---|---|---|
| Purchase Only | Available | Not displayed | Price (USD) | Available |
| Sell Only | Not displayed | Available | Sell Price | Not displayed |
| Purchase And Sell | Available | Available | Price (USD) | Available |
This allows the item form to display only the fields relevant to the selected purchasing or selling configuration.
Item Configuration Flow
The item creation process follows a structured configuration flow:
Select Item Type → Select Item Category → Enter Item Details → Configure Pricing → Configure Stock & Inventory → Add Additional Information
The selected Item Type determines the purchasing and selling fields displayed during configuration.
Recommended: Select the correct item type before entering item details. Use meaningful item names and appropriate categories, select the correct unit and location, maintain accurate opening quantities and pricing information, and provide an item image and description when additional identification is useful.
Item Filters
Items can be filtered by how they are used:
- All – Displays all items available in the system.
- Purchase Only – Items used only for purchasing.
- Sell Only – Items used only for selling.
- Purchase & Sell – Items that can both be purchased and sold.
Empty Items List
If no items have been created, the Items page displays:
No Items Available
Supporting message:
There are currently no items available.
The user can click Add Item to create the first item.
Stock Transfer List
The Stock Transfer List is used to manage and track the movement of inventory items between locations, warehouses, or stock points.
The page provides:
- Transfer Stock – Create a new stock transfer.
- More Actions – Additional stock-transfer operations.
- Search/Filter – Locate existing transfer records.
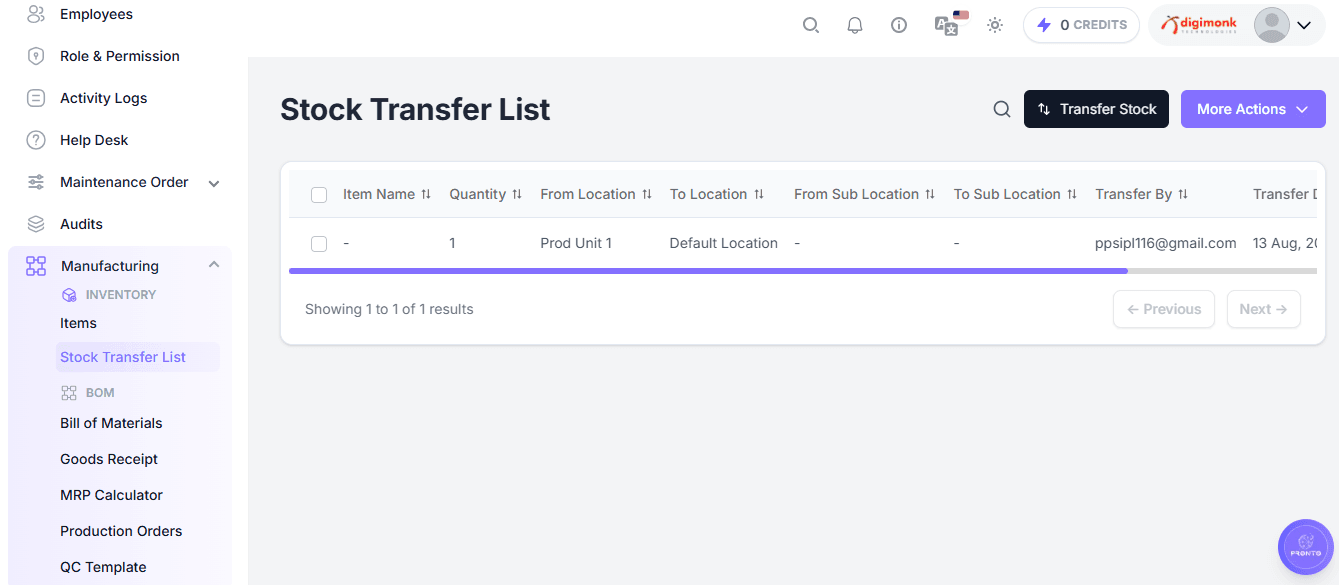
Transfer Stock
To create a new stock transfer:
- Go to Manufacturing → Stock Transfer List.
- Click Transfer Stock.
- Select the Item and enter the Quantity.
- Choose the Source and Destination location.
- Add any Remarks if needed.
- Click Save to confirm the transfer.
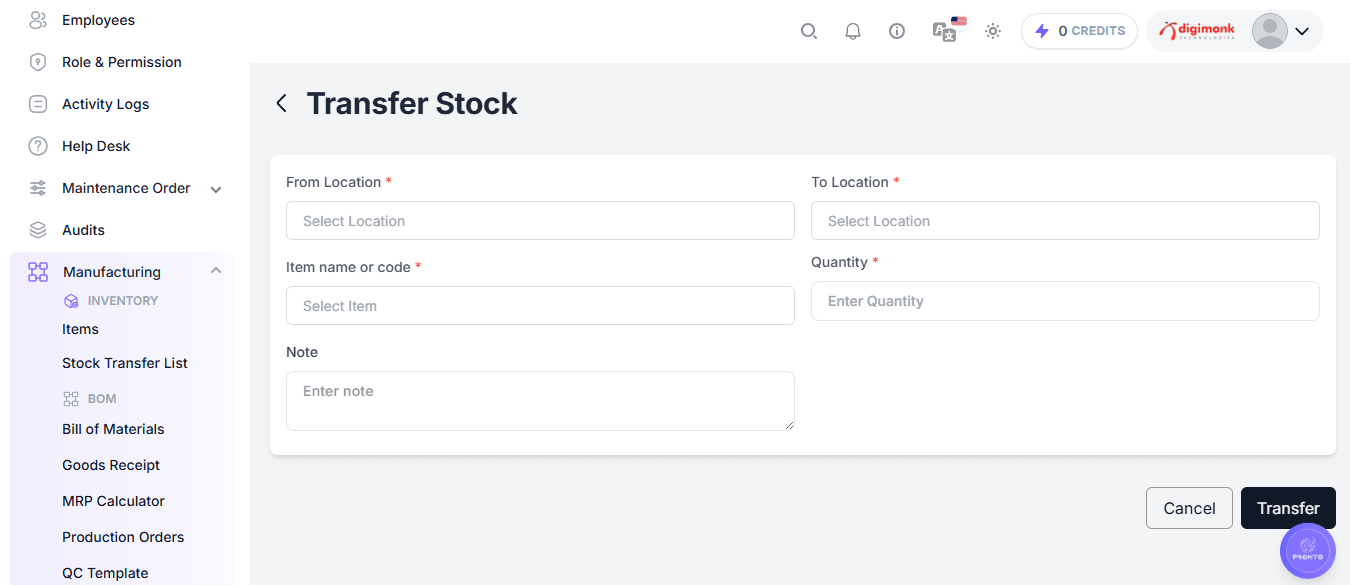
Empty Stock Transfer List
If no transfers exist, the page displays:
No Transfer List Available
Supporting message:
There is currently no transfer list available. Please add items to view them here.
Bill of Materials (BOM)
A Bill of Materials defines the complete list of components and quantities required to manufacture a finished product.
The page provides:
- New BOM – Create a new Bill of Materials.
- All Statuses – Filter BOMs by status.
- BOM List – Displays all created BOM records.
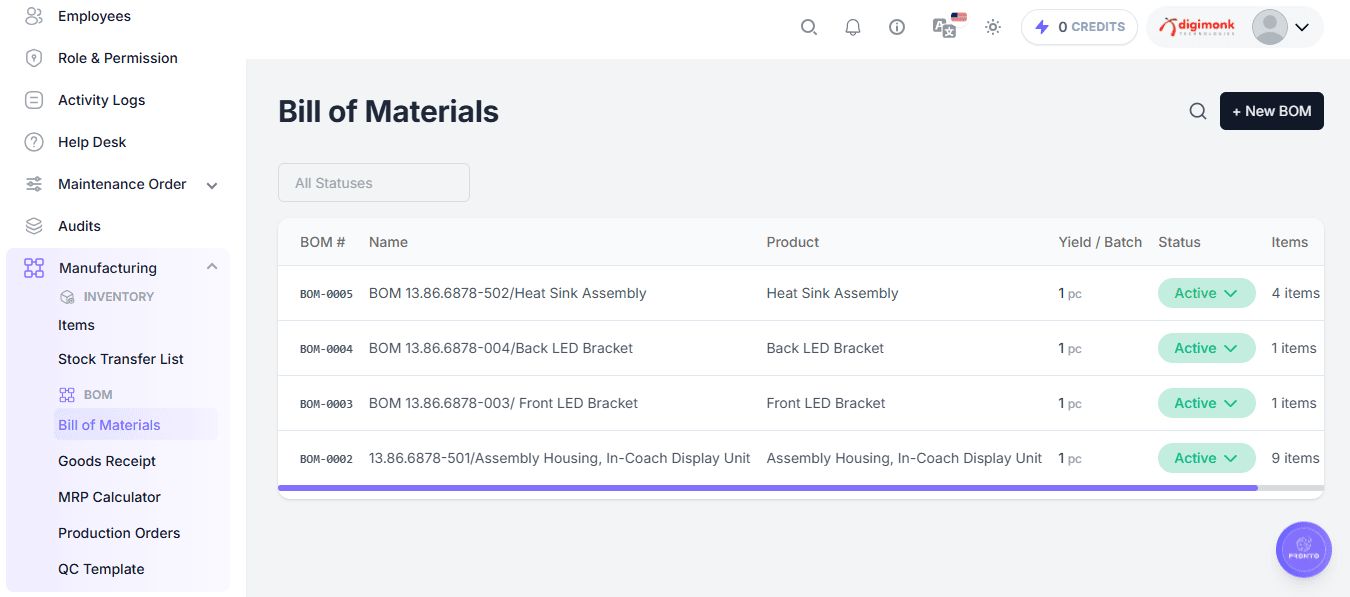
Create a New BOM
- Click + New BOM.
- Select the Finished Product.
- Add the required Components and their Quantities.
- Select the Unit of Measure for each component.
- Add any Notes if needed.
- Click Save.
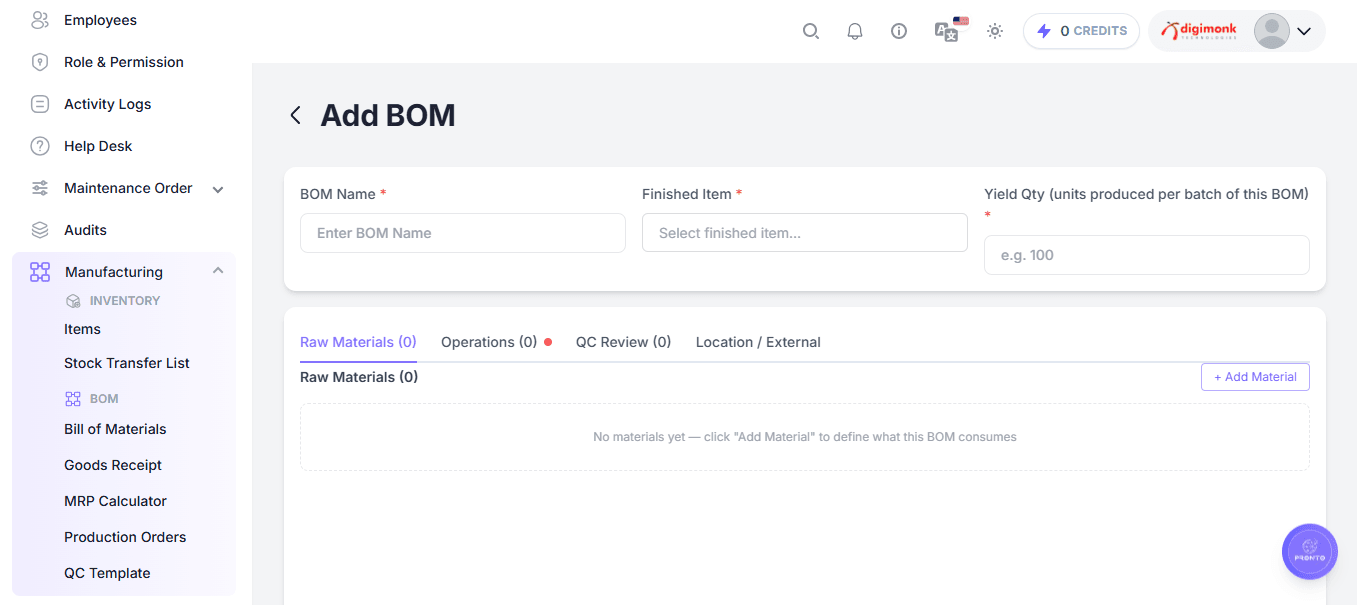
Raw Materials Tab
The Raw Materials tab is used to define all materials required to manufacture the finished product.
Each raw material record specifies:
- Material Item
- Quantity required per batch
- Unit of Measure (UOM)
- Scrap / Waste Percentage
- Critical Material indicator
Navigation: Manufacturing → Bill of Materials → Add BOM → Raw Materials
This information is used by:
- Material Requirement Planning (MRP)
- Production Orders
- Inventory Consumption
- Stock Planning
Add Raw Material
To add a raw material:
- Click + Add Material.
- Select the Raw Material Item.
- Enter the Quantity per Batch.
- Verify the Unit of Measure.
- Enter the Scrap / Waste %, if applicable.
- Mark the item as Critical, if production depends on this material.
- Save the BOM.
Example:
| Field | Value |
|---|---|
| Raw Material | Mechanical Screen |
| Quantity | 1 |
| Unit | pc |
| Scrap | 0% |
| Critical | Yes |
Raw Material Fields
| Field | Description |
|---|---|
| Raw Material | Item required for production |
| Qty per Batch | Quantity consumed in one production batch |
| Unit of Measure | Measurement unit of the material |
| Scrap / Waste % | Expected wastage percentage |
| Critical | Indicates mandatory material for production |
Critical Material
The Critical option identifies materials that are essential for production.
If a critical material is unavailable:
- Production may be delayed.
- MRP will highlight shortages.
- Procurement teams can prioritize purchasing.
Example:
Mechanical Screen → Critical Material
Operations Tab
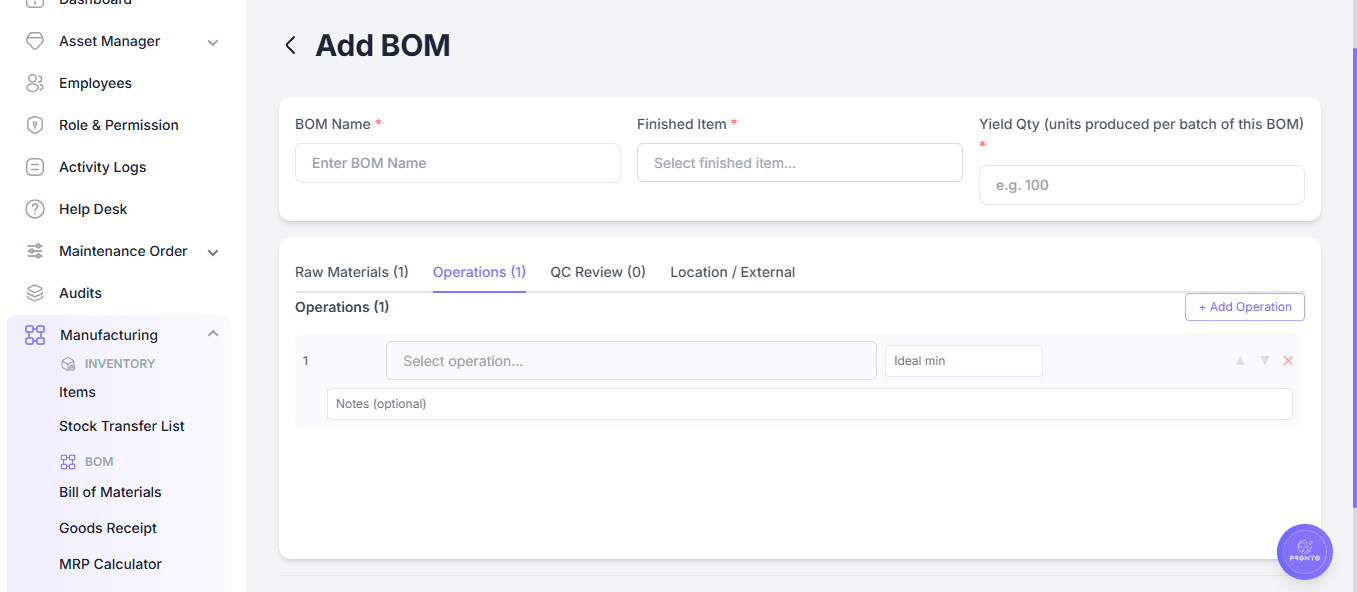
The Operations tab defines the manufacturing steps required to produce the finished item.
Operations represent the sequence of work performed during production.
Navigation: Manufacturing → Bill of Materials → Add BOM → Operations
Examples:
- Cutting
- Welding
- Assembly
- Painting
- Testing
- Packaging
Add Operation
To add an operation:
- Click + Add Operation.
- Select an operation from the list.
- Arrange the sequence using the Up / Down arrows.
- Remove unwanted operations using the Delete (✕) option.
Example Production Flow:
Cutting → Welding → Assembly → Testing → Packaging
Operation Sequence
Production follows the exact order defined in the BOM:
Raw Material → Operation 1 → Operation 2 → Operation 3 → Finished Product
Proper operation sequencing ensures:
- Correct production flow
- Reduced errors
- Accurate production tracking
- Better planning
QC Review Tab
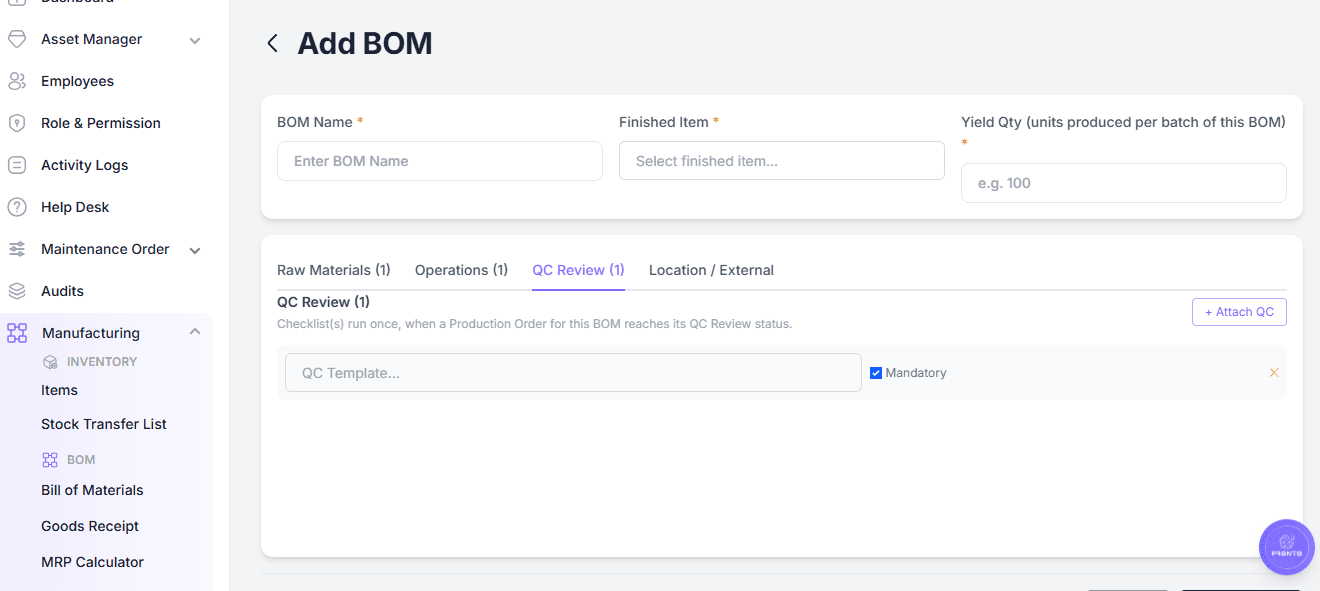
The QC Review tab is used to attach Quality Control checklists to the BOM.
These quality inspections are executed when the Production Order reaches the QC Review stage.
Navigation: Manufacturing → Bill of Materials → Add BOM → QC Review
Attach QC Template
To attach a quality checklist:
- Click + Attach QC.
- Select a QC Template.
- Mark it as Mandatory, if required.
- Save the BOM.
Example QC Checks:
- Dimension Inspection
- Surface Finish Check
- Functional Testing
- Visual Inspection
Mandatory QC
If a QC template is marked as Mandatory:
- Production cannot proceed without QC completion.
- Quality checks become compulsory.
- Defective products can be identified early.
Location / External Tab
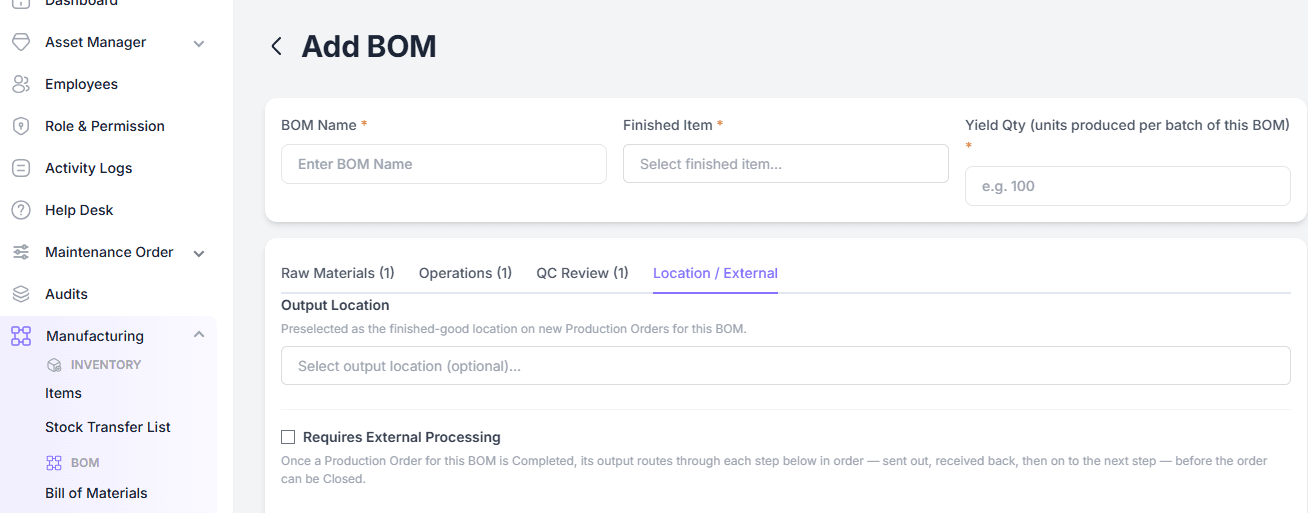
The Location / External tab is used to define:
- Output Location
- External Processing Steps
Navigation: Manufacturing → Bill of Materials → Add BOM → Location / External
Output Location
The Output Location specifies where finished goods will be stored after production.
Example:
- Finished Goods Warehouse
- Main Store
- Dispatch Area
This location is automatically used in Production Orders.
External Processing
Enable Requires External Processing when production involves third-party vendors.
Example:
Production → Vendor Painting → Return to Factory → Final Dispatch
This helps organizations track outsourced manufacturing activities.
BOM Workflow
The complete BOM flow is:
Raw Materials → Operations → QC Review → Output Location → Production Order → Finished Goods
Empty BOM List
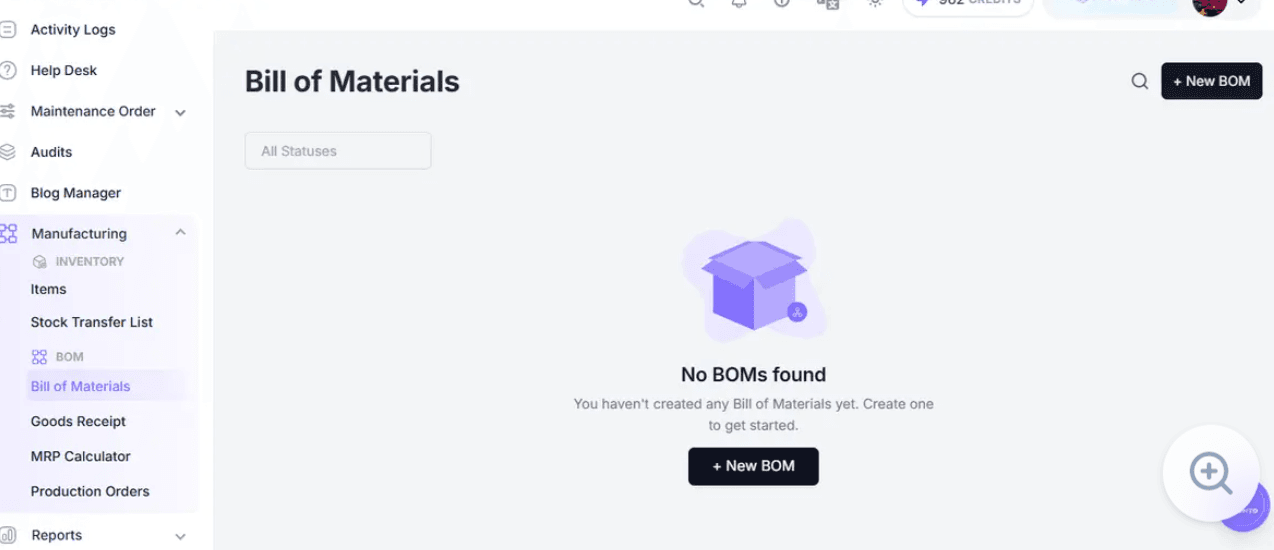
If no BOM records have been created, the page displays:
No BOMs found
Supporting message:
You haven't created any Bill of Materials yet. Create one to get started.
Goods Receipt
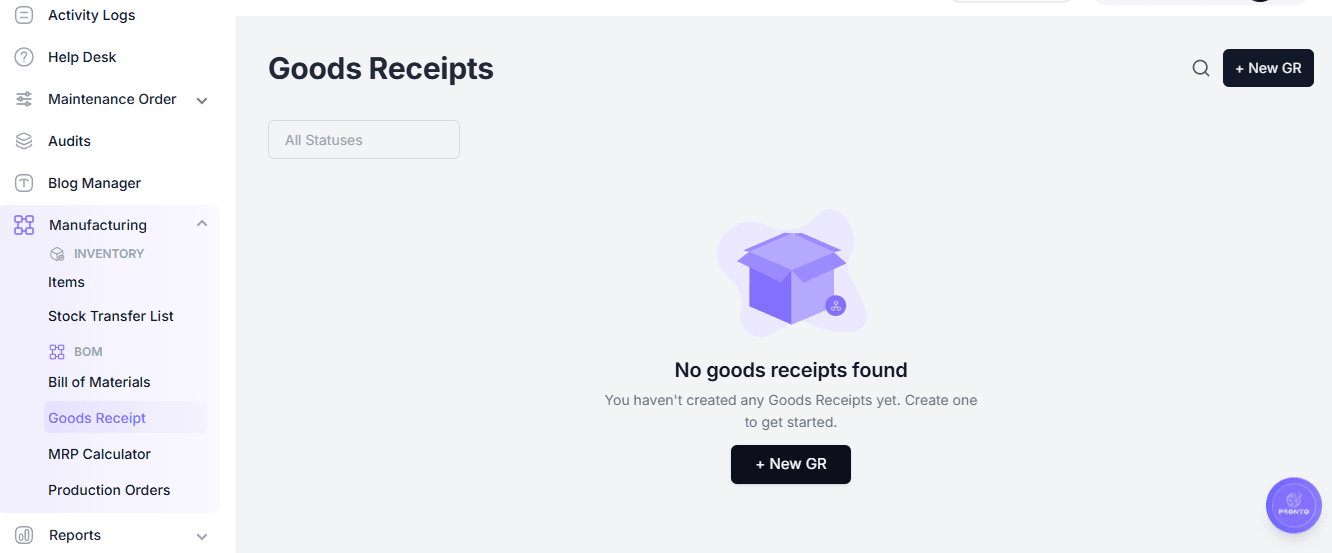
Goods Receipt is used to record materials or products physically received from a supplier.
The page provides:
- + New GR – Create a new Goods Receipt.
- All Statuses – Filter receipts by status.
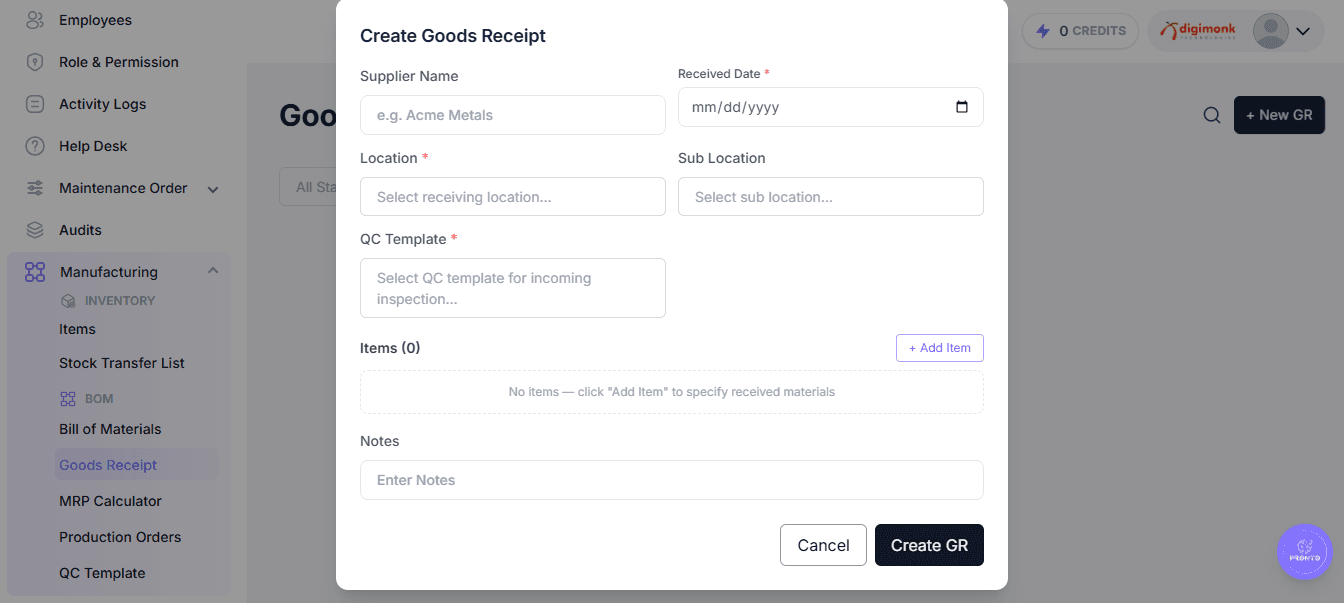
Create a New Goods Receipt
- Click + New GR.
- Select the Supplier/Vendor.
- Add the Items received and their Quantities.
- Enter the Receipt Date and any Reference (e.g., purchase order).
- Click Save to confirm.
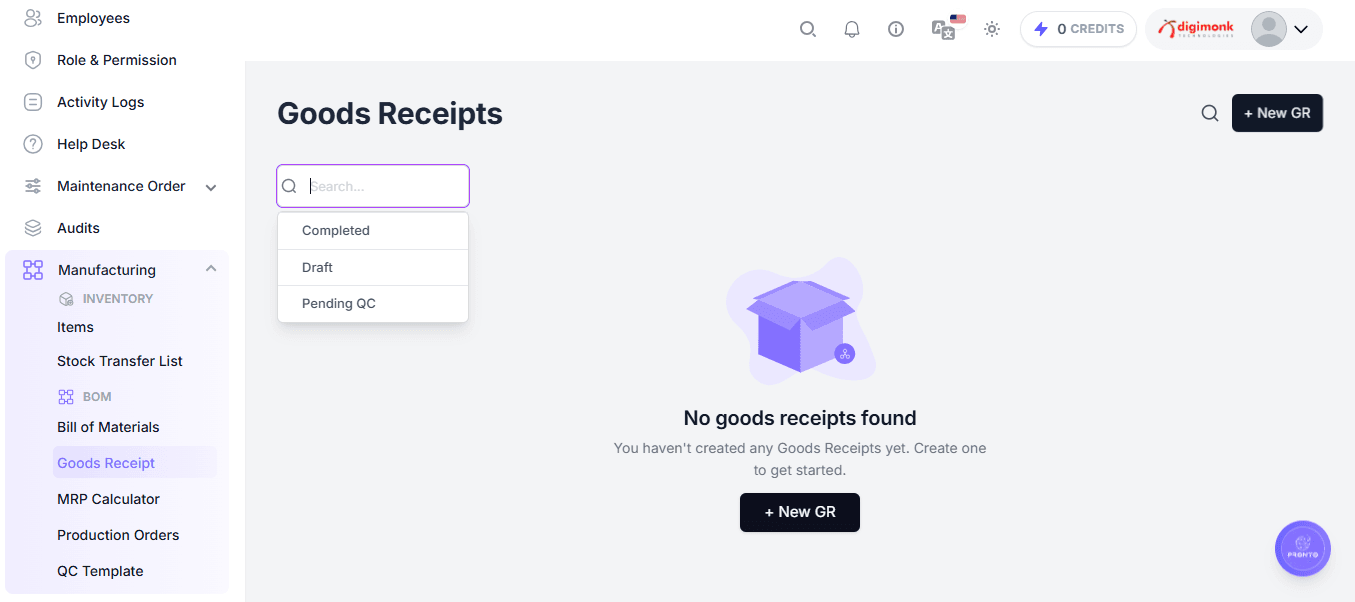
Empty Goods Receipt List
If no receipts exist, the page displays:
No goods receipts found
Supporting message:
You haven't created any Goods Receipts yet. Create one to get started.
MRP Calculation
To perform an MRP calculation:
- Open Manufacturing → MRP Calculator.
- Select an Approved BOM.
- Enter the required Number of Batches.
- Click Run MRP.
- Review the calculated material requirements.
- Check the available stock and any identified shortages.
- Review the status of each material before proceeding with production planning.
Only approved BOMs can be used for the MRP calculation.
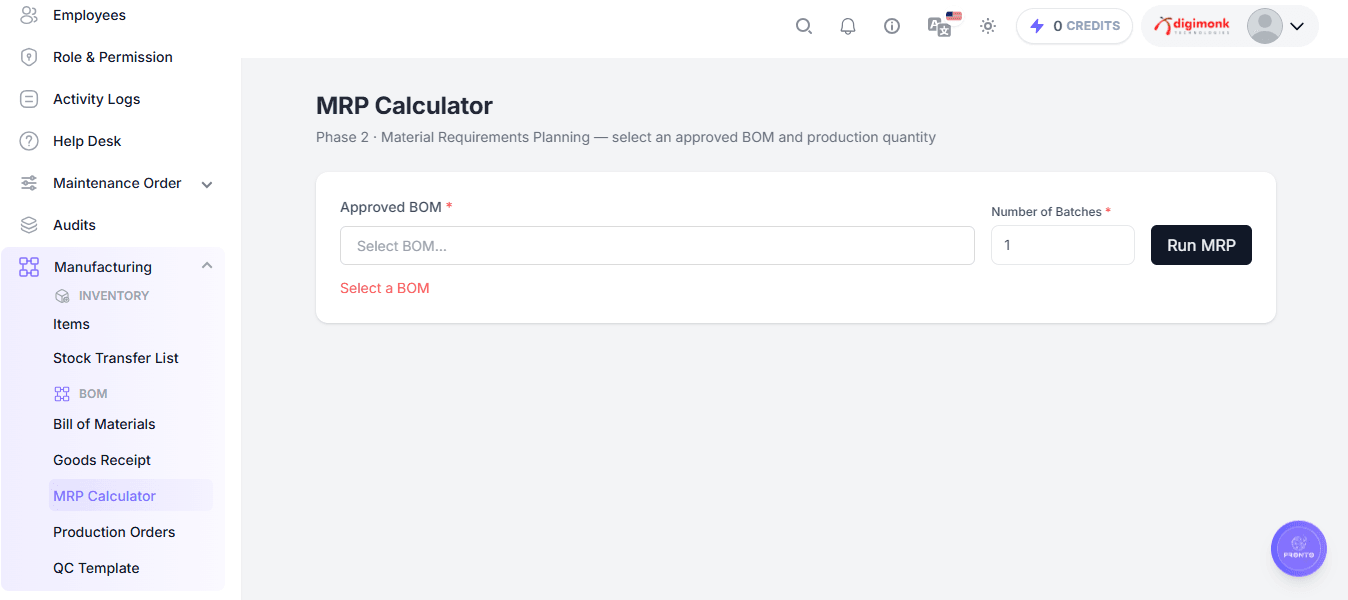
MRP Input Fields
| Field | Description |
|---|---|
| Approved BOM | Selects the approved Bill of Materials that will be used for the calculation. |
| Number of Batches | Specifies how many production batches are planned. |
| Run MRP | Calculates the required materials based on the selected BOM and number of batches. |
Approved BOM
The Approved BOM field is mandatory.
The user must select a BOM that has already been approved from the Bill of Materials page.
The selected BOM determines:
- Finished product.
- Raw materials.
- Quantity required per batch.
- Scrap / Waste percentage.
- Critical material information.
Example:
BOM-0003 — BOM 13.86.6878-003 / Front LED Bracket (Front LED Bracket) v1
Once the BOM is selected, the system uses its raw-material configuration for the MRP calculation.
Number of Batches
The Number of Batches field determines the planned production quantity in terms of BOM batches.
For example:
- 1 batch → Requirements are calculated for one production batch.
- 5 batches → Requirements are calculated for five production batches.
- 10 batches → Requirements are calculated for ten production batches.
The number of batches directly affects the total quantity of materials required.
MRP Result Summary
After running the MRP calculation, the system displays a summary of the selected BOM.
The summary includes:
- BOM Number / Name
- Product
- Number of Batches
- Overall stock availability status
The system may display a status such as:
Stock Sufficient
This indicates that the currently available inventory is sufficient for the calculated material requirements.
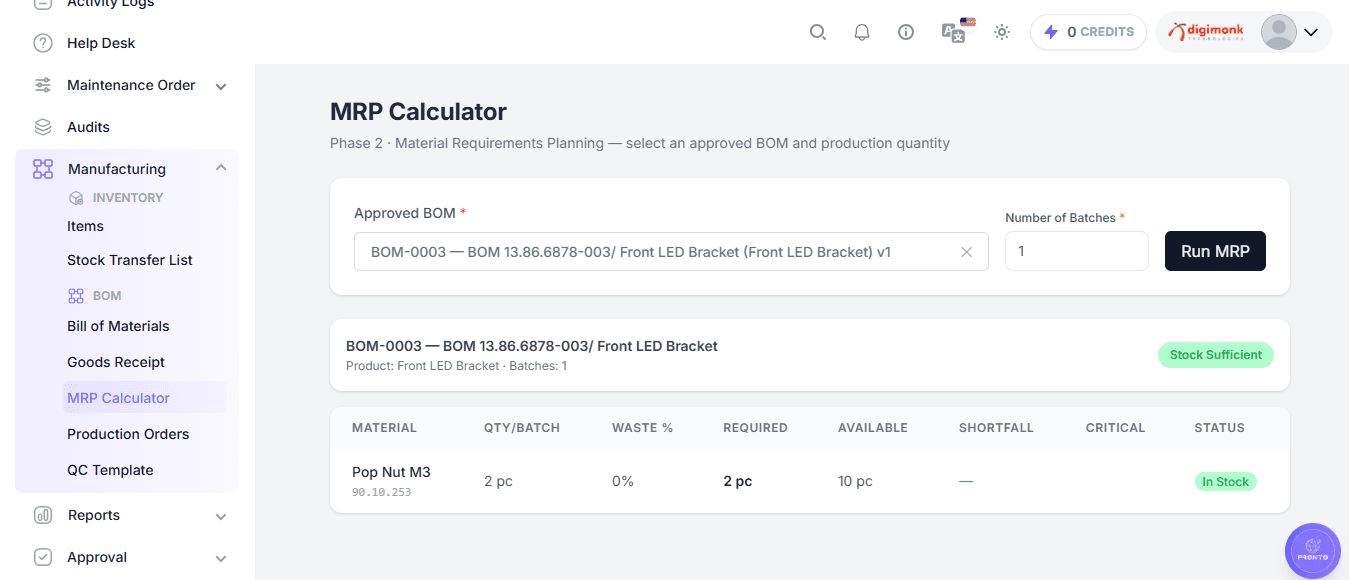
Material Requirement Details
The MRP result displays a detailed material-wise calculation.
Each material is evaluated against the planned production requirement and current inventory availability.
The result table contains:
- Material
- Qty / Batch
- Waste %
- Required
- Available
- Shortfall
- Critical
- Status
Material Requirement Fields
| Field | Description |
|---|---|
| Material | Raw material required for manufacturing the finished product. |
| Qty / Batch | Quantity of the material required for one production batch. |
| Waste % | Scrap or wastage percentage configured in the BOM. |
| Required | Total quantity of material required for the selected number of batches. |
| Available | Quantity of the material currently available in inventory. |
| Shortfall | Quantity missing when available stock is less than the required quantity. |
| Critical | Indicates whether the material has been marked as critical in the BOM. |
| Status | Indicates whether the required material is available in stock. |
Required Quantity Calculation
The MRP Calculator determines the required quantity based on the material quantity defined in the BOM and the number of production batches.
For a material without wastage:
Required Quantity = Qty per Batch × Number of Batches
Example:
| Information | Value |
|---|---|
| Qty / Batch | 2 pc |
| Number of Batches | 1 |
| Waste | 0% |
| Required Quantity | 2 pc |
If the same BOM is planned for 5 batches:
| Information | Value |
|---|---|
| Qty / Batch | 2 pc |
| Number of Batches | 5 |
| Waste | 0% |
| Required Quantity | 10 pc |
When a Scrap / Waste % is configured in the BOM, the MRP calculation considers the configured wastage while determining the material requirement.
The exact calculated quantity depends on the BOM configuration and the production quantity entered in the MRP Calculator.
Available Stock
The Available column shows the quantity of the material currently available in inventory.
The available stock is compared with the calculated requirement.
Example:
| Material | Required | Available |
|---|---|---|
| Pop Nut M3 | 2 pc | 10 pc |
In this example, 10 pc are available while only 2 pc are required.
Therefore, the available stock is sufficient for the planned production.
Shortfall
The Shortfall column identifies the quantity of material that is missing from inventory.
When sufficient stock is available, the system does not show a shortage.
Example:
| Material | Required | Available | Shortfall |
|---|---|---|---|
| Pop Nut M3 | 2 pc | 10 pc | — |
If the required quantity is greater than the available quantity, the difference represents the material shortage.
Example:
| Material | Required | Available | Shortfall |
|---|---|---|---|
| Pop Nut M3 | 10 pc | 6 pc | 4 pc |
This helps the user identify materials that may need to be procured or replenished before production.
Critical Materials
The Critical column indicates whether the material has been marked as Critical in the BOM.
Critical materials are important production components that may require special attention during material planning.
Example:
Pop Nut M3 → Critical
Critical material information helps users prioritize material availability before starting production.
The Critical indicator is configured from the Raw Materials section of the BOM.
Material Status
The Status column indicates the availability condition of each material.
For example:
In Stock
indicates that the required quantity of the material is currently available.
The status allows users to quickly identify whether a material is ready for production or requires attention.
Stock Sufficient
When all required materials have sufficient inventory, the BOM result displays:
Stock Sufficient
This indicates that the calculated material requirements can be fulfilled using the currently available stock.
Example:
Stock Sufficient → Production material requirements are currently available.
Material Shortage
If the available stock is lower than the required quantity, the MRP results identify the shortage.
A shortage indicates that additional material may be required before production can proceed.
The user can use the shortage information to:
- Plan procurement.
- Replenish inventory.
- Review stock availability.
- Adjust the production quantity.
- Prioritize critical materials.
Example:
Required: 20 pc → Available: 12 pc → Shortfall: 8 pc
MRP Planning Workflow
The MRP Calculator works as part of the manufacturing planning process:
Approved BOM → Select BOM → Enter Number of Batches → Run MRP → Calculate Material Requirements → Compare Available Stock → Identify Shortages → Production Planning
The calculation provides the material availability information required before creating or proceeding with production orders.
Relationship With BOM and Production Orders
The MRP Calculator uses information configured in the Bill of Materials.
The overall manufacturing flow is:
Item → BOM → BOM Approval → MRP Calculation → Material Availability Check → Production Order → Production
The BOM defines what materials are required, while the MRP Calculator determines how much material is required for the planned number of batches.
The Production Order can then be created based on the production plan.
Example MRP Calculation
Consider the following production plan:
Finished Product: Front LED Bracket
BOM: BOM-0003
Number of Batches: 1
| Material | Qty / Batch | Waste | Required | Available | Shortfall | Status |
|---|---|---|---|---|---|---|
| Pop Nut M3 | 2 pc | 0% | 2 pc | 10 pc | — | In Stock |
Since 10 pc are available and only 2 pc are required, the material requirement is satisfied.
Therefore, the BOM displays:
Stock Sufficient
No Approved BOM
If there are no approved BOMs available, the MRP Calculator displays:
No approved BOMs found. Approve a BOM first from the Bill of Materials page.
The user must first create and approve a BOM from:
Manufacturing → Bill of Materials
After approval, the BOM becomes available for selection in the MRP Calculator.
Best Practices
For accurate material planning:
- Use an approved and up-to-date BOM.
- Enter the correct number of production batches.
- Maintain accurate inventory quantities.
- Configure correct quantities per batch.
- Define applicable Scrap / Waste percentages in the BOM.
- Mark genuinely critical materials as Critical.
- Review material shortages before creating production orders.
- Recheck inventory when production quantities change.
Recommended: Always run the MRP calculation using the latest approved BOM and current inventory information before starting production. Review all material shortages and critical components to avoid production delays.
Production Orders
A Production Order is a formal instruction to manufacture a specific quantity of a product, using an approved BOM.
The page provides:
- + New Order – Create a new Production Order.
- All Statuses – Filter orders by status (e.g., Draft, Planned, In Progress, Completed, Cancelled).
- Production Order List – Displays all existing orders.
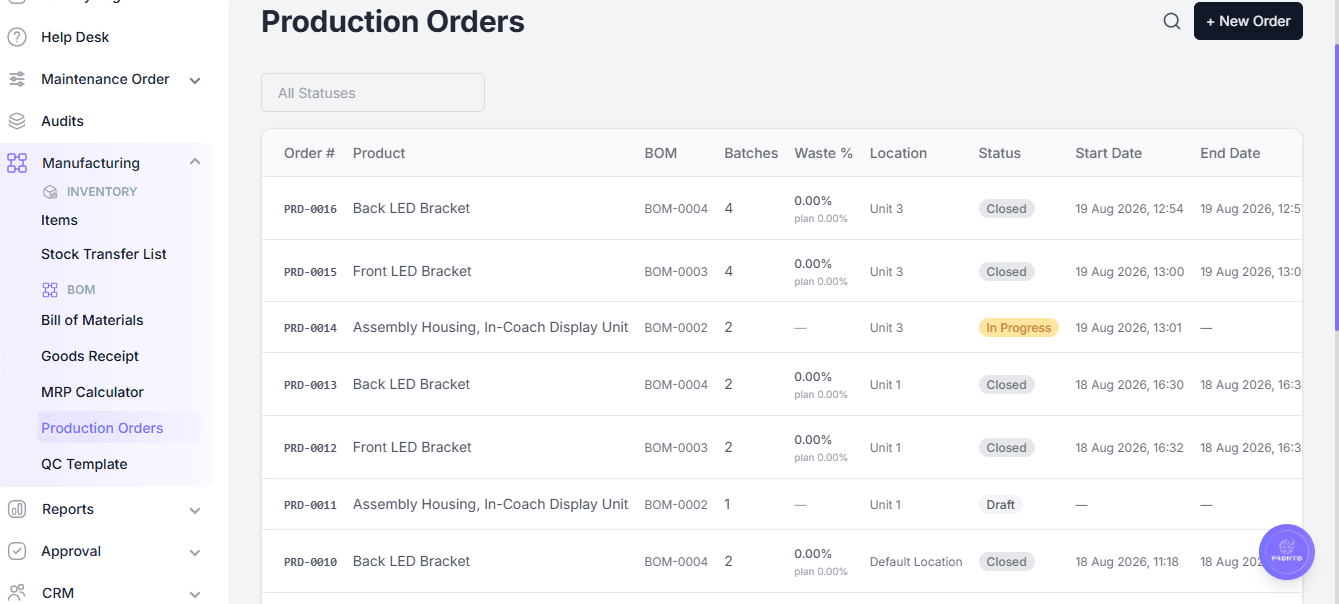
Create a New Production Order
- Click + New Order.
- Select the Product to manufacture and its BOM.
- Enter the required Quantity and Production Date.
- Add any Notes or Reference.
- Click Save to create the order.
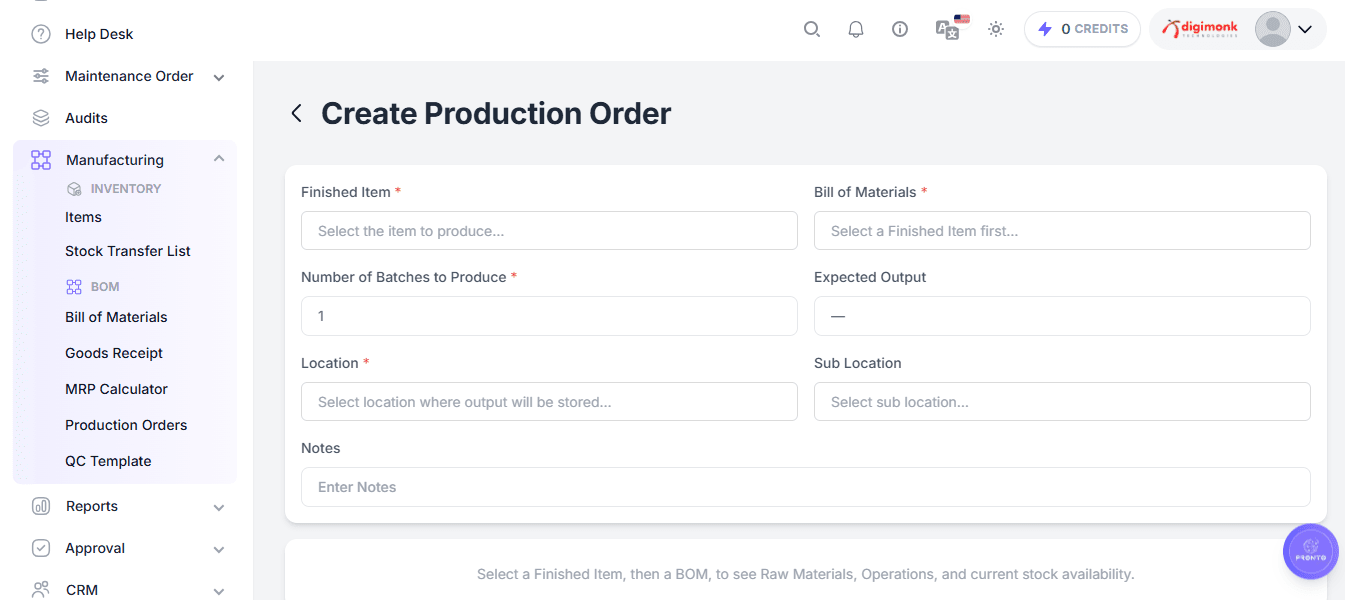
Production Order Actions
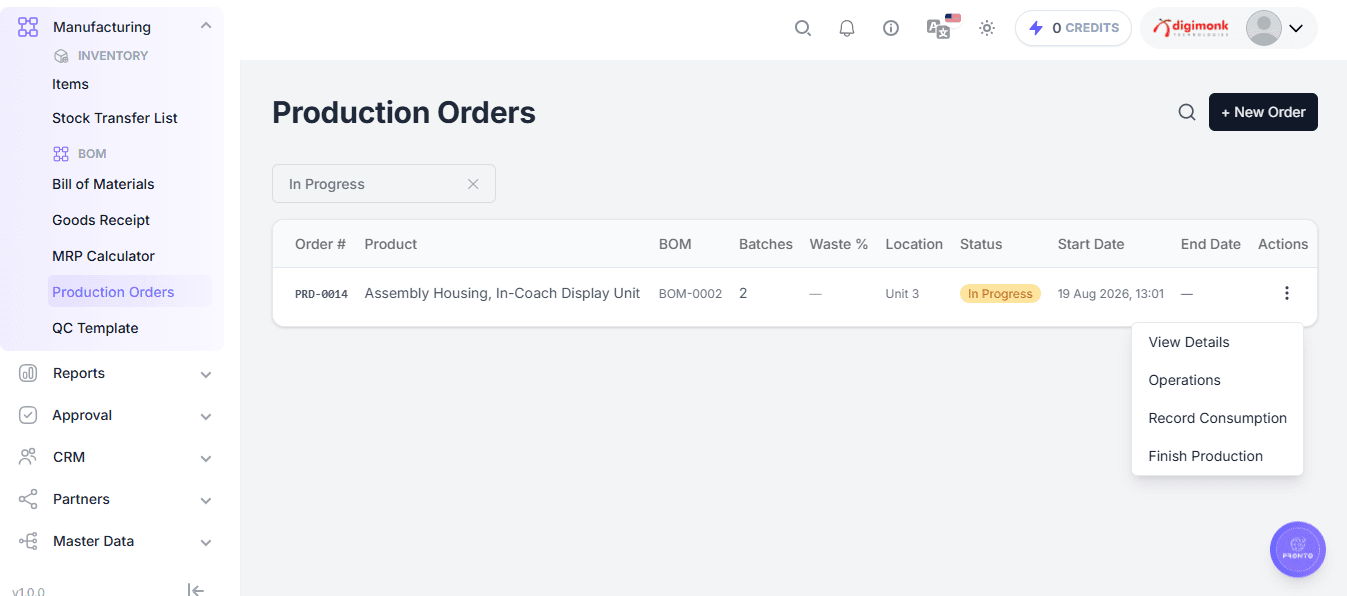
The Actions menu available for each Production Order provides access to the main activities required to manage and complete the production process.
The available actions include:
- View Details – View complete information about the selected Production Order.
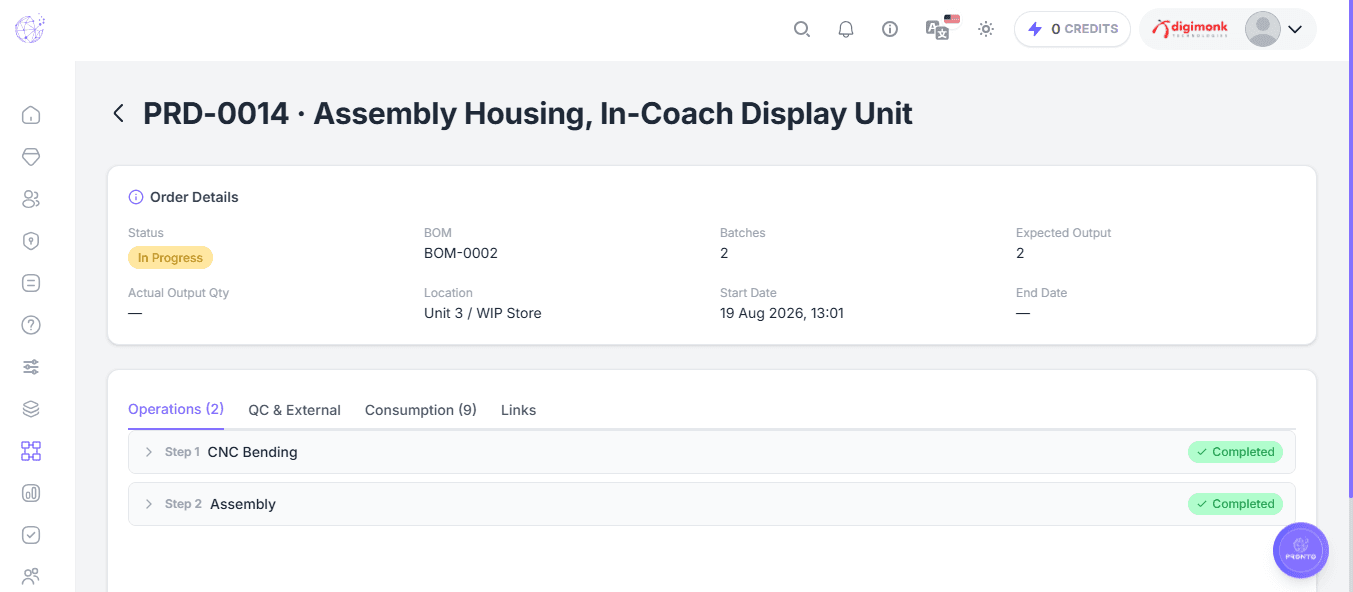
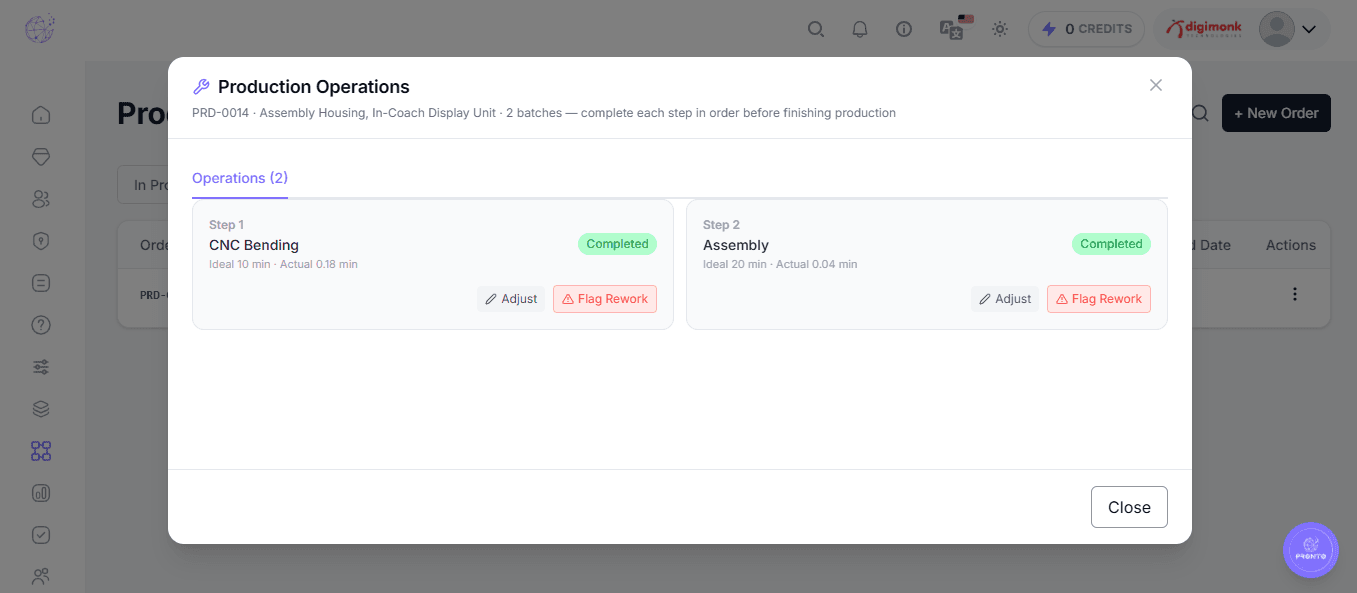
- Operations – View and manage the operations associated with the Production Order.
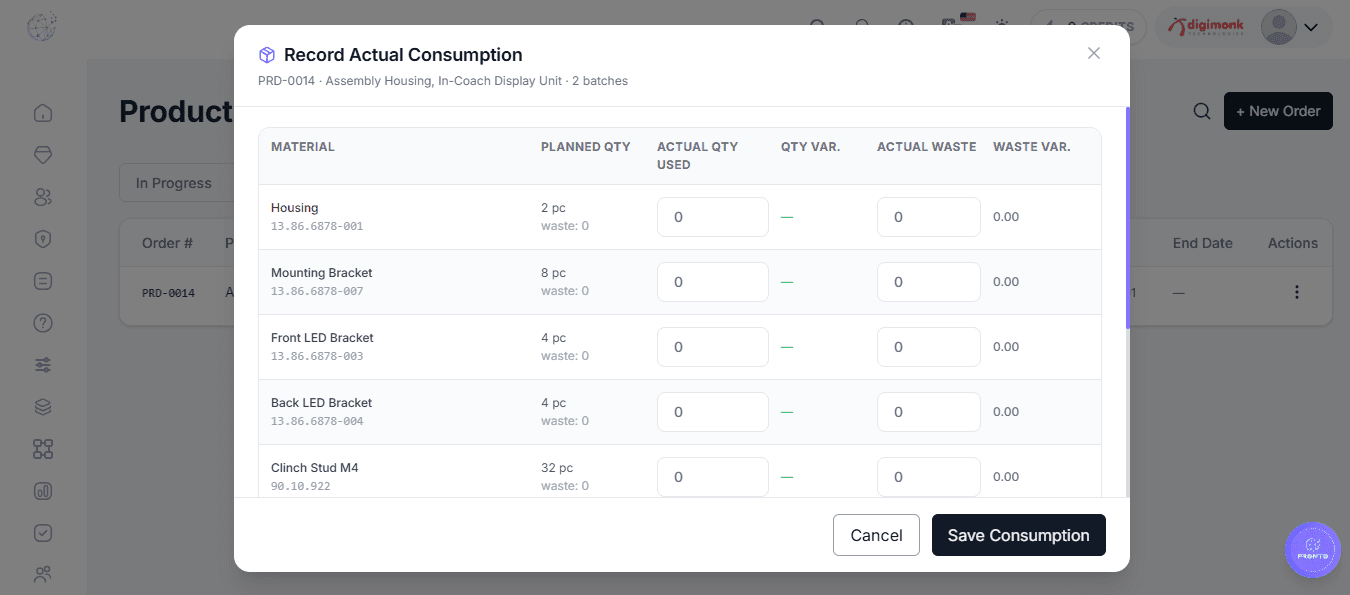
- Record Consumption – Record the actual consumption of raw materials used during production.
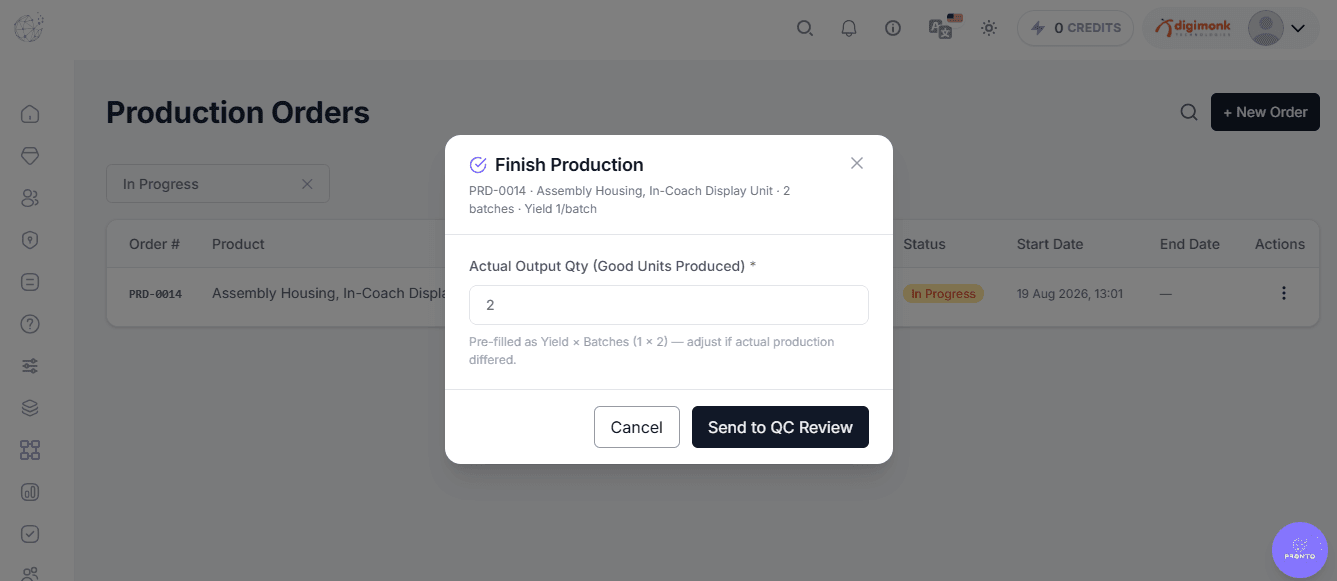
- Finish Production – Complete the production process and record the finished product.
These actions allow users to manage a Production Order from its active production stage through material consumption and final completion.
View Details
The View Details action is used to open and review the complete information of a selected Production Order.
Users can use this option to verify important production information before performing further actions.
The Production Order may include information such as:
- Order Number
- Product
- BOM
- Number of Batches
- Waste %
- Production Location
- Production Status
- Start Date
- End Date
Example:
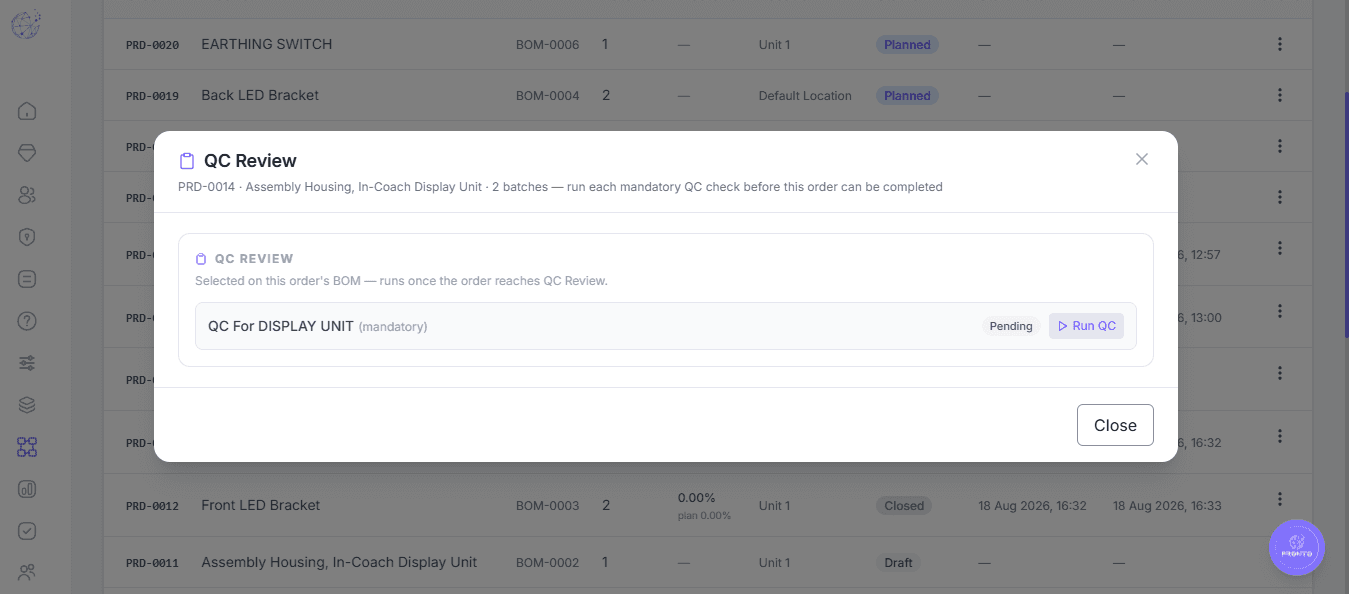
Production Order: PRD-0014
Product: Assembly Housing, In-Coach Display Unit
BOM: BOM-0002
Batches: 2
Location: Unit 3
Status: In Progress
Use View Details to verify the Production Order information before recording consumption, managing operations, or finishing production.
Operations
The Operations action is used to view and manage the manufacturing operations associated with the selected Production Order.
Operations represent the individual production steps that need to be performed to manufacture the finished product according to the BOM.
For example, a Production Order may contain operations such as:
- Assembly
- Cutting
- Welding
- Inspection
- Testing
- Packaging
The operations available for a Production Order depend on the operations configured in its associated Bill of Materials (BOM).
Example:
BOM → Operations → Production Order → Execute Operations
Users should complete the required production operations according to the defined manufacturing process.
Record Consumption
The Record Consumption action is used to record the raw materials consumed during production.
Consumption records help maintain an accurate relationship between the materials required by the BOM and the materials actually used during manufacturing.
The consumption process can include:
- Open the Actions menu for the Production Order.
- Select Record Consumption.
- Review the raw materials associated with the Production Order.
- Enter or verify the quantity consumed.
- Record the material consumption.
- Continue the production process after the required consumption has been recorded.
Example:
If the BOM requires:
| Raw Material | Required Quantity |
|---|---|
| Pop Nut M3 | 2 pc |
The consumption record should reflect the quantity actually consumed for the Production Order.
Accurate consumption records are important for inventory tracking, material usage analysis, and production control.
Finish Production
The Finish Production action is used to complete the manufacturing activity for the selected Production Order.
Before finishing production, users should verify that:
- Required raw materials have been consumed or recorded.
- Required production operations have been completed.
- The correct Production Order is being processed.
- The finished product quantity is correct.
- The production location is correct.
To finish production:
- Open the Actions menu for the Production Order.
- Select Finish Production.
- Review the production information.
- Confirm the completion of production.
Once production is finished, the Production Order can move from its active production stage toward completion according to the application's configured workflow.
Example workflow:
Production Order → Operations → Record Consumption → Finish Production → Completed Production
Finish Production should be performed only after the required production activities and material consumption have been properly recorded.
Production Order Action Workflow
The Production Order actions support the complete production execution workflow.
1. View Details
Review the Production Order information, BOM, product, batches, location, and current status.
2. Operations
Review and manage the production operations defined for the BOM.
3. Record Consumption
Record the actual raw materials consumed during production.
4. Finish Production
Complete the production process after the required manufacturing activities have been performed.
Overall workflow: Production Order → View Details → Operations → Record Consumption → Finish Production → QC Review
Production Order Workflow
The complete In Progress Production Order workflow can be summarized as:
Production Order Created → Production Started → Operations Performed → Material Consumption Recorded → Finish Production → QC Review → External Processing (if applicable) → Production Completed
Example:
PRD-0014 → 2 Batches → CNC Bending → Assembly → Record Consumption → QC Review → Finish Production
This workflow ensures that production progress, material consumption, manufacturing operations, quality checks, and final output are properly tracked throughout the production lifecycle.
Production Control
Production Order actions help maintain control over the manufacturing process by connecting production planning, operations, material consumption, and production completion.
They help users:
- Review production order information.
- Track production operations.
- Record raw material consumption.
- Monitor production progress.
- Complete manufacturing activities.
- Maintain accurate production records.
- Support inventory and production tracking.
The Production Order therefore acts as the central record for executing a manufacturing requirement generated from an approved BOM.
Recommended: Always review the Production Order details before performing an action. Record material consumption accurately, complete the required operations before finishing production, and verify the production location and quantities to maintain reliable manufacturing and inventory records.
Empty Production Orders List
If no production orders exist, the page displays:
No production orders found
Manufacturing Flow Summary
Items → Bill of Materials → BOM Approval → MRP Calculation → Production Order → Manufacturing → Finished Goods / Inventory
Raw materials can also enter through:
Supplier → Goods Receipt → Inventory → Production
QC Template
The QC Template module is used to create and manage standardized quality-control checklists for manufacturing and production processes.
QC Templates define the questions that must be checked when a quality inspection is performed. They help ensure that quality checks are performed consistently and that important inspection criteria are not missed.
Navigation: Manufacturing → QC Template
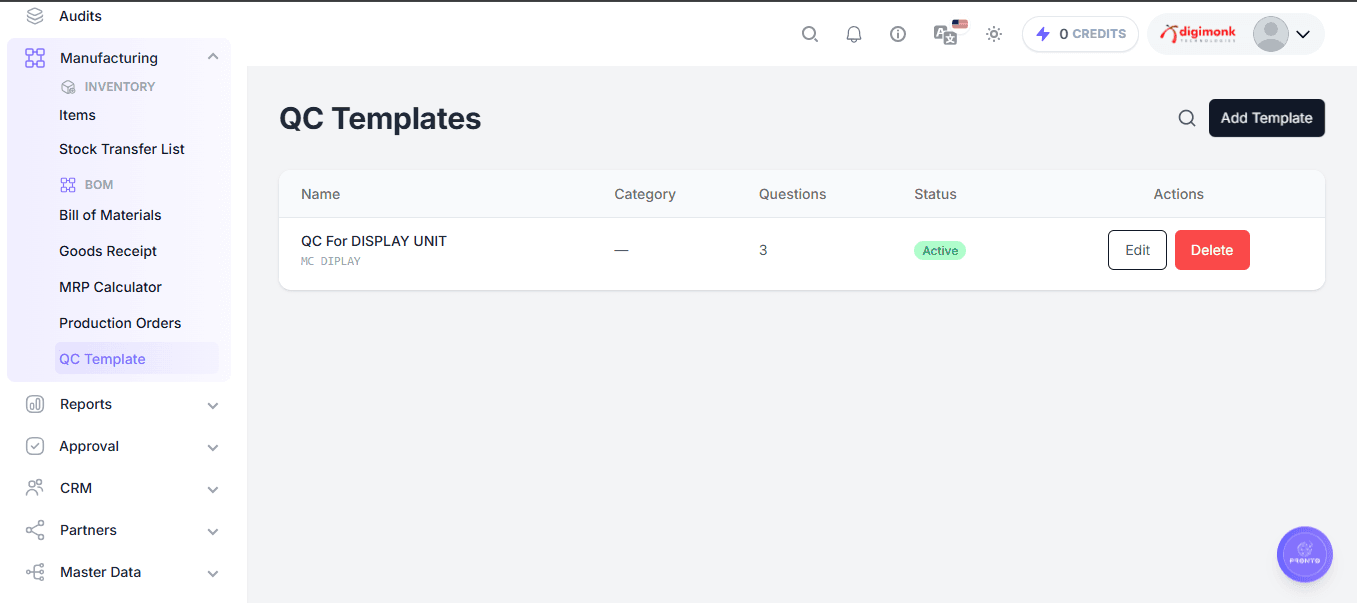
The QC Template list provides the following information:
- Name – Name of the quality-control template.
- Category – Category associated with the template.
- Questions – Number of questions configured in the template.
- Status – Current status of the template.
- Actions – Options to edit or delete the template.
QC Template List
The QC Template page displays all configured quality-control templates in a structured list.
Each template record provides key information required to identify and manage the template.
The list includes:
| Field | Description |
|---|---|
| Name | Name of the QC template. |
| Category | Category assigned to the template. |
| Questions | Total number of questions configured in the template. |
| Status | Indicates whether the template is currently Active or Inactive. |
| Actions | Provides options to edit or delete the template. |
The Add Template button allows users to create a new QC Template.
Add QC Template
To create a new QC Template:
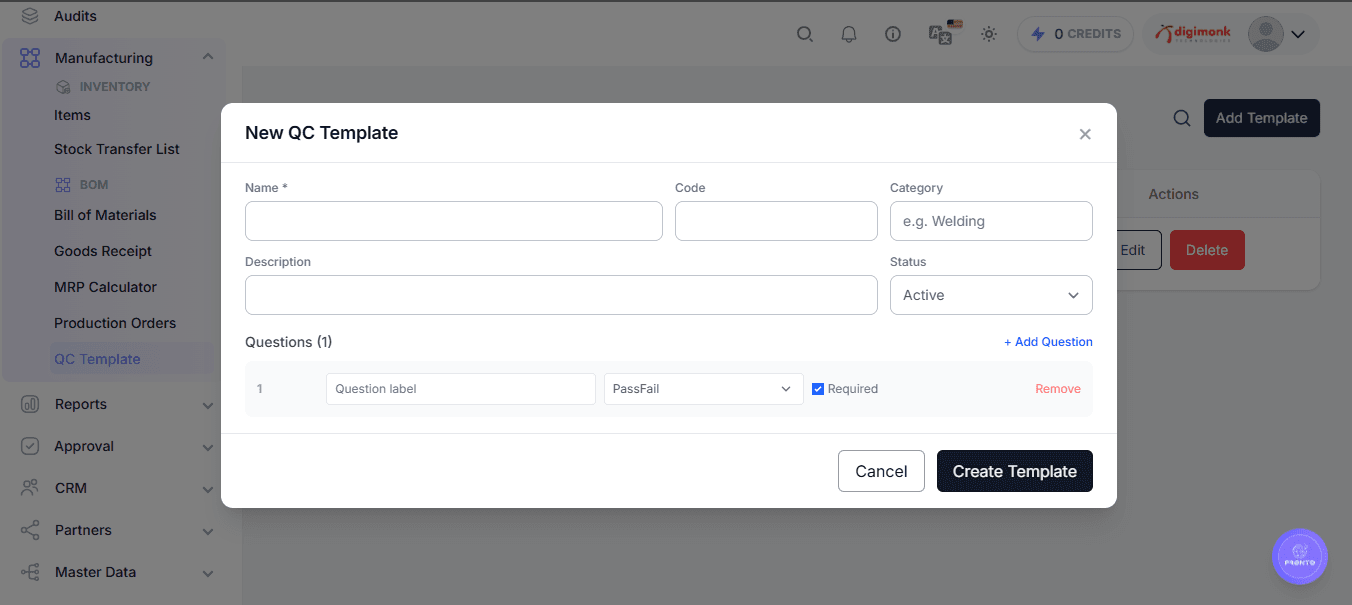
- Click Add Template.
- Enter the Name of the QC Template.
- Enter a Code to uniquely identify the template, if required.
- Enter the Category associated with the quality check.
- Enter a Description explaining the purpose of the template.
- Select the required Status.
- Configure the QC questions.
- Click Create Template to save the template.
The Name field is mandatory.
Example:
Name: QC For DISPLAY UNIT
Code: MC DISPLAY
Category: Manufacturing Quality
Description: Quality inspection checklist for the display unit.
Basic Template Information
The QC Template form contains the following basic information:
| Field | Description |
|---|---|
| Name* | Name of the quality-control template. |
| Code | Identifier used to reference the template. |
| Category | Category or type of quality inspection. |
| Description | Additional information about the purpose or scope of the template. |
| Status | Determines whether the template is Active or Inactive. |
The Name field is marked as mandatory and must be completed before the template can be created.
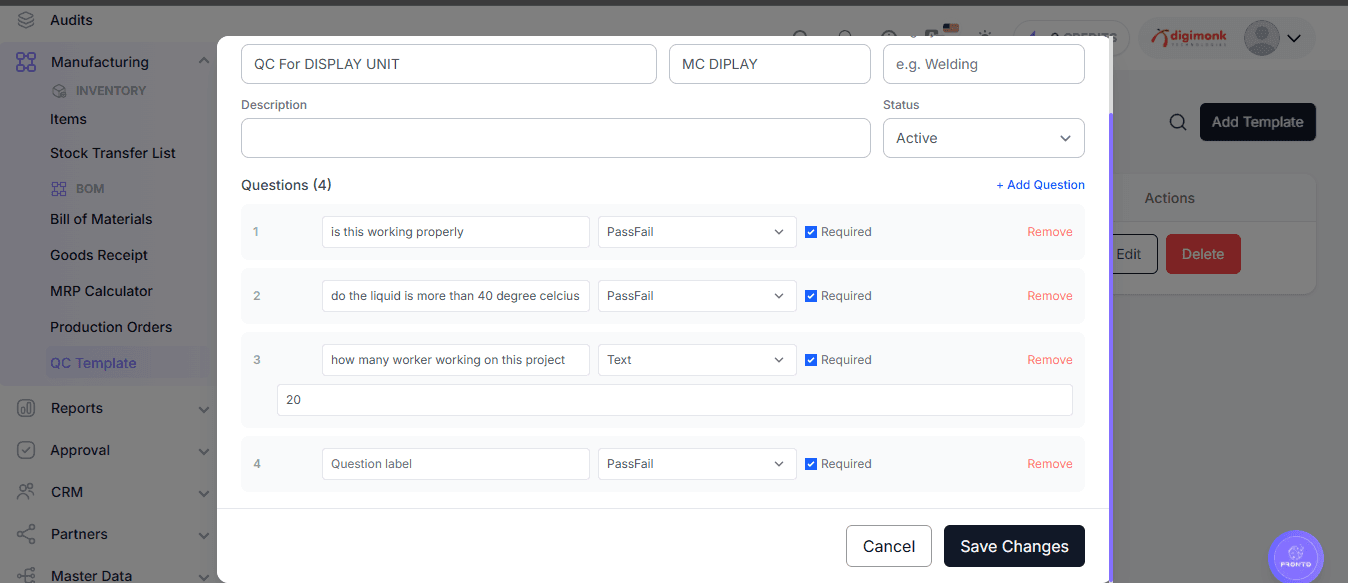
QC Questions
The Questions section defines the individual checks that must be performed as part of the QC process.
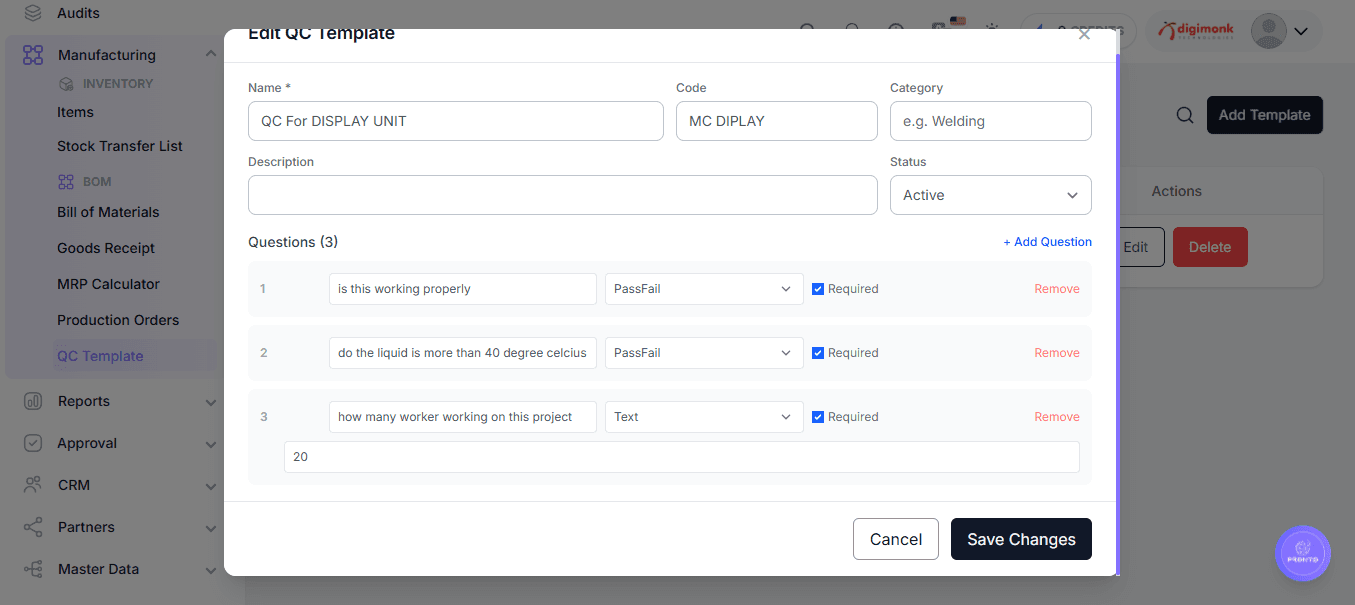
Each question contains:
- Question Label – The actual inspection question or check to be performed.
- Response Type – Defines how the user should provide the response.
- Required – Determines whether the question must be answered.
- Remove – Removes the question from the template.
A new question can be added using + Add Question.
Example:
Question: Is this working properly?
Response Type: PassFail
Required: Yes
Additional questions can be added to create a complete inspection checklist.
Question Response Types
The QC Template supports different response formats for inspection questions.
The available response types shown in the template include:
- PassFail – Used when the inspection result should be recorded as a pass or fail.
- Text – Used when the inspector needs to enter a text-based response.
The response type should be selected according to the nature of the inspection question.
Example:
| Question | Response Type |
|---|---|
| Is the unit working properly? | PassFail |
| How many workers are working on this project? | Text |
Required Questions
Each QC question contains a Required option.
When Required is enabled, the question is treated as a mandatory inspection check and must be completed as part of the QC process.
When configuring a template:
- Add the inspection question.
- Select the appropriate response type.
- Enable Required when the question must be answered.
- Leave it disabled when the question is optional.
Making critical inspection questions required helps ensure that important quality checks are not skipped.
Add Question
To add additional inspection criteria:
- Click + Add Question.
- Enter the Question Label.
- Select the required Response Type.
- Enable or disable Required according to the inspection requirement.
- Repeat the process to add additional questions.
- Use Remove if a question is no longer required.
A QC Template can contain multiple questions, allowing organizations to create a complete inspection checklist for a particular product, process, or manufacturing activity.
Edit QC Template
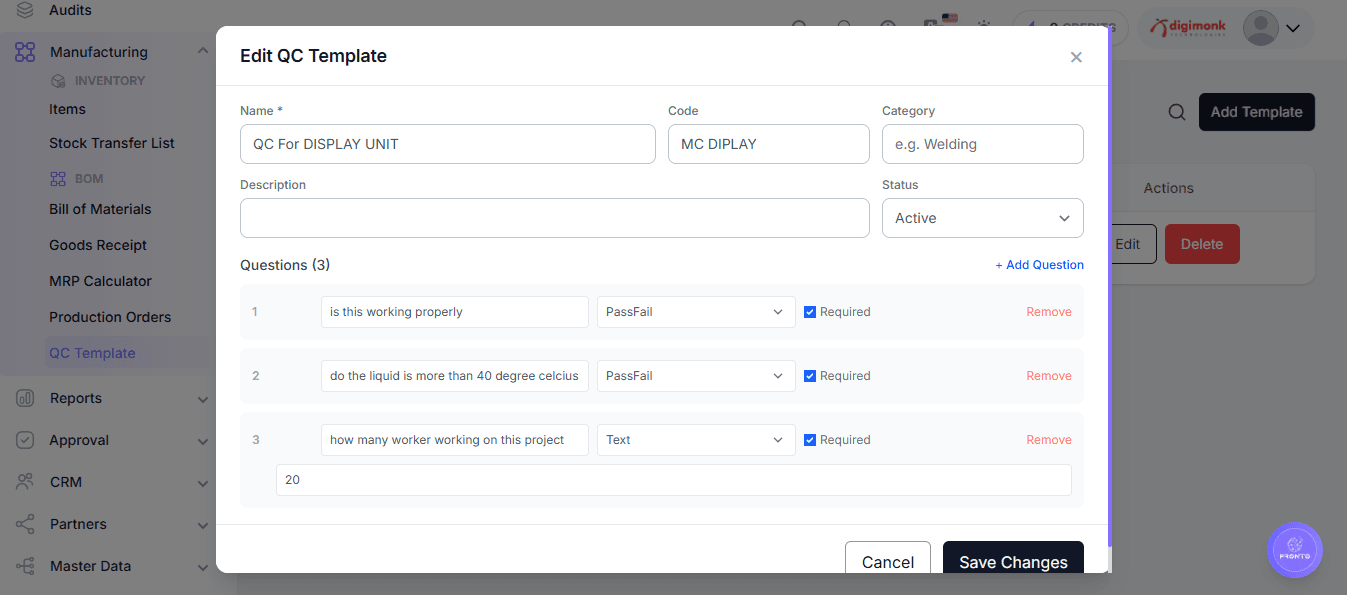
Existing QC Templates can be modified using the Edit action available from the QC Template list.
The Edit QC Template form allows users to update:
- Template Name
- Template Code
- Category
- Description
- Status
- Existing QC questions
- Question response types
- Required question settings
Users can also:
- Add new questions.
- Remove existing questions.
- Change the response type.
- Change whether a question is required.
After making the required changes, click Save Changes to update the template.
Template Status
The Status field controls whether a QC Template is available for use.
The template can be maintained with an appropriate status such as:
- Active – The QC Template is currently available for quality-control activities.
- Inactive – The QC Template is not currently intended for use.
In the QC Template list, the current status is displayed for each template.
Keep frequently used QC Templates Active and deactivate templates that are no longer required instead of creating unnecessary duplicate templates.
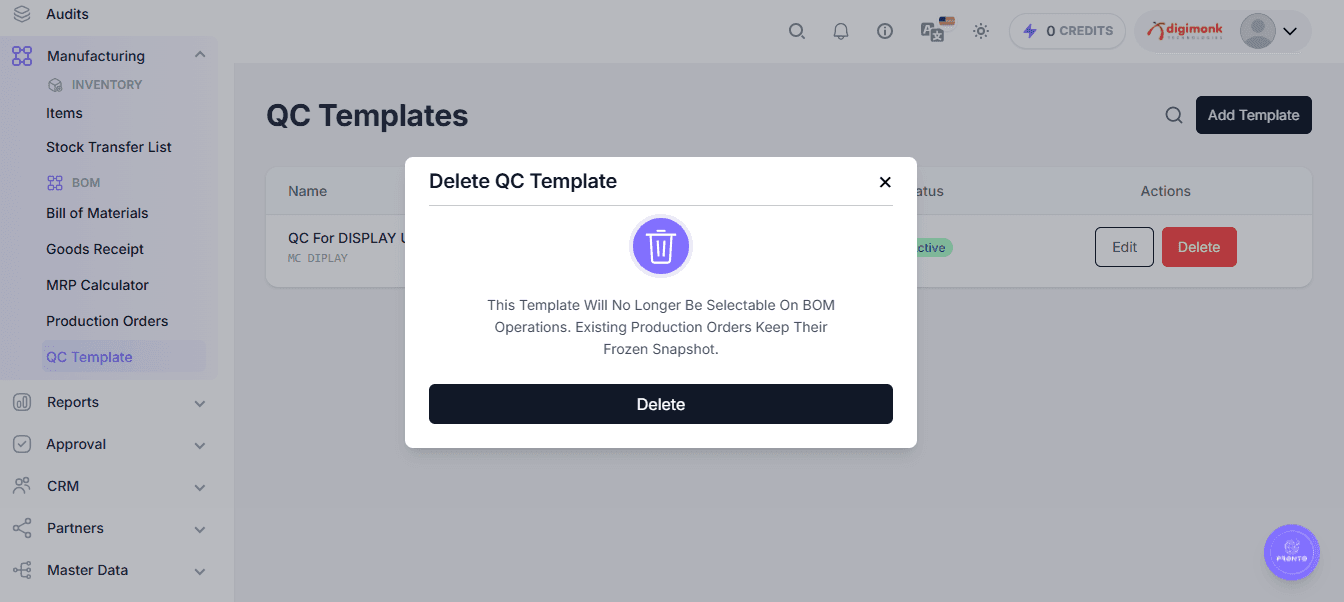
Delete QC Template
The QC Template list provides a Delete action for template records.
To delete a template:
- Locate the required QC Template.
- Click Delete.
- Confirm the deletion if a confirmation prompt is displayed.
Review the template before deleting it, especially when it is being used as part of an existing manufacturing or quality-control process.
QC Template Management
The QC Template module provides a centralized way to manage standardized quality inspections.
Users can:
- Create QC Templates.
- Define template codes and categories.
- Add multiple inspection questions.
- Select appropriate response types.
- Mark important questions as required.
- Edit existing templates.
- Activate or deactivate templates.
- Remove unnecessary questions.
- Delete obsolete templates.
This makes QC Templates a reusable foundation for consistent quality-control procedures across manufacturing operations.
QC Template in Manufacturing
QC Templates can be used to establish a standardized inspection checklist for manufacturing activities.
A typical quality-control process can be represented as:
QC Template → Inspection Questions → Production Quality Check → Pass / Fail or Text Response → Quality Decision
Example:
QC For DISPLAY UNIT
- Is the unit working properly? → PassFail
- Is the liquid temperature within the required range? → PassFail
- Enter the required workforce information. → Text
This approach ensures that the same quality criteria can be checked consistently for similar production activities.
Recommended: Use clear and specific question labels, select the most appropriate response type, mark critical inspection questions as Required, maintain meaningful template names and codes, and keep inactive or obsolete templates properly managed to maintain clean and reliable QC master data.
Approval
Watch Video
Approval Overview
The Approval module provides a controlled, transparent workflow for submitting requests, routing them through the required approval hierarchy, and tracking their status from creation to final decision. It helps ensure that purchase and other business requests are reviewed and approved by the appropriate users before execution.
The Approval module includes:
- My Approval
- My Request
- Purchase Order
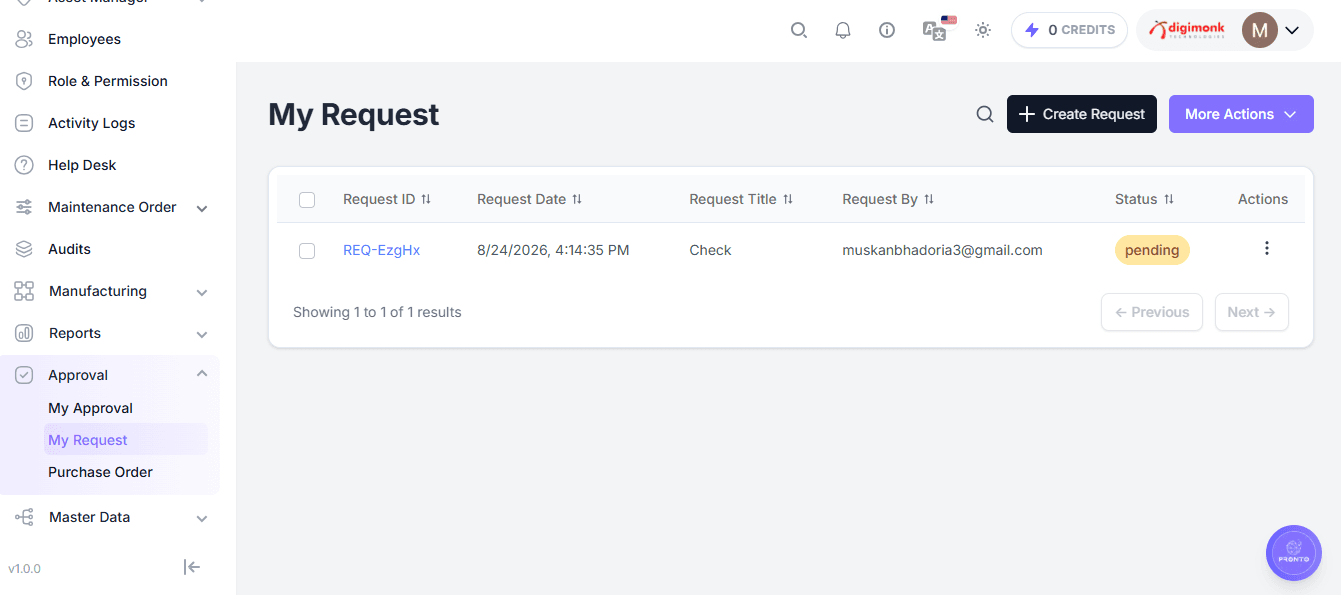
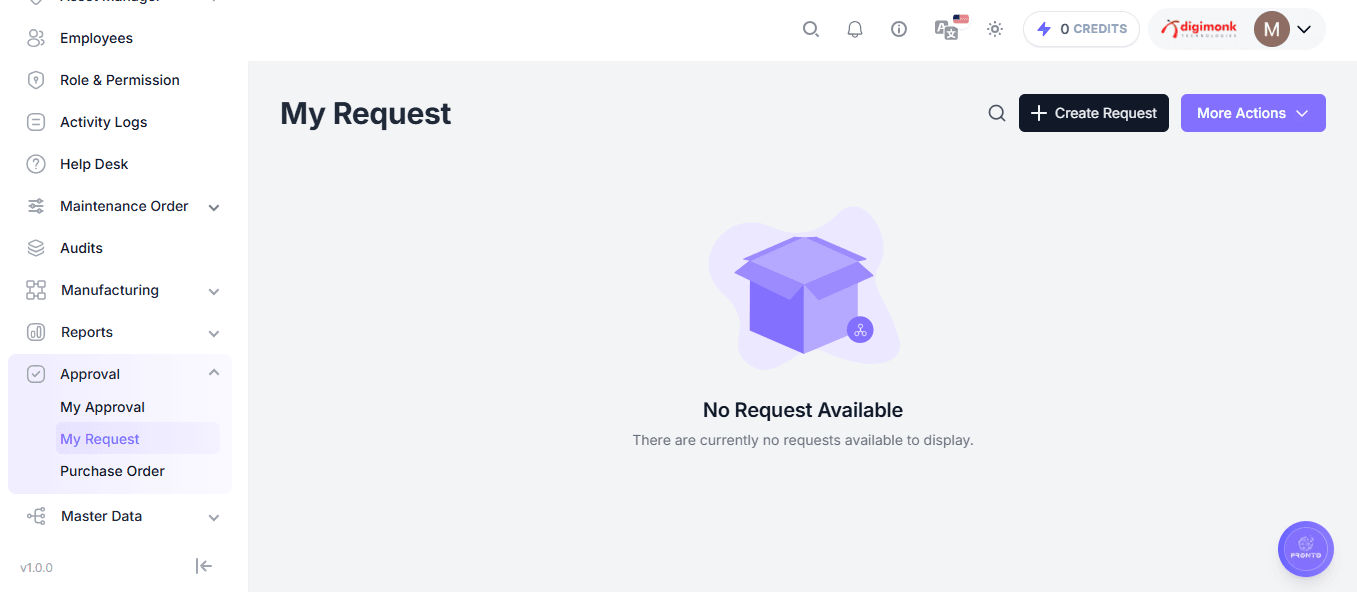
My Request
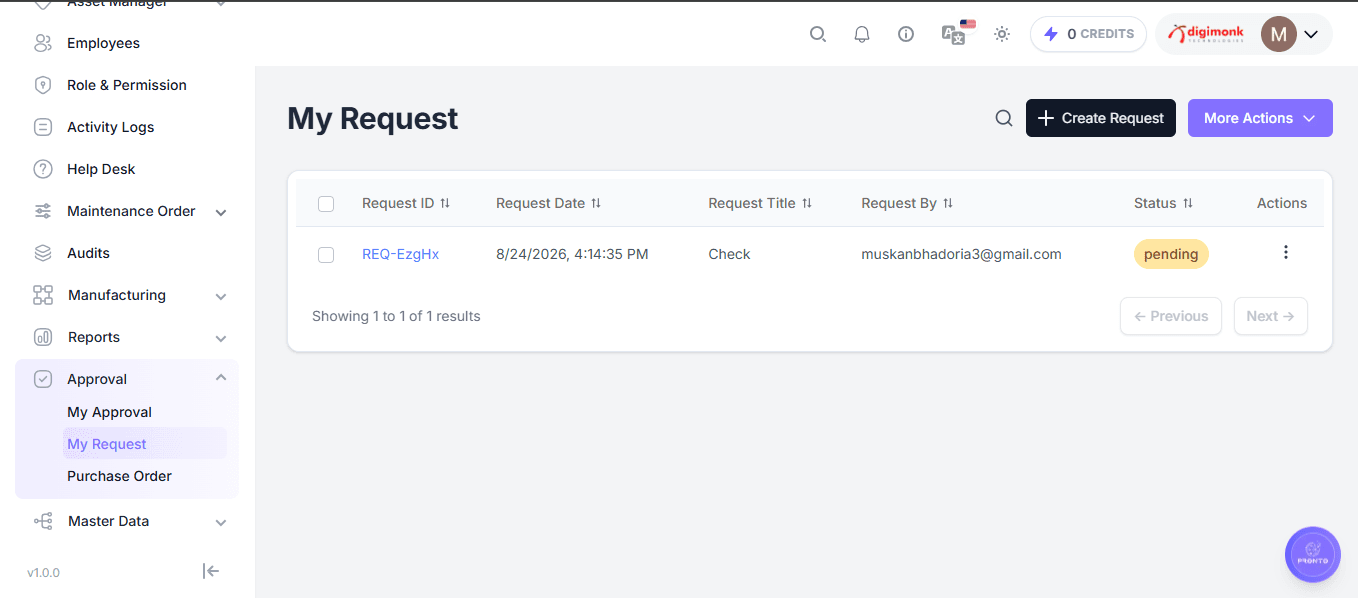
The My Request page allows users to create, submit, and track requests raised by them.
The page provides:
- Create Request – Create a new approval request.
- More Actions – Access additional request-related actions.
- Search – Quickly find an existing request.
- Request List – View requests created by the current user.
- Empty State – Displays "No Request Available" when no requests exist.
Navigation: Approval → My Request
Create Request
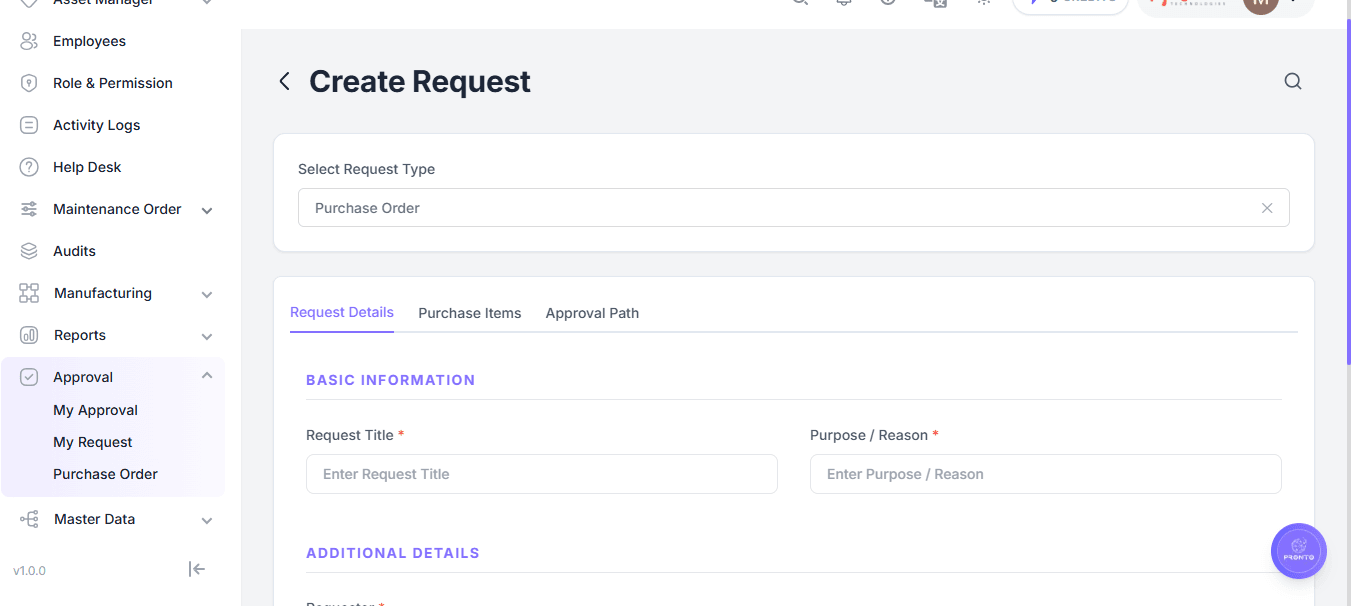
Click Create Request to start a new approval request.
Select Request Type – Select the required request type from the available options.
Example: Purchase Order
The selected request type determines the information and approval workflow associated with the request.
Create Request Sections
The Create Request screen is divided into three sections:
- Request Details
- Purchase Items
- Approval Path
Request Details
The Request Details tab captures the basic information required for the request.
Basic Information
| Field | Description |
|---|---|
| Request Title | Enter a clear and meaningful title for the request. |
| Purpose Reason | Specify why the request is being created and provide the business justification. |
Additional Details
| Field | Description |
|---|---|
| Requester | Identifies the employee/user submitting the request. |
| Attachments | Attach supporting documents required for review and approval. |
Attachments
Users can upload supporting documents using Click to upload or drag & drop files.
Attachment rules:
- Multiple files are supported.
- Maximum file size: 5 MB per file.
Examples of supporting documents may include quotations, specifications, requirement documents, or other approval-related evidence.
My Request – Actions
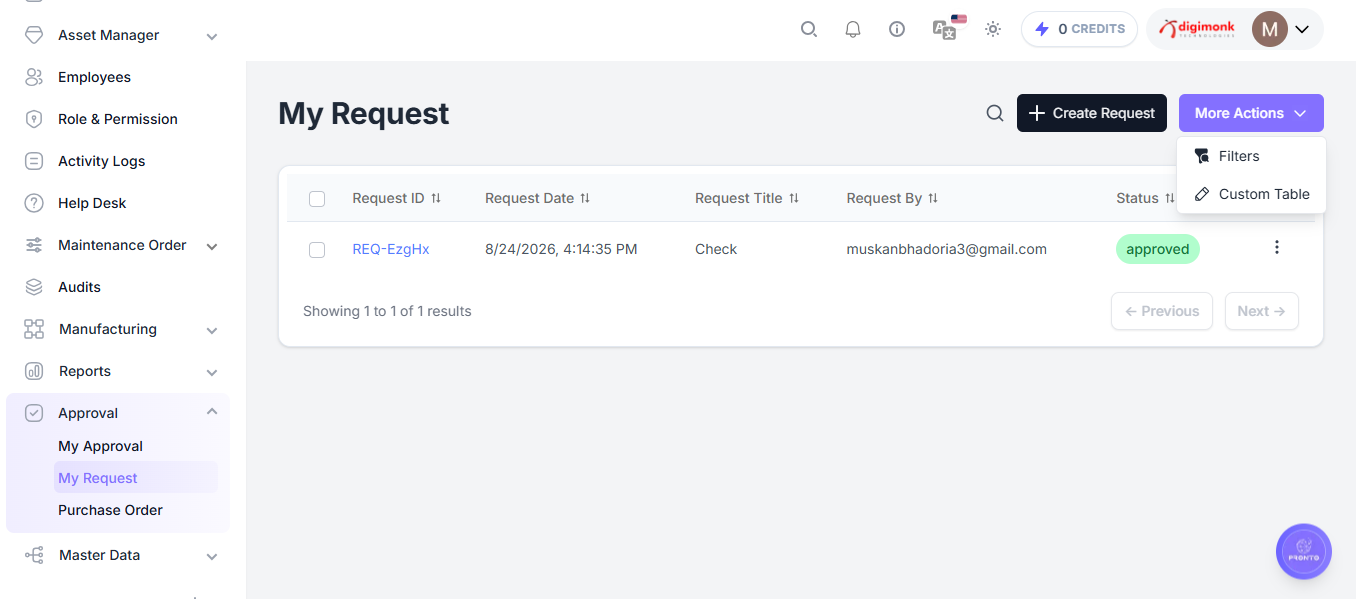
The Actions menu provides request-specific actions based on the current status of the request.
To access the available actions:
Approval → My Request → Actions
Available Actions
The available actions depend on the current status of the request.
Delete : Deletes the request from the My Request list when deletion is permitted.
Create PO : Converts an approved purchase request into a Purchase Order. This action is available for approved purchase requests.
Delete
The Delete action allows the requester to remove a request when deletion is permitted by the system.
Select:
Actions → Delete
The system removes the selected request after the deletion action is confirmed.
Note: Deletion availability may depend on the request status and configured permissions.
Create PO
The Create PO action is used to convert an approved Purchase Request into a formal Purchase Order.
Select:
Actions → Create PO
The system opens the Create Purchase Order screen and automatically loads the approved purchase items.
The approved:
- Item
- Quantity
- Price
- Total
are retained from the original request.
Important: Prices and quantities are locked to the approved values during Purchase Order creation.
Create PO Workflow
My Request → Approved Request → Actions → Create PO → Ordered Items → Vendor & Logistics → Issue Purchase Order → Purchase Order Created
Ordered Items
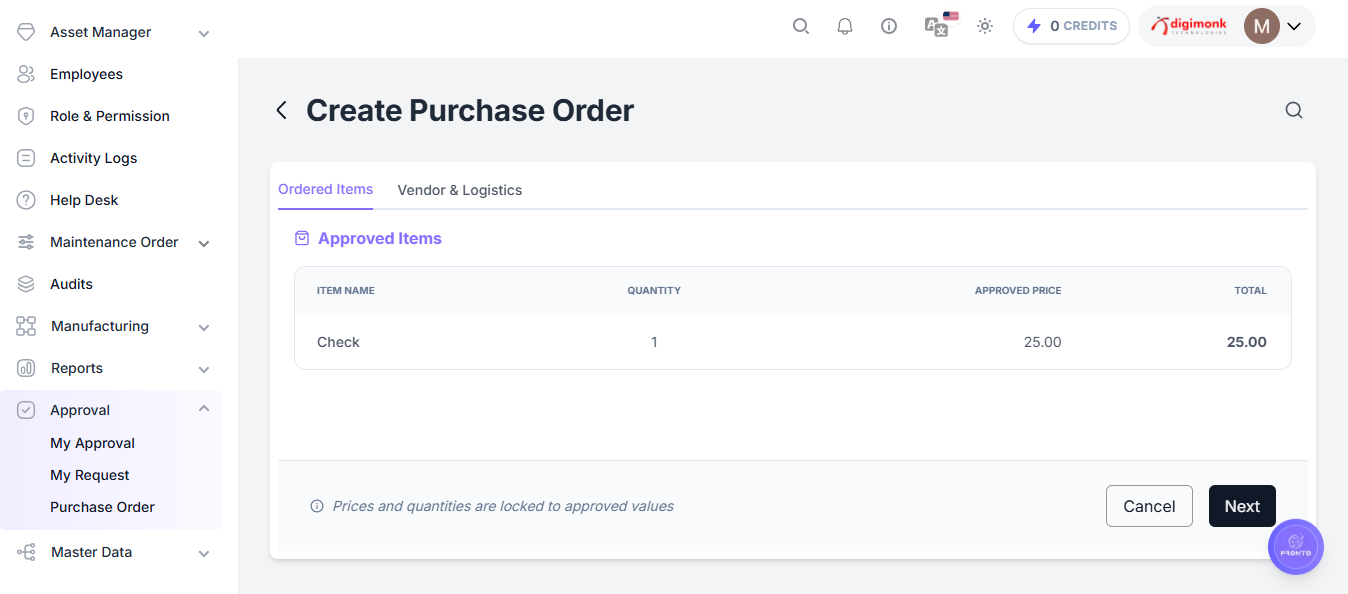
The Ordered Items section displays all purchase items that were approved as part of the original Purchase Request.
Ordered Items – Approved purchase items
Approved Items
| Field | Description |
|---|---|
| Item Name | Displays the name of the approved purchase item. |
| Quantity | Displays the quantity approved in the purchase request. |
| Approved Price | Displays the unit price approved during the approval process. |
| Total | Displays the total amount calculated from the approved quantity and price. |
Example
| Item Name | Quantity | Approved Price | Total |
|---|---|---|---|
| Check | 1 | $25.00 | $25.00 |
Price & Quantity Control
The system displays:
Prices and quantities are locked to approved values
This ensures that the approved quantity and price cannot be changed while creating the Purchase Order.
The Ordered Items section therefore maintains consistency between the approved Purchase Request and the resulting Purchase Order.
Vendor & Logistics
The Vendor & Logistics section captures supplier and delivery information required to complete and issue the Purchase Order.
| Field | Description |
|---|---|
| Select Supplier | Select the supplier/vendor responsible for fulfilling the Purchase Order. |
| Shipping Address | Enter the address where the purchased items should be delivered. |
| Location | Select the primary inventory location where the purchased items will be received or stored. |
| Sub Location | Select the specific storage location within the selected inventory location. |
| Attachments | Upload supporting documents such as supplier quotations, specifications, or delivery documents. |
| Purchase Notes | Add specific instructions or additional information for the supplier. |
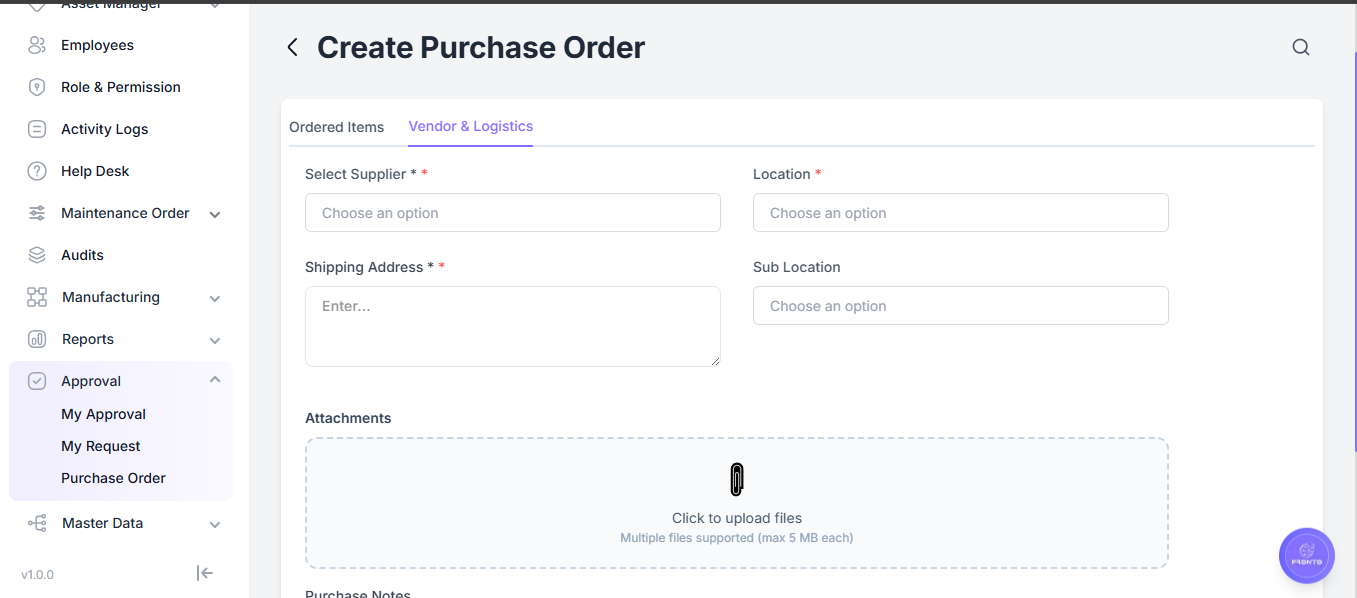
Supplier
Select Supplier: Select the vendor responsible for supplying the approved purchase items.
Choose an option
The selected supplier will be associated with the Purchase Order.
Shipping Address
Shipping Address: Enter the complete delivery address for the purchased items.
Enter...
Ensure that the address is accurate to avoid delivery issues.
Location
*Location * Select the main inventory location where the purchased items will be received.
Choose an option
Sub Location
Sub Location Select the specific storage area or sub-location within the selected location.
Choose an option
Attachments
Users can attach relevant documents to support the Purchase Order.
📎 Click to upload files
Attachment rules:
- Multiple files are supported.
- Maximum file size: 5 MB per file.
Examples of supporting documents include:
- Supplier quotations
- Technical specifications
- Delivery documents
- Purchase-related documents
Purchase Notes
Use Purchase Notes to provide additional instructions to the supplier.
Any specific instructions for vendor
Examples include:
- Required delivery date
- Packaging requirements
- Quality requirements
- Special handling instructions
- Delivery instructions
Purchase Order Control
The Vendor & Logistics section does not modify the approved item quantities or prices. These values remain locked based on the approved Purchase Request.
The section is used only to define:
Supplier → Delivery Address → Inventory Location → Sub Location → Supporting Documents → Vendor Instructions
After completing the Vendor & Logistics information, proceed to Issue Purchase Order to create the final Purchase Order.
Purchase Items
The Purchase Items tab is used to define the items required for a Purchase Order request.
Click + Add Item to add a purchase item.
| Field | Description |
|---|---|
| Item Name Description | Enter the name or description of the item being requested. |
| Qty | Enter the required quantity. |
| Unit Price | Enter the price per unit. |
Each added item appears as a separate purchase-item line.
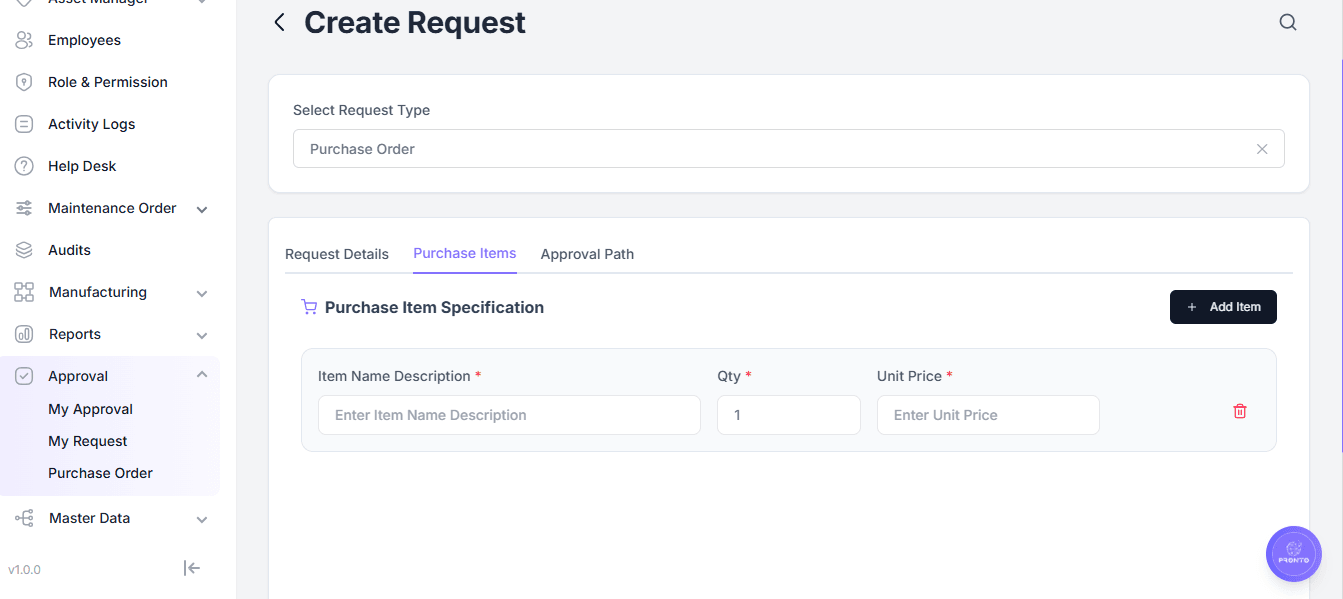
Purchase Items Example
| Item Name Description | Qty | Unit Price |
|---|---|---|
| Pop Nut M3 | 100 | $0.25 |
| Mounting Bracket | 20 | $4.50 |
| LED Bracket Assembly | 10 | $12.00 |
Users can:
- Add multiple items.
- Review item quantities and prices.
- Remove an item using the delete action.
Approval Path
The Approval Path defines the sequence through which the request must pass before it can be approved.
This ensures that requests are reviewed by the appropriate authority instead of being processed directly without authorization.
Approval Workflow:
Request Created → Submitted for Approval → Approval Review → Approved / Rejected → Request Processed
Approval Review
The assigned approver can review the submitted request and evaluate:
- Request details
- Purpose / business justification
- Requester
- Purchase items
- Quantity
- Unit price
- Attachments
- Required approval level
The approver can then take the appropriate decision based on the configured approval process.
Approval Outcomes
| Status | Description |
|---|---|
| Pending | Request has been submitted and is waiting for approval. |
| Approved | Request has successfully passed the required approval. |
| Rejected | Request has been declined by the approver. |
| Cancelled | Request has been cancelled and will not proceed further. |
Note: The exact approval sequence depends on the approval configuration and assigned approval hierarchy.
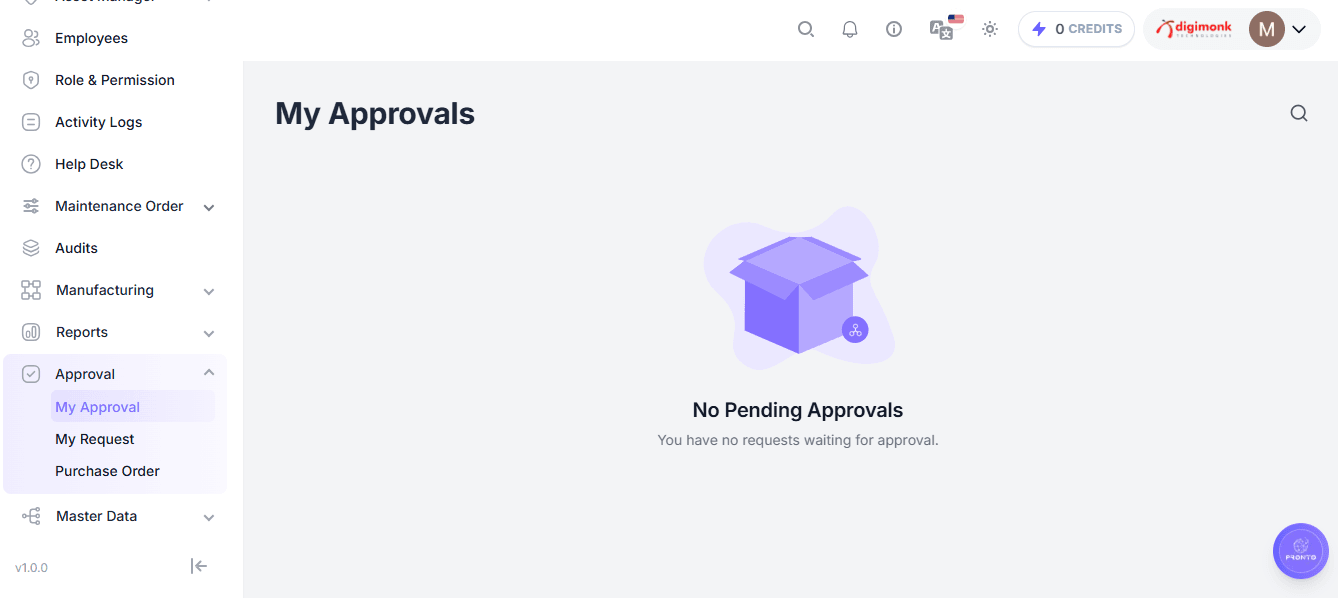
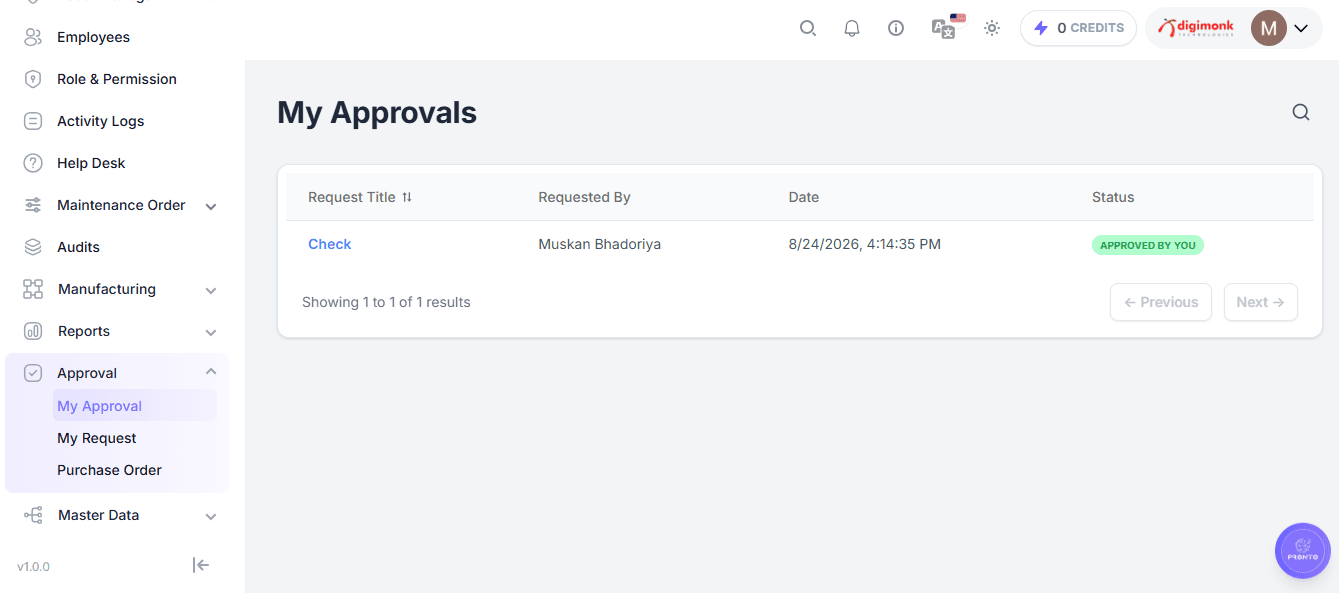
My Approval
The My Approval page provides approvers with a centralized view of requests that require their action.
The page displays requests that are currently waiting for the logged-in user's approval.
When there are no pending requests, the system displays:
No Pending Approvals
You have no requests waiting for approval.
Navigation: Approval → My Approval
Approver Responsibilities
The approver should review the request before making a decision, including:
- Request purpose and justification.
- Requester information.
- Requested items.
- Quantity and pricing.
- Supporting attachments.
- Overall business requirement.
The approver then completes the configured approval action.
Empty State
If no requests are pending approval, the page displays:
No Pending Approvals
Supporting message:
You have no requests waiting for approval.
Purchase Order
The Purchase Order section provides access to purchase requests/orders associated with the approval workflow.
It helps maintain a clear connection between:
Purchase Request → Approval → Purchase Order
This provides better control over purchasing activities and reduces the risk of unauthorized purchases.
Navigation: Approval → Purchase Order
Approval Workflow Summary
The complete approval process can be represented as:
Create Request → Select Request Type → Enter Request Details → Add Purchase Items → Define / Apply Approval Path → Submit Request → My Approval → Approver Reviews Request → Approved / Rejected → Purchase Processing / Request Rejected
Key Benefits
- Controlled authorization – Requests cannot bypass the configured approval process.
- Centralized tracking – Users can monitor requests from creation through final decision.
- Clear accountability – Each request is associated with its requester and approval activity.
- Document support – Attachments provide supporting evidence for approval decisions.
- Purchase control – Purchase requests can be reviewed before being converted into purchasing activity.
- Improved transparency – Requesters and approvers have dedicated views for their respective responsibilities.
- Reduced manual communication – The approval workflow keeps request information and decisions within the system.
End-to-End Approval Process
Request Creation → Request Details → Purchase Items → Approval Path → Request Submission → Approver Review → Approval Decision → Purchase Processing
This workflow ensures that every purchase request follows a structured, traceable, and authorization-driven process from initial requirement to final approval.
CRM
CRM Dashboard
The CRM module helps users manage leads, customers, sales activities, quotations, sales orders, invoices, and proforma invoices.
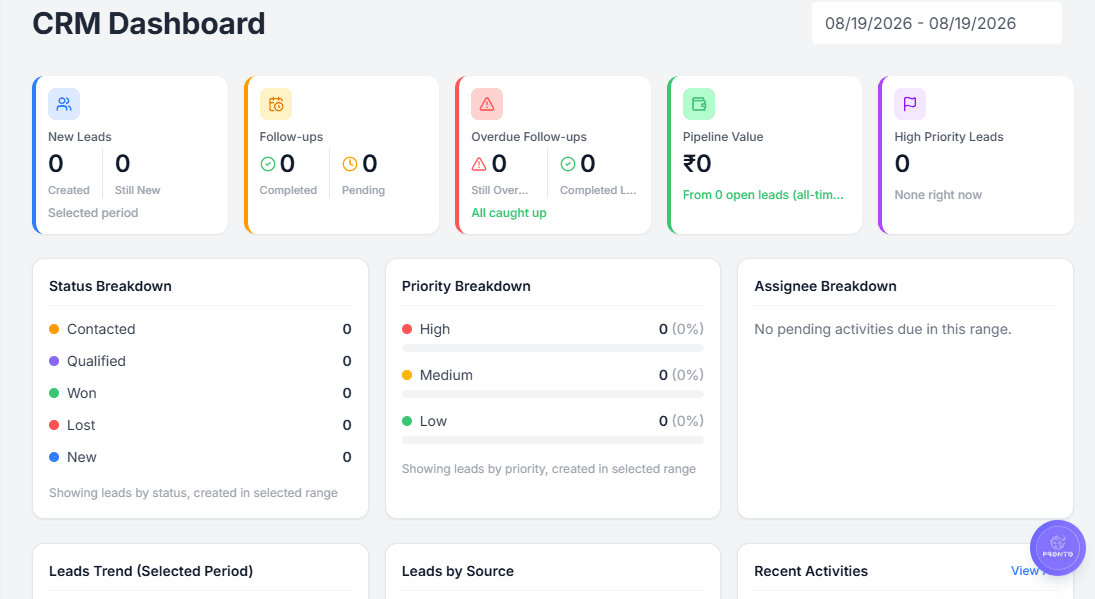
The CRM Dashboard provides a centralized overview of lead activity, follow-ups, pipeline value, lead priorities, lead sources, assignees, and recent activities. It helps users quickly monitor the current status and performance of leads without opening individual lead records.
Navigation: Dashboard → CRM → Dashboard
Dashboard Overview
The CRM Dashboard provides an overview of important CRM activities and lead information. It includes:
- New Leads
- Follow-ups
- Overdue Follow-ups
- Pipeline Value
- High Priority Leads
- Status Breakdown
- Priority Breakdown
- Assignee Breakdown
- Leads Trend
- Leads by Source
- Recent Activities
New Leads
The New Leads section displays a summary of leads created during the selected period. It shows:
- Created – Total number of new leads created during the selected period.
- Still New – Number of leads that are still in the New status.
- Selected Period – Indicates the time period currently selected for the dashboard data.
This section helps users understand how many new leads have entered the CRM and how many are still waiting for further action.
Follow-ups
The Follow-ups section provides an overview of follow-up activities associated with leads. It displays:
- Completed – Number of follow-ups that have been completed.
- Pending – Number of follow-ups that are still pending.
This section helps users monitor whether required follow-up activities have been completed on time.
Overdue Follow-ups
The Overdue Follow-ups section highlights follow-up activities that were not completed within the expected time. It displays:
- Still Overdue – Number of follow-ups that are currently overdue.
- Completed Late – Number of follow-ups that were completed after their scheduled date.
- All caught up – Indicates that there are currently no overdue follow-ups.
This section helps users identify delayed activities and take corrective action.
Pipeline Value
The Pipeline Value section displays the total estimated value of currently open leads. It shows:
- Pipeline Value – Total monetary value of open leads.
- Open Leads – Number of open leads contributing to the pipeline value.
The pipeline value is calculated from open leads and does not include leads that are already marked as Lost or Won.
Example: ₹0 from 0 open leads.
This helps managers understand the potential business value currently available in the sales pipeline.
High Priority Leads
The High Priority Leads section displays leads that have been marked with High priority. It shows:
- Total number of high-priority leads.
- A message when there are no high-priority leads requiring attention.
Example: 0 – None right now.
This section helps users quickly identify important leads that may require immediate attention.
Status Breakdown
The Status Breakdown section displays the number of leads according to their current status:
- New – Newly created leads that have not yet progressed to another status.
- Contacted – Leads that have been contacted by the assigned user.
- Qualified – Leads that have been identified as potential opportunities.
- Won – Leads that have successfully resulted in a business conversion.
- Lost – Leads that are no longer being pursued or were not converted.
This section helps users understand the distribution and progression of leads.
Priority Breakdown
The Priority Breakdown section displays leads according to their assigned priority level:
- High – High-priority leads requiring greater attention.
- Medium – Leads with normal or moderate priority.
- Low – Leads with lower priority.
The dashboard displays both the total number and percentage of leads for each priority level.
Example: High – 0 (0%) · Medium – 0 (0%) · Low – 0 (0%)
Assignee Breakdown
The Assignee Breakdown section provides information about pending activities assigned to users. It helps identify activities that require attention from specific users or team members.
If there are no pending activities within the selected period, the dashboard displays:
No pending activities due in this range.
This allows managers to monitor pending work and identify users who may need to take action.
Leads Trend
The Leads Trend section displays the trend of leads created during the selected period. It helps users:
- Monitor lead creation over time.
- Identify increases in lead generation.
- Identify decreases in lead generation.
- Analyze lead-generation trends for the selected date range.
Leads by Source
The Leads by Source section displays the number of leads generated from different sources:
- Website – Leads generated through the company website.
- Referral – Leads received through referrals.
- Cold Call – Leads generated through cold calling activities.
- Social Media – Leads generated through social media channels.
- Advertisement – Leads generated through advertisements or campaigns.
Example: Website – 0 · Referral – 0 · Cold Call – 0 · Social Media – 0 · Advertisement – 0
This section helps users understand which sources are generating leads and evaluate the effectiveness of different lead-generation channels.
Recent Activities
The Recent Activities section displays the latest CRM activities performed within the system, giving users a quick overview of recent actions related to leads and follow-ups.
- Recent activity information.
- View All option to view the complete activity list.
If there are no recent activities, the dashboard displays:
No recent activity.
Activity times are displayed according to the user's local timezone.
Key Benefits
The CRM Dashboard helps users:
- Monitor newly created leads.
- Track pending and completed follow-ups.
- Identify overdue follow-up activities.
- Monitor the current sales pipeline value.
- Identify high-priority leads.
- Analyze leads by status and priority.
- Monitor lead assignment and pending activities.
- Track lead-generation trends.
- Identify the most common lead sources.
- Review recent CRM activities from one centralized dashboard.
Leads
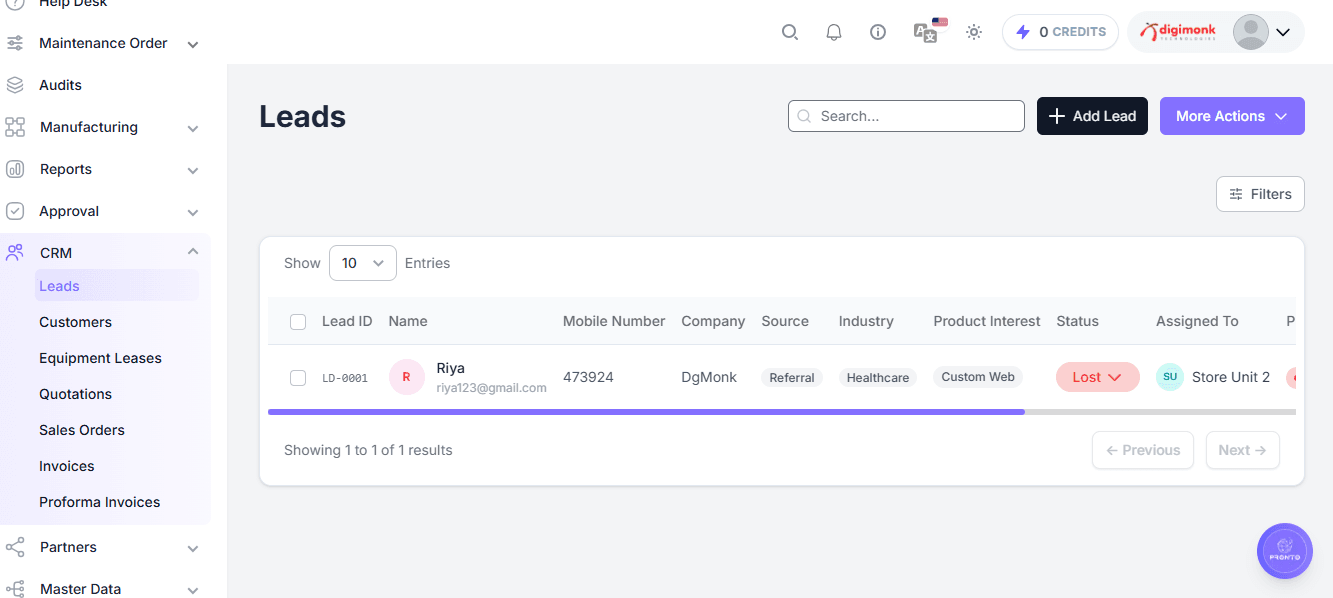
The Leads section in the CRM module allows users to view and manage potential customers or business opportunities. Users can add new leads, filter existing leads, and perform additional actions through the More Actions menu.
Navigation: Dashboard → CRM → Leads
The Leads page provides:
- More Actions – Provides additional options for managing lead records.
- Add Lead – Allows users to create a new lead.
- Filters – Allows users to filter and find specific lead records.
Add Lead
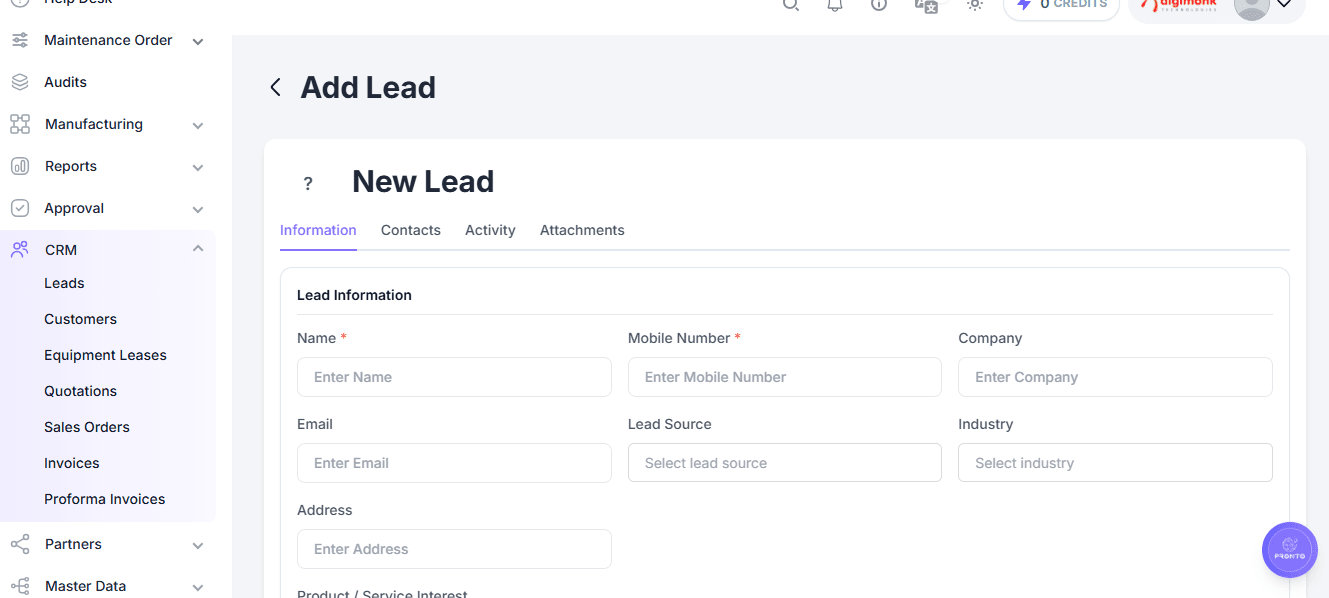
To create a new lead:
- Navigate to CRM → Leads.
- Click the Add Lead button at the top-right corner.
- The lead creation form will open.
- Enter the required lead information.
- After entering all required details, save the lead.
- Once successfully saved, the new lead will be added to the Leads list.
Filters
The Filters option allows users to narrow down the lead list and quickly find relevant lead records.
- Open the CRM → Leads page.
- Click Filters.
- Select the required filtering criteria.
- Apply the filter.
- The system displays the leads matching the selected conditions.
Filters are useful when the system contains a large number of lead records.
More Actions
The More Actions button provides additional operations for managing lead records. Users can use this option to perform available administrative or bulk operations on selected leads.
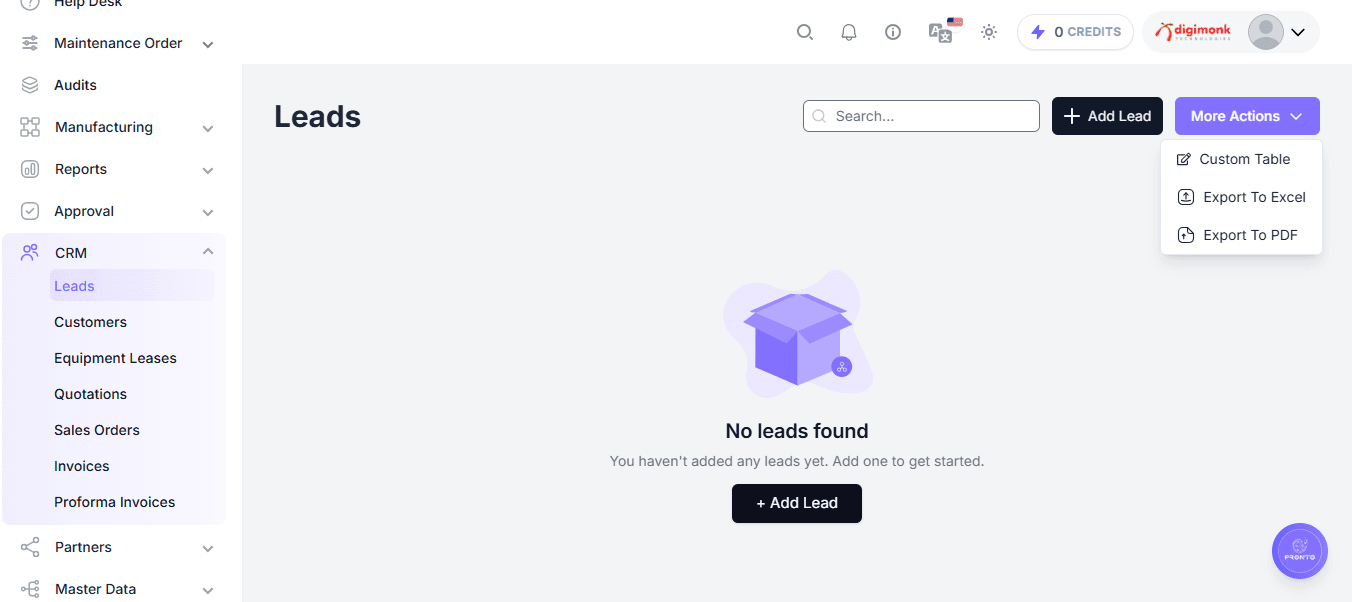
Empty Lead List
If no leads have been created in the system, the Leads page displays:
No leads found
Supporting message:
You haven't added any leads yet. Add one to get started.
In this situation, click Add Lead to create the first lead.
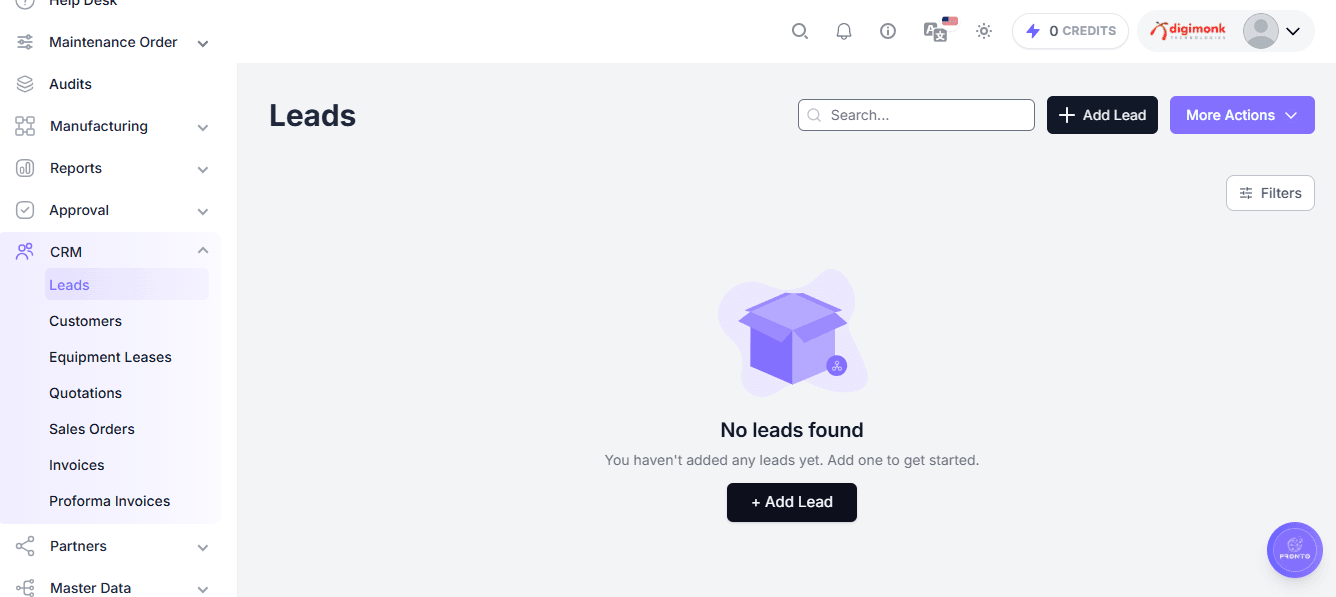
Lead Management
Once leads are created, they can be managed from the Leads page according to the permissions assigned to the logged-in user. Lead management may include:
- Viewing available lead records.
- Adding new leads.
- Filtering lead records.
- Performing available actions from More Actions.
- Managing lead information according to user permissions.
Customers
The Customers section in the CRM module allows users to view and manage customer records in one centralized place. Users can add new customers, search and filter existing customer records, and perform additional actions through the More Actions menu.
Navigation: Dashboard → CRM → Customers
The Customers page provides:
- More Actions – Provides additional options for managing customer records.
- Add Customer – Allows users to create a new customer.
- Filters – Allows users to filter and find specific customer records.
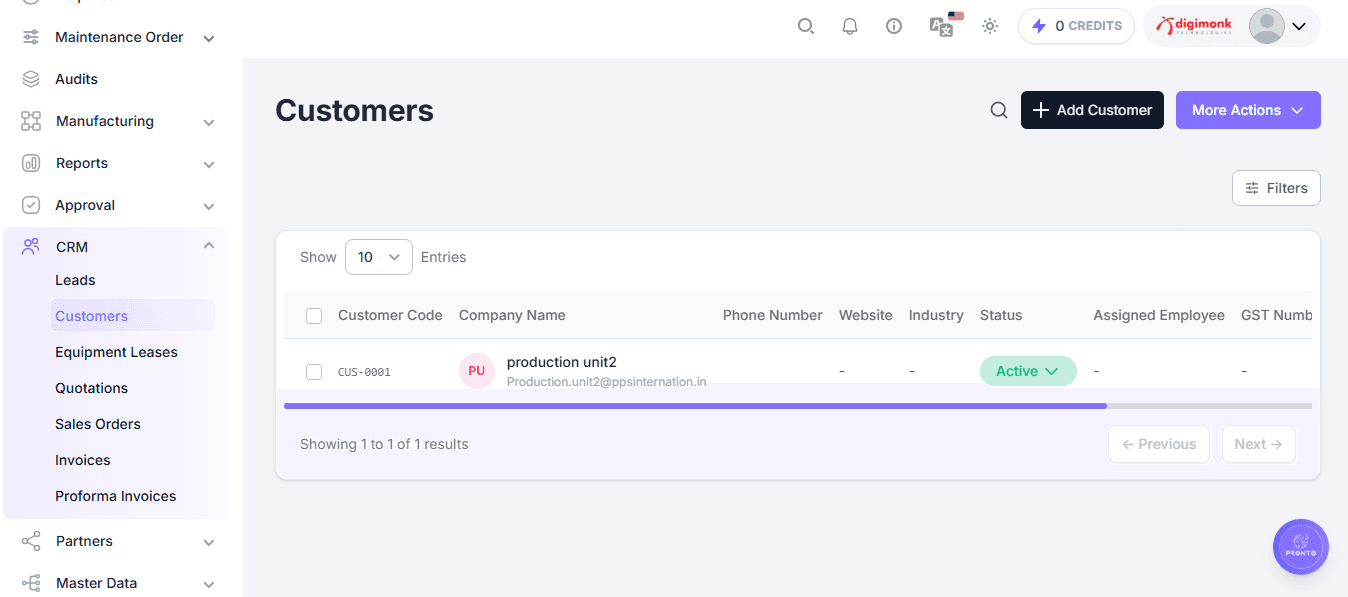
Add Customer
To create a new customer:
- Navigate to CRM → Customers.
- Click the Add Customer button at the top-right corner.
- The customer creation form will open.
- Enter the required customer information.
- After entering all mandatory details, save the customer record.
- Once successfully saved, the new customer will be added to the Customers list.
The + Add Customer option can also be used to start the customer creation process when no customer records are available.
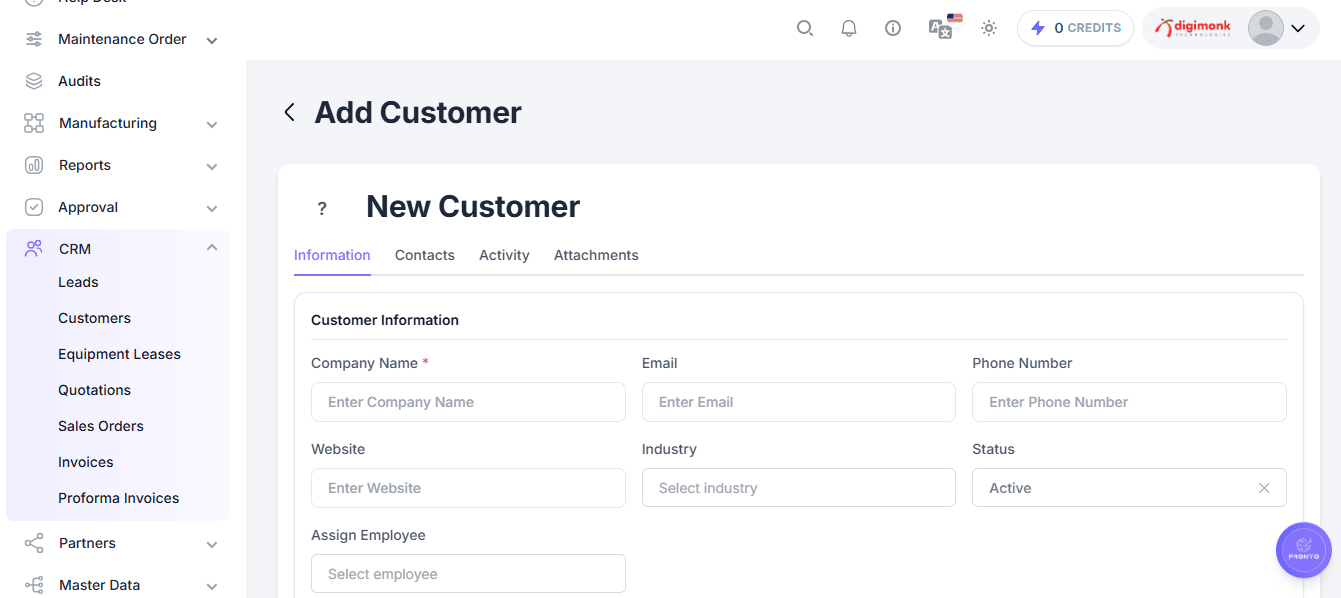
Filters
The Filters option allows users to narrow down the customer list and quickly find relevant customer records.
- Open the CRM → Customers page.
- Click Filters.
- Select the required filtering criteria.
- Apply the selected filters.
- The system will display the customer records matching the selected conditions.
Filters are useful when a large number of customer records are available.
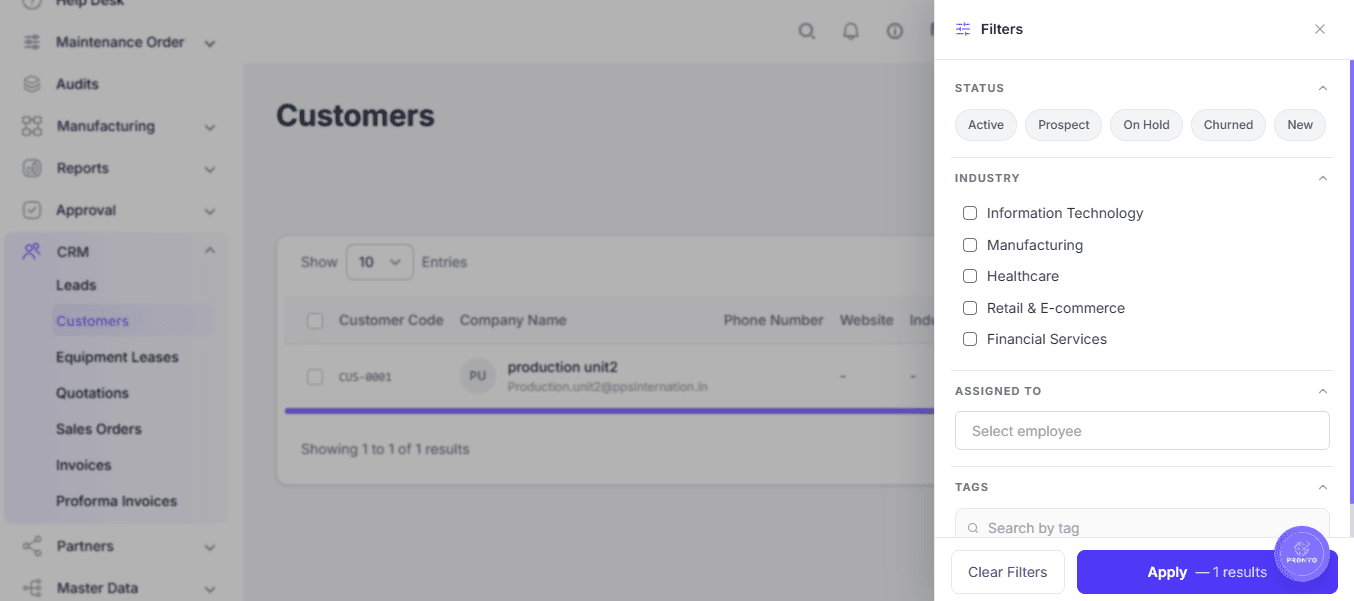
More Actions
The More Actions button provides additional operations for managing customer records. Users can use this option to perform available administrative or bulk operations on customer records.
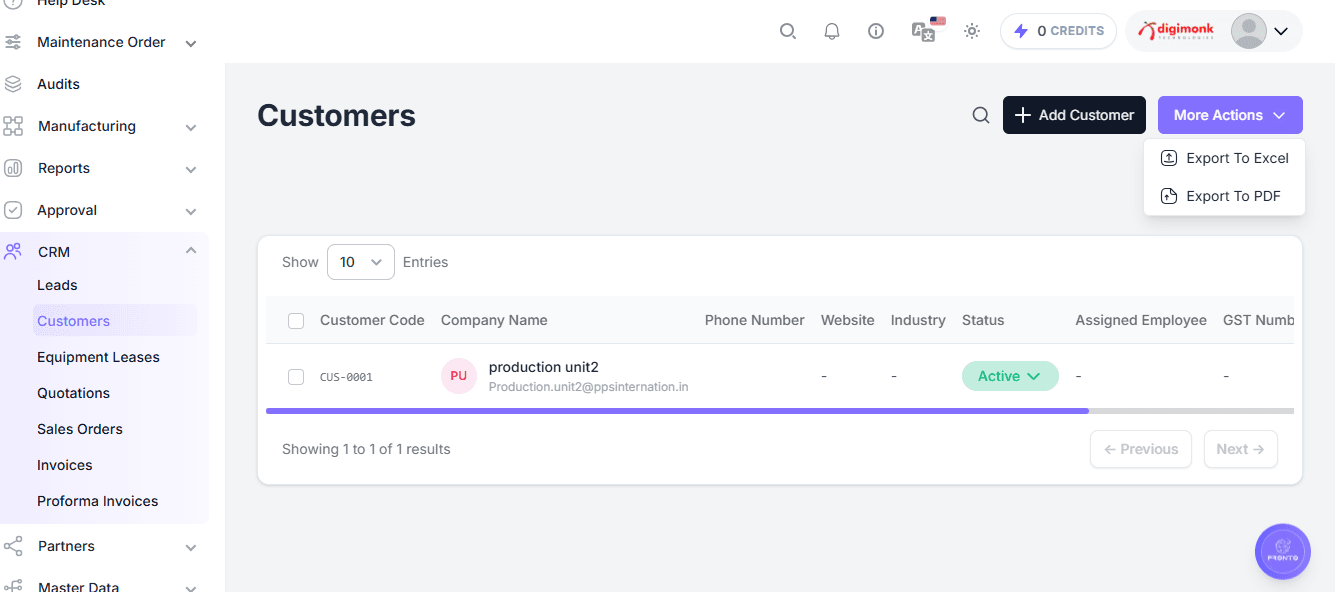
Empty Customer List
If no customers have been created in the system, the Customers page displays:
No customers found
Supporting message:
You haven't added any customers yet. Add one to get started.
In this situation, click Add Customer or + Add Customer to create the first customer record.
Customer Management
Once customers are created, they can be managed from the Customers page according to the permissions assigned to the logged-in user. Customer management may include:
- Viewing available customer records.
- Adding new customers.
- Filtering customer records.
- Performing available actions from More Actions.
- Managing customer information according to user permissions.
Customer Relationships
Customer records can be used across different CRM and sales processes. A customer can be associated with:
- Quotations – A customer can be selected when creating a quotation.
- Sales Orders – A customer can be associated with a Sales Order.
- Invoices – The customer can be used for billing.
This allows customer information to be reused across the sales process.
Equipment Leases
The Equipment Leases section in the CRM module allows users to manage and maintain equipment lease records. Users can add new lease records and view existing leases from a centralized list.
Navigation: CRM → Equipment Leases
The Equipment Leases page contains: page title, Add Lease button, company logo, profile logo, search, notifications, help access, light/dark theme switch, and credits display.
Add Lease
The Add Lease button allows users to create a new equipment lease record, used to register equipment that is being leased and maintain the corresponding lease information.
Workflow:
Equipment Leases → Add Lease → Enter Lease Details → Save → Lease Record Created → Appears in Equipment Leases List
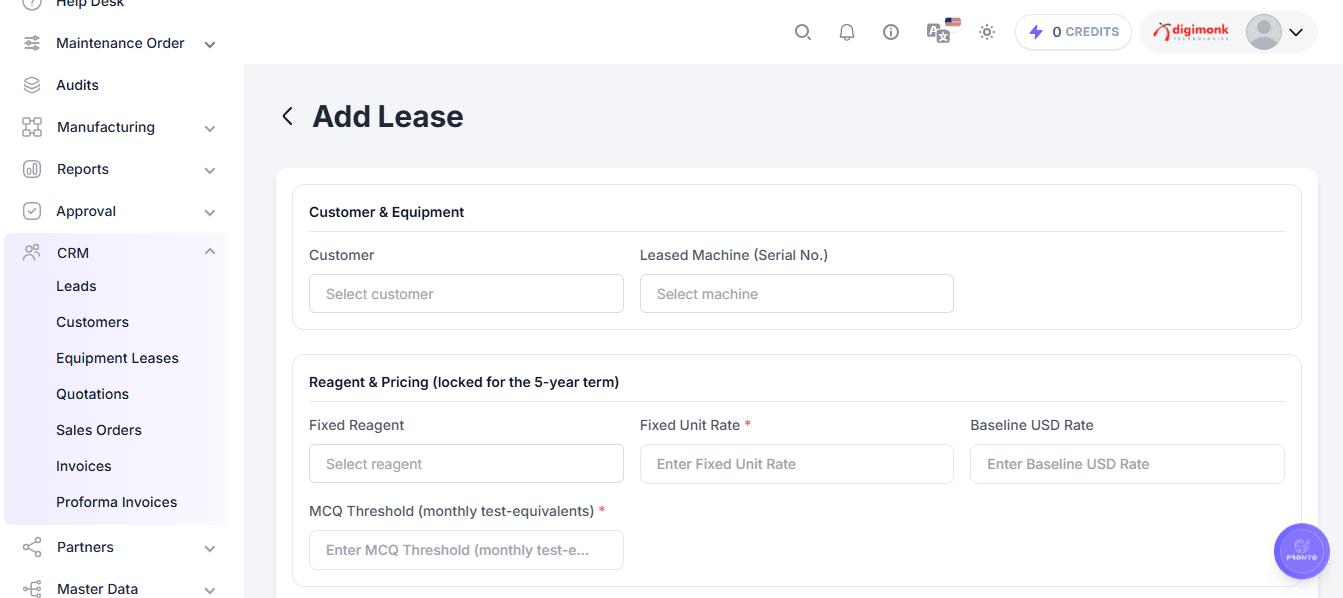
Empty Lease List
If no equipment lease records have been created, the Equipment Leases page displays an empty state instead of a lease table:
No leases found
Supporting message:
You haven't added any equipment leases yet. Add one to get started.
The + Add Lease action provides a direct way to create the first lease record.
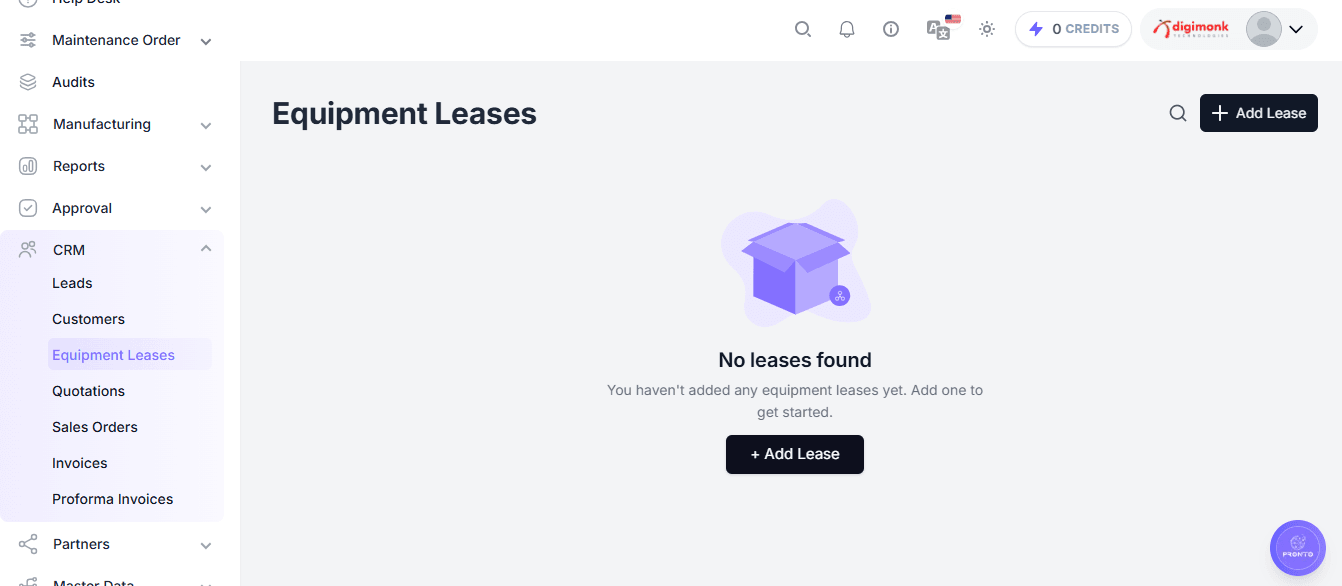
Functional Requirements & User Workflow
The Equipment Leases page provides: View Leases, Add Lease, Empty State, Search, Notifications, and Theme Switch.
A typical workflow is:
- Open the CRM module.
- Select Equipment Leases.
- Click Add Lease.
- Enter the required lease information.
- Save the lease.
- The newly created lease appears in the Equipment Leases list.
- Users can subsequently manage the lease record.
Quotations
The Quotations section in the CRM module allows users to create, manage, track, and monitor customer quotations throughout the quotation lifecycle. It provides a centralized view of quotations along with their current status.
Navigation: CRM → Quotations
The Quotations page provides:
- Search – Search for existing quotation records.
- New Quotation – Create a new quotation.
- Status Filters – Filter quotations according to their current status.
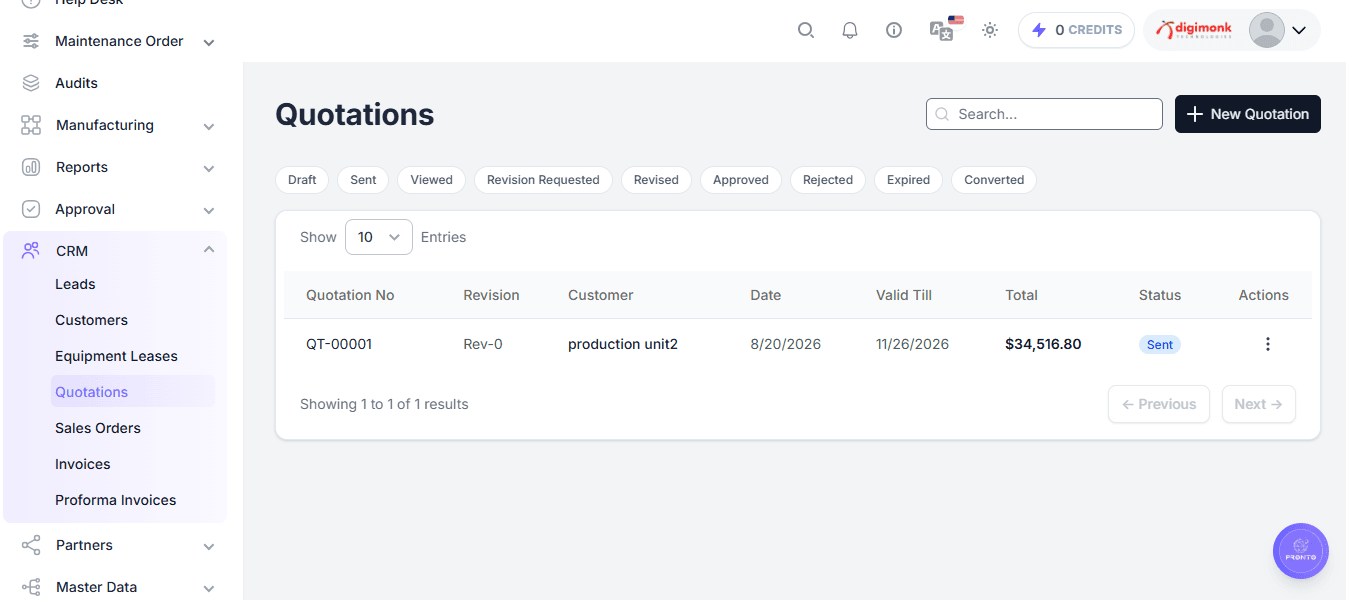
Quotation Statuses
- Draft – Quotation has been created but has not yet been sent to the customer.
- Sent – Quotation has been sent to the customer for review.
- Viewed – Customer has opened or viewed the quotation.
- Revision Requested – Customer has requested changes to the quotation.
- Revised – Quotation has been modified based on the requested changes.
- Approved – Customer has approved the quotation.
- Rejected – Customer has rejected the quotation.
- Expired – Quotation has passed its validity/expiry period without being approved.
- Converted – Quotation has been converted into the next business document/process, such as a Sales Order.
Quotation Lifecycle
New Quotation → Draft → Sent → Viewed → Approved → Converted
Alternative paths:
Sent / Viewed → Revision Requested → Revised → Sent
Sent / Viewed → Rejected
Sent / Viewed → Expired
Search Functionality
The Search... field allows users to locate specific quotation records. This is useful when a large number of quotations are available.
Users may search using: quotation number, customer name, or other supported quotation information.
New Quotation
The New Quotation button allows users to create a new quotation. The empty state also provides a + New Quotation action when no quotation records are available.
Basic workflow:
Quotations → New Quotation → Enter Quotation Details → Save → Quotation Created → Quotation Appears in Quotation List
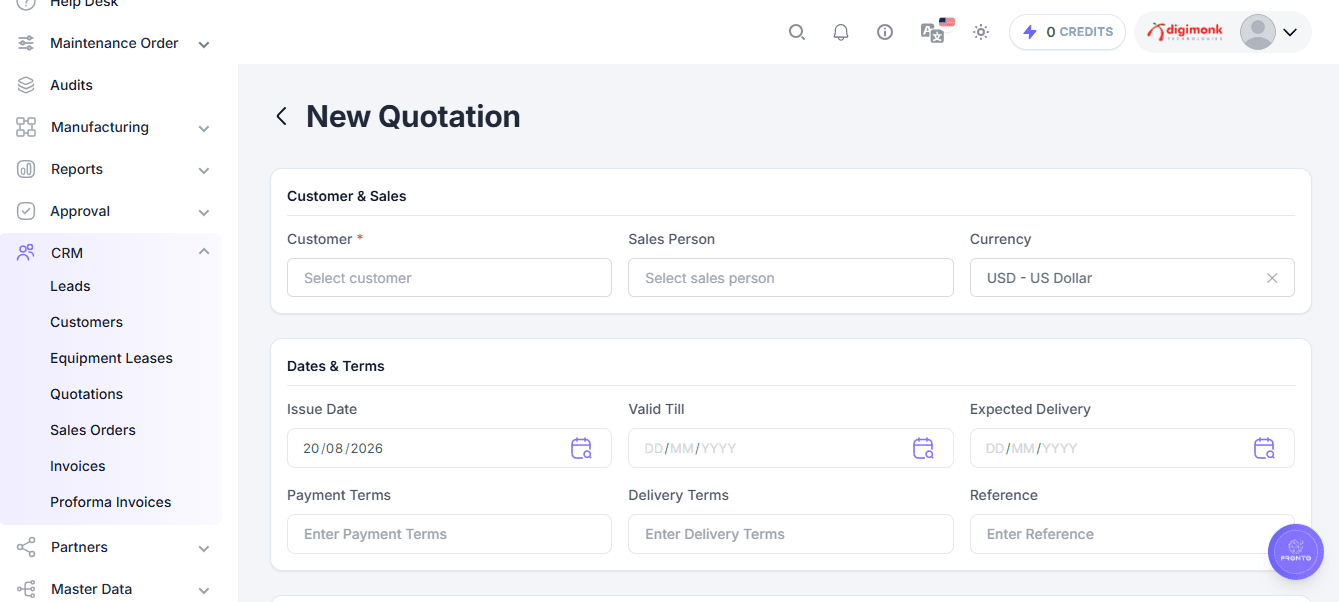
Empty Quotation List
If no quotation records have been created, the Quotations page displays:
No quotations found
Supporting message:
You haven't created any quotations yet. Create one to get started.
The user can click + New Quotation to create the first quotation.
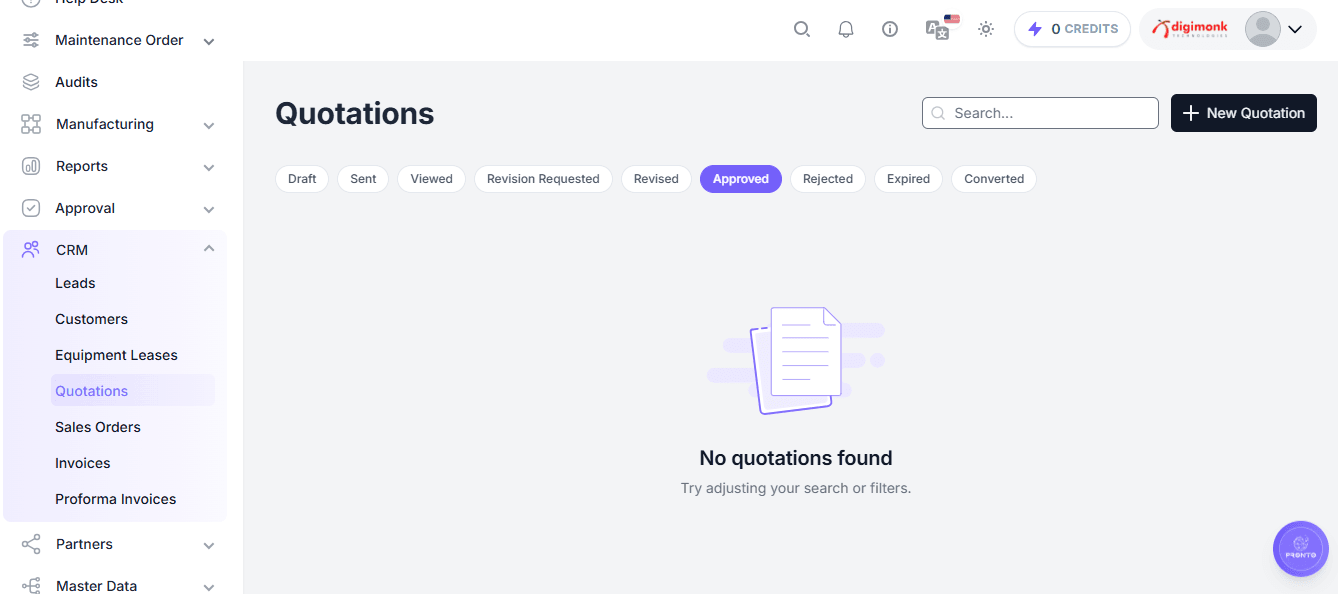
Sales Orders
The Sales Orders section in the CRM module allows users to create, manage, and track customer sales orders. Sales orders can be created directly or generated by converting an Approved Quotation.
Navigation: CRM → Sales Orders
The Sales Orders page provides:
- Search – Search for existing sales orders.
- New Sales Order – Create a new sales order.
- Status Filters – Filter orders according to their current status.
- Order Type Filters – Filter orders based on how they were created.
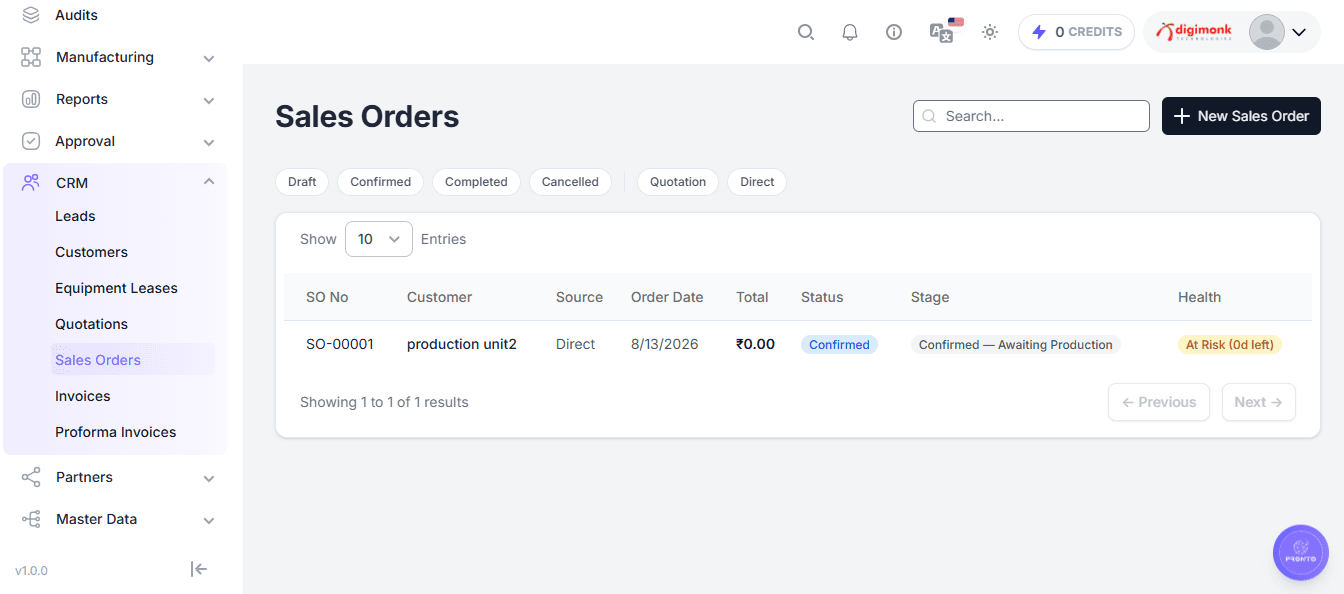
Sales Order Statuses & Types
Statuses:
- Draft – Created but not yet confirmed.
- Confirmed – Confirmed and considered an active order.
- Completed – Successfully fulfilled or completed.
- Cancelled – Cancelled and no longer active.
Order-source filters:
- Quotation – Originated from an Approved Quotation.
- Direct – Created directly using the New Sales Order option.
Sales Order Lifecycle
New Sales Order → Draft → Confirmed → Completed
A draft or confirmed order may also be cancelled:
Draft / Confirmed → Cancelled
A sales order can also originate from a quotation:
Quotation → Approved → Convert to Sales Order → Sales Order → Confirmed → Completed
Create a Sales Order
To create a direct sales order:
- Open CRM → Sales Orders.
- Click New Sales Order.
- Enter the required customer and order information.
- Save the order.
- The order starts in Draft status.
- Confirm the order.
- The order becomes Confirmed.
- Complete the order.
- The order becomes Completed.
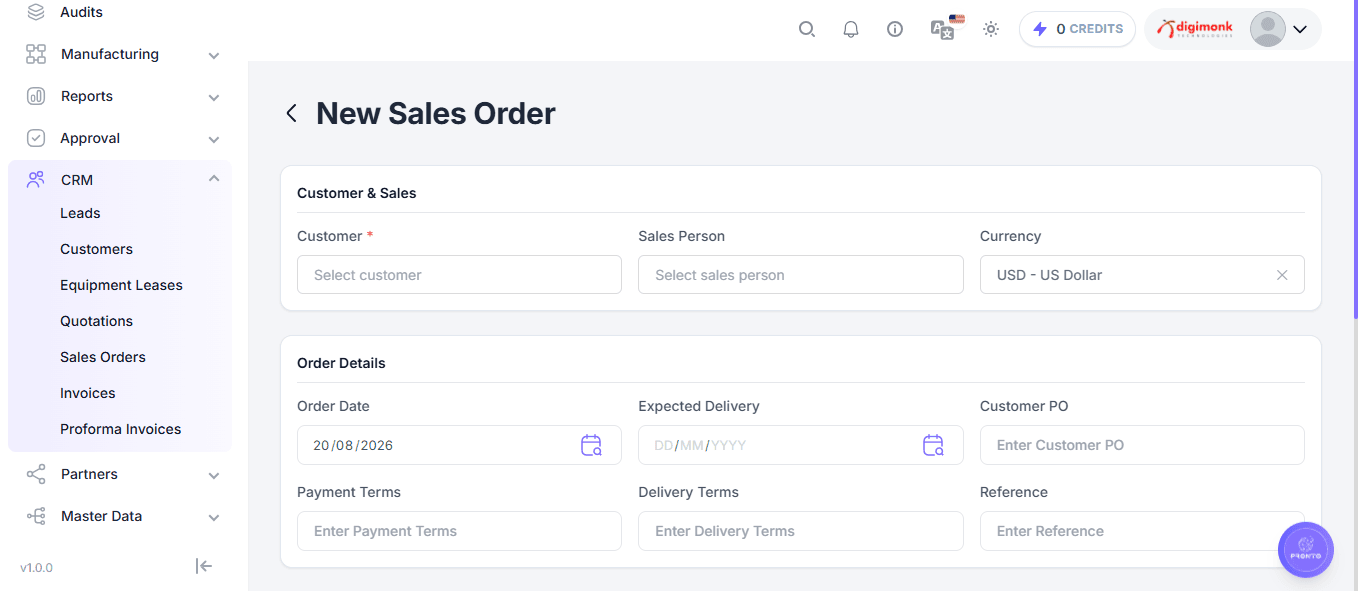
Convert Approved Quotation
An approved quotation can be converted into a Sales Order:
Quotation → Viewed → Approved → Convert to Sales Order → Sales Order
This avoids manually recreating the same customer and order information.
Empty Sales Order List
If no sales orders are available, the system displays:
No Sales Orders found
Supporting message:
You haven't created any Sales Orders yet. Create one, or convert an Approved Quotation.
Option 1 — Create Directly: Click + New Sales Order
Option 2 — Convert an Approved Quotation: Take an existing Approved Quotation and convert it into a Sales Order.
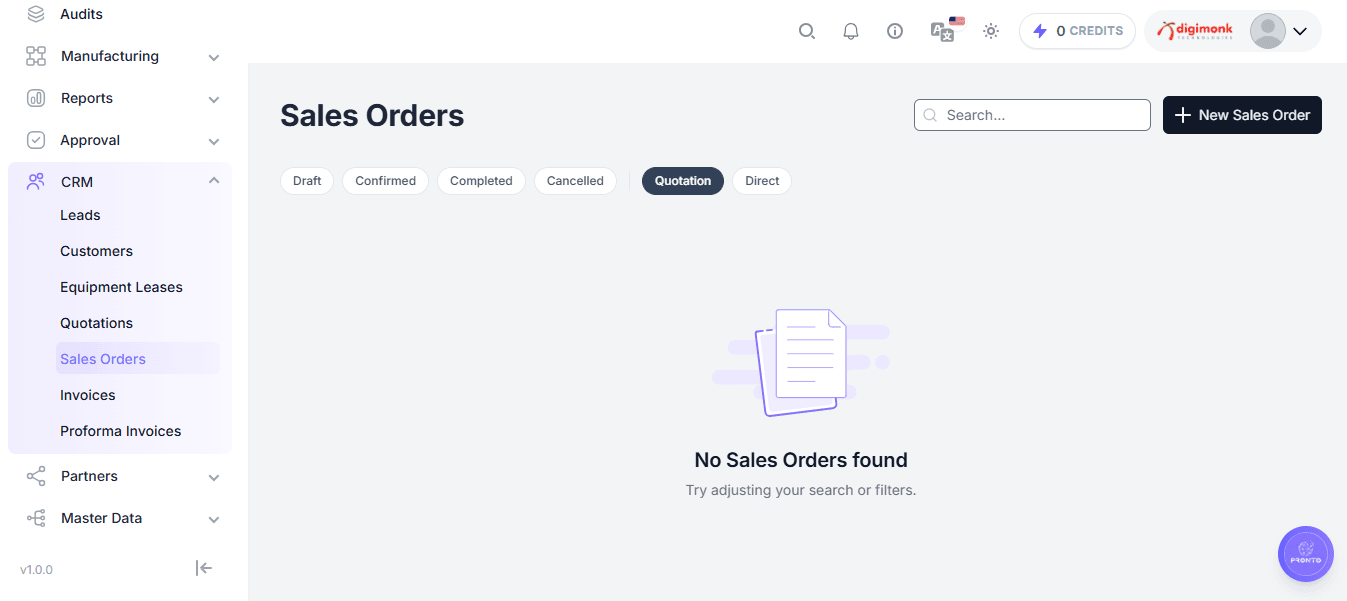
Functional Requirements
The Sales Orders module provides:
- Create Sales Order, Search, Draft Management
- Confirm Order, Complete Order, Cancel Order
- Quotation Conversion, Direct Order
- Status Filtering, Source Filtering
Invoices
The Invoices section in the CRM module allows users to create, manage, and track customer invoices throughout the billing lifecycle. Users can create new invoices, search existing invoices, monitor invoice status, and track customer payments.
Navigation: CRM → Invoices
The Invoices page provides:
- Search – Search for existing invoice records.
- New Invoice – Create a new invoice.
- Status Filters – Filter invoices according to their current status.
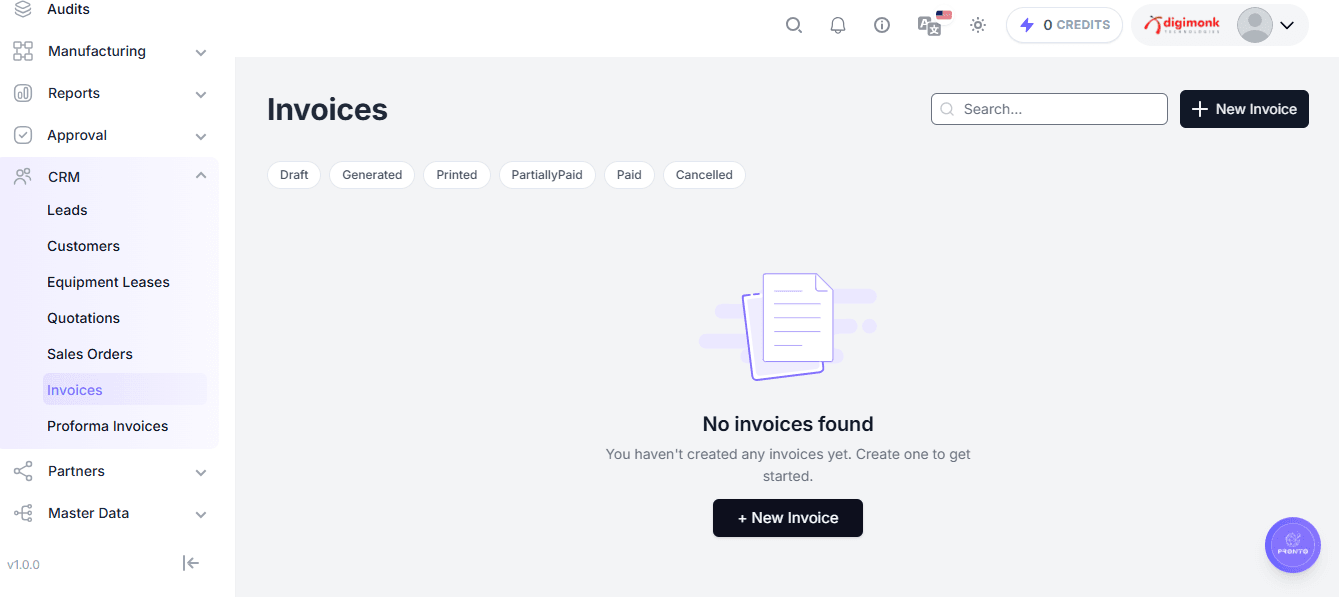
Invoice Statuses & Lifecycle
- Draft – Created but still being prepared.
- Generated – Generated and ready for further billing or payment processing.
- Printed – Generated and marked as printed.
- Partially Paid – Customer has paid only a portion of the invoice amount.
- Paid – The complete invoice amount has been received.
- Cancelled – Cancelled and no longer active.
Lifecycle: New Invoice → Draft → Generated → Printed → Paid
Also: Printed / Generated → Partially Paid → Paid, and Draft / Generated → Cancelled
Search Functionality
The Search... field allows users to quickly locate an invoice. This is particularly useful when a large number of invoices exist in the system.
Users may search using: invoice number, customer name, invoice information, or other supported invoice fields.
New Invoice
The New Invoice button allows users to create a new invoice. When no invoices are available, the empty-state page also provides + New Invoice, allowing the user to create the first invoice.
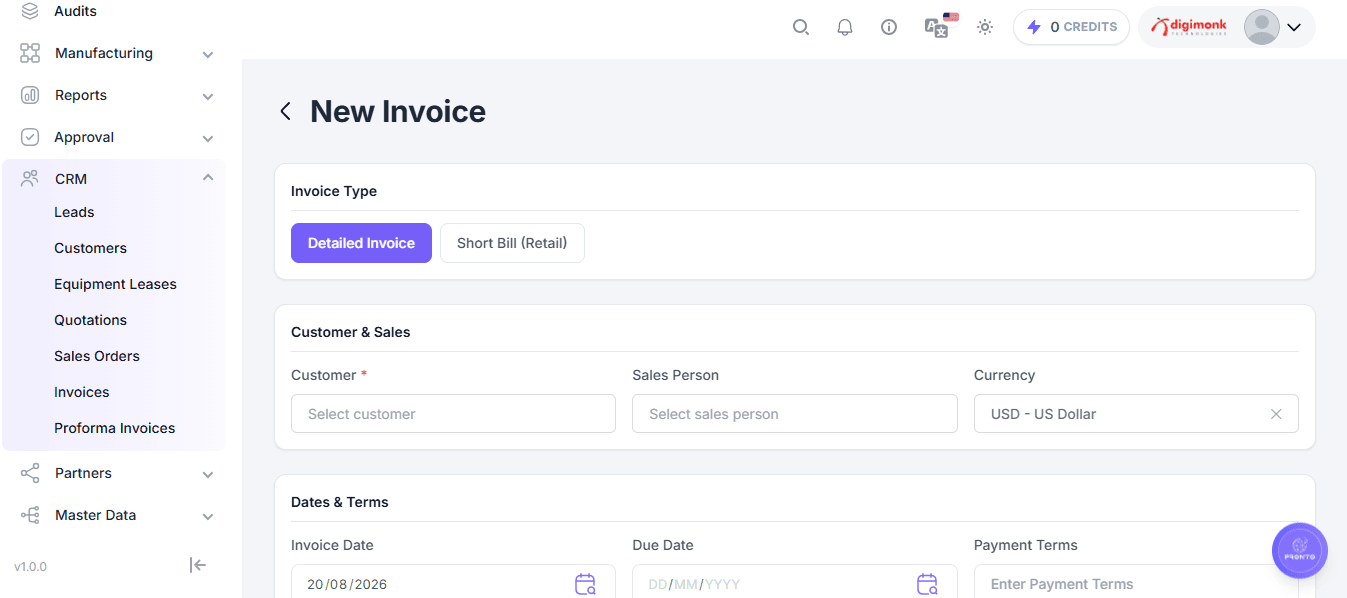
Create an Invoice
To create a new invoice:
- Open CRM → Invoices.
- Click New Invoice.
- Enter the required invoice details.
- Save the invoice.
- The invoice starts in Draft status.
- Generate the invoice.
- The invoice becomes Generated.
- Print the invoice if required.
- Track the customer's payment.
Payment Tracking
The Invoices module allows users to track customer payment status:
- Unpaid / Generated – Invoice has been generated, but payment has not been completed.
- Partially Paid – Some amount has been received, but the complete invoice amount is still outstanding.
- Paid – The complete invoice amount has been received.
Example: Invoice amount ₹100,000. Customer pays ₹40,000 → Partially Paid. When payment reaches ₹100,000 → Paid.
Empty Invoice List
If no invoices have been created in the system, the Invoices page displays:
No invoices found
Supporting message:
You haven't created any invoices yet. Create one to get started.
The user can click + New Invoice to create the first invoice.
User Workflow & Relationship With Sales Orders
A typical invoice workflow: create → Draft → Generated → print if required → customer pays → Partially Paid or Paid → optionally Cancelled, subject to business rules.
Invoices are closely related to the Sales Orders module:
Lead → Customer → Quotation → Approved → Sales Order → Invoice → Payment → Paid
This connects the CRM sales process with the billing and payment process.
Proforma Invoices
The Proforma Invoices section allows users to create and manage preliminary billing documents before generating a final invoice.
Navigation: CRM → Proforma Invoices
The page provides:
- Search – Search existing proforma invoices.
- New Proforma Invoice – Create a new proforma invoice.
- Status Filters – Filter records by status.
Proforma Invoice Statuses
| Status | Description |
|---|---|
| Draft | Proforma invoice is being prepared. |
| Generated | Proforma invoice has been generated. |
| Converted | Proforma invoice has been converted into a final invoice. |
| Cancelled | Proforma invoice has been cancelled. |
Lifecycle: New Proforma Invoice → Draft → Generated → Converted → Final Invoice
Also: Draft / Generated → Cancelled
New Proforma Invoice
To create a proforma invoice:
- Open CRM → Proforma Invoices.
- Click New Proforma Invoice.
- Enter the required information.
- Save the record.
- The proforma invoice is created in Draft status.
- Generate it when ready.
An Approved Quotation can also be used to create a Proforma Invoice:
Quotation → Approved → Create Proforma Invoice → Proforma Invoice
Empty State
If no proforma invoices exist, the page displays:
No proforma invoices found
You haven't created any proforma invoices yet. Create one to get started.
Click + New Proforma Invoice to create the first record.
Relationship With Invoices
The typical process is:
Quotation → Approved → Proforma Invoice → Converted → Final Invoice
A Proforma Invoice is a preliminary billing document and is not the final invoice.
Partners
Watch Video
Partners Overview
The Partners module is used to manage and maintain information about organizations and individuals who interact with the business. Partners can include customers, suppliers, vendors, business contacts, and other external parties.
The Partners page provides:
- Add Partner – Create a new partner record.
- Filters – Filter and locate partner records.
- Search – Search for an existing partner when records are available.
- Partner List – Displays all created partners.
What is a Partner?
A Partner represents an individual or organization that has a business relationship with the company. Examples include:
- Customers
- Suppliers
- Vendors
- Business organizations
- Service providers
- Other business contacts
A single partner record can be reused across different modules where that partner is involved.
Add Partner
To create a new partner:
- Navigate to Partners.
- Click the Add Partner button at the top-right corner.
- The partner creation form will open.
- Enter the required details:
- Name – Name of the person or organization.
- Partner Type – Identifies the type of partner.
- Email – Contact email address.
- Phone – Contact number.
- Address – Business/residential address.
- Company Details – Organization-related information.
- Notes (Optional) – Additional information.
- Click Save to create the partner.
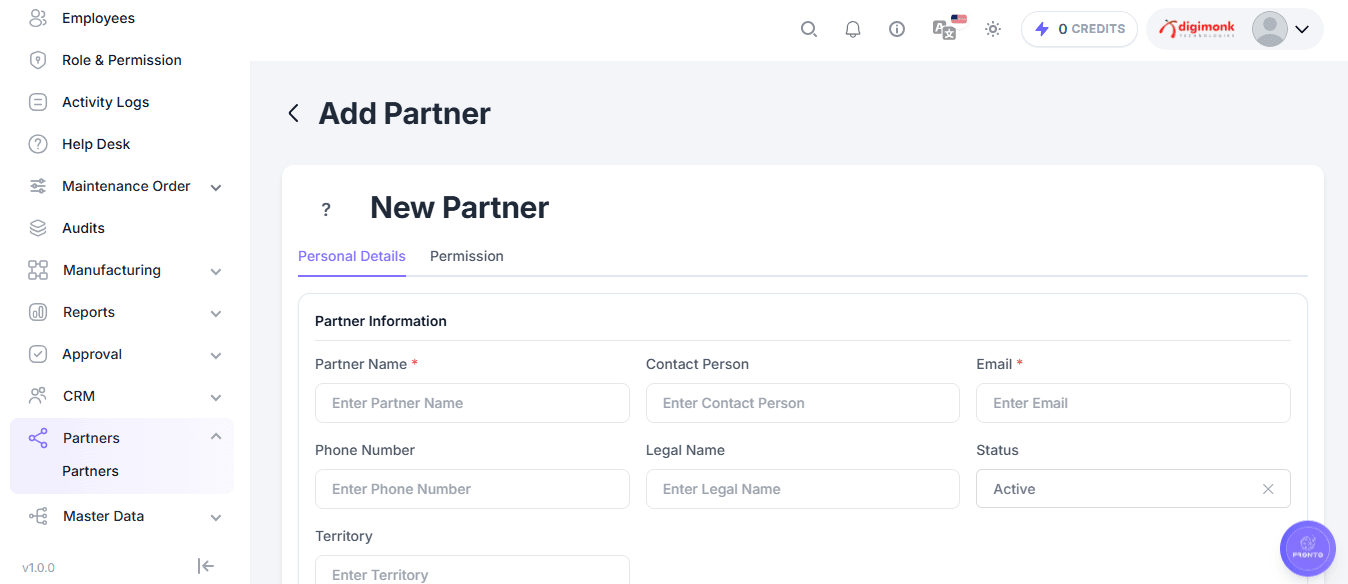
Filters
The Filters option allows users to narrow down the partner list and quickly find relevant records.
To use filters:
- Open the Partners page.
- Click Filters.
- Select the required filtering criteria.
- Apply the filter.
- The system displays the partners matching the selected conditions.
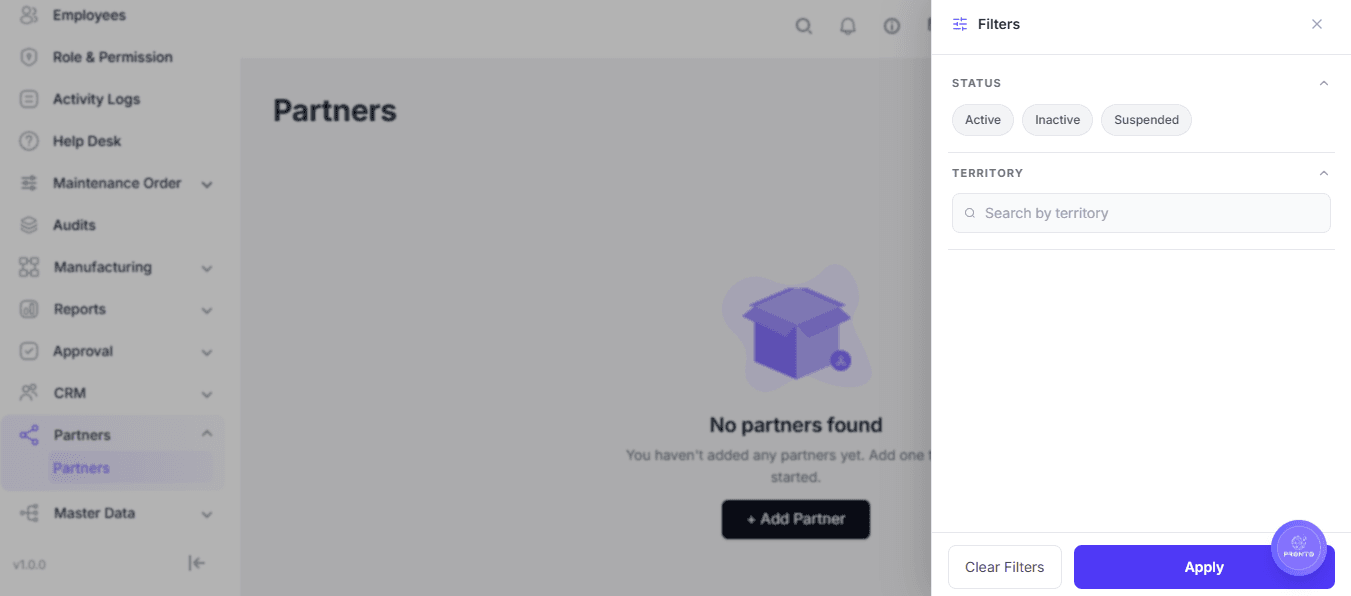
Partner Management
Once partners are created, they can be managed from the Partners page according to the permissions assigned to the logged-in user.
Partner management may include:
- Viewing available partner records.
- Adding new partners.
- Filtering partner records.
- Updating partner information.
- Searching for partners.
- Using partner information in CRM and sales processes.
Empty Partner List
If no partners have been created in the system, the Partners page displays:
No partners found
Supporting message:
You haven't added any partners yet. Add one to get started.
The user can click Add Partner to create the first partner record.
Relationship With Other Modules
Partners can be used across multiple areas of the application:
- CRM – A partner can be associated with a Lead → Customer/Partner relationship.
- Quotations – A partner/customer can be selected when creating a quotation.
- Sales Orders – A customer/partner can be associated with a Sales Order.
- Invoices – The partner can be used as the customer for billing.
- Purchases / Goods Receipt – A supplier/vendor partner can be associated with incoming goods.
Overall relationship:
Partner → Lead / Customer → Quotation → Sales Order → Invoice
For suppliers:
Partner → Supplier → Goods Receipt → Inventory
Partner vs Customer
A Partner is a broader concept than a Customer.
- Partner: General business contact/entity. Can represent customers, suppliers, vendors, etc., and can be used across multiple modules.
- Customer: Partner specifically acting as a customer. Mainly represents the buyer/customer and is primarily used in customer and sales processes.
The Partners module acts as a centralized master record for business entities used throughout the application.
Role & Permission
Watch Video
Purpose:
- Define and manage user roles and permissions.
Usage: - Create, edit, or delete user roles.
- Assign specific access permissions such as view, edit, delete, and module access.
- Helps maintain proper access control and data security.
- Only Admin users can modify or create roles and permissions.
Role & Permission
- Role Name: Displays the name of each role (e.g., Admin, Employee).
- Description: Summary of permissions assigned to the role.
- Employee: Number of employees assigned to that role.
- Actions: Allows editing or deleting a role.
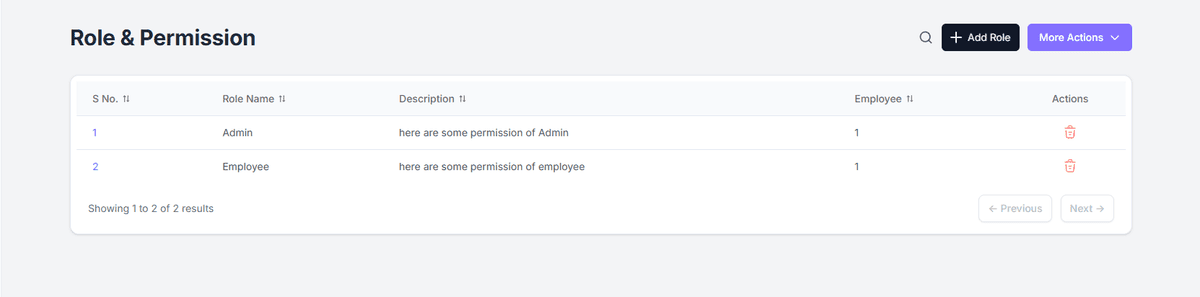
Main Functions
Activity Logs
Watch Video
Activity Logs
- Action: Type of activity (Create, Update, Assign).
- Entity: Module where the activity occurred (e.g., Employee, Asset).
- Entity ID: Unique identifier of the record (e.g., EMP-0001, AST-001).
- Asset/Emp Name: Related employee or asset name.
- History Log: Describes the action (e.g., “Asset Assigned to Employee”).
- Action By: Shows which user performed the action.
- Date & Time: Displays when the action took place.
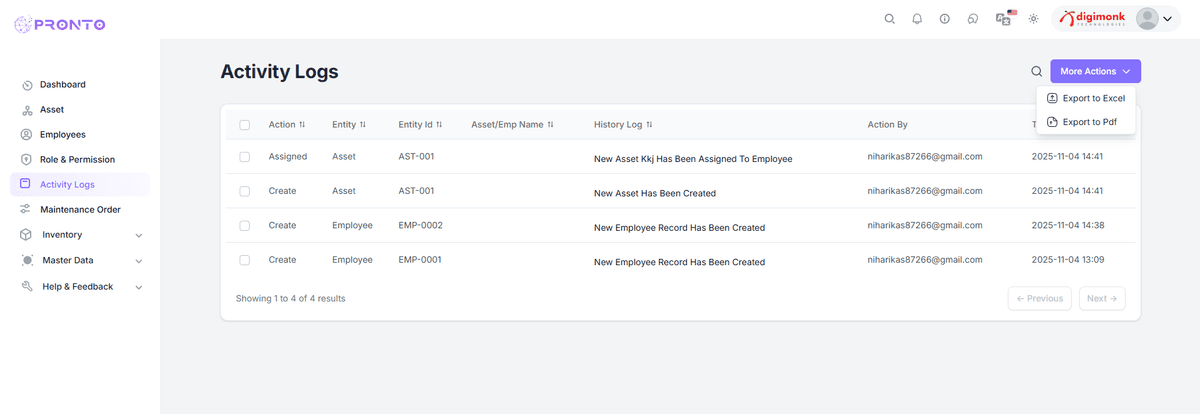
Key Features
-
Audit Tracking:
- View all recent changes such as record creation, updates, or transfers.
-
Detailed Change Log:
- For updated records, view field name, old value, and new value.
-
Export Logs:
- Use More Actions → Export (Excel/PDF) to download the complete activity record.
Maintenance Order
Watch Video
Purpose:
The Maintenance Order helps record preventive and corrective maintenance activities for assets.
It ensures proper tracking, reduces equipment downtime, and keeps maintenance operations organized.
Add Maintenance Order
Purpose:
- Create a new maintenance request or schedule preventive maintenance for assets.
- Helps in tracking and managing maintenance activities efficiently.
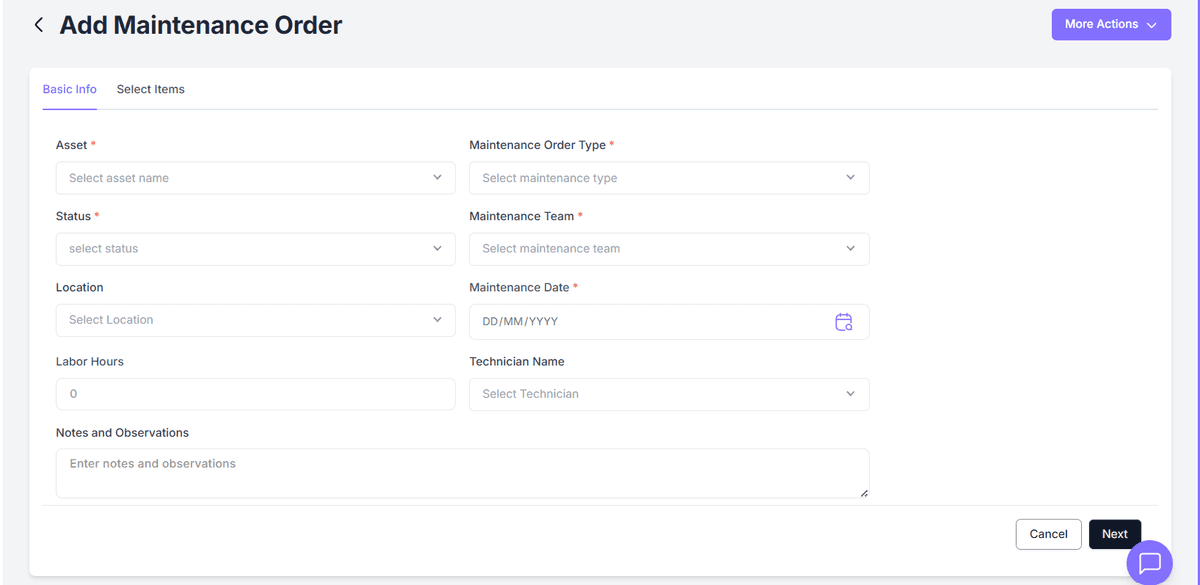
Basic Info
Fill in all required details marked with (*):
- Asset* – Select the asset needing maintenance (e.g., Generator, Laptop, AC Unit).
- Maintenance Order Type* – Choose Preventive, Corrective, or Emergency.
- Status* – Select current status (Pending, In Progress, Completed).
- Maintenance Team* – Select responsible team or department.
- Location – Choose maintenance site.
- Maintenance Date* – Pick maintenance date.
- Parts Replaced – Mention any replaced parts.
- Labor Hours – Enter time spent on maintenance.
- Technician Name – Choose assigned technician.
- Notes & Observations – Add remarks or findings.
Click Next to continue to the Select Items tab.
Select Items Tab
- Add spare parts, consumables, or materials used during maintenance.
- Verify all information before submission.
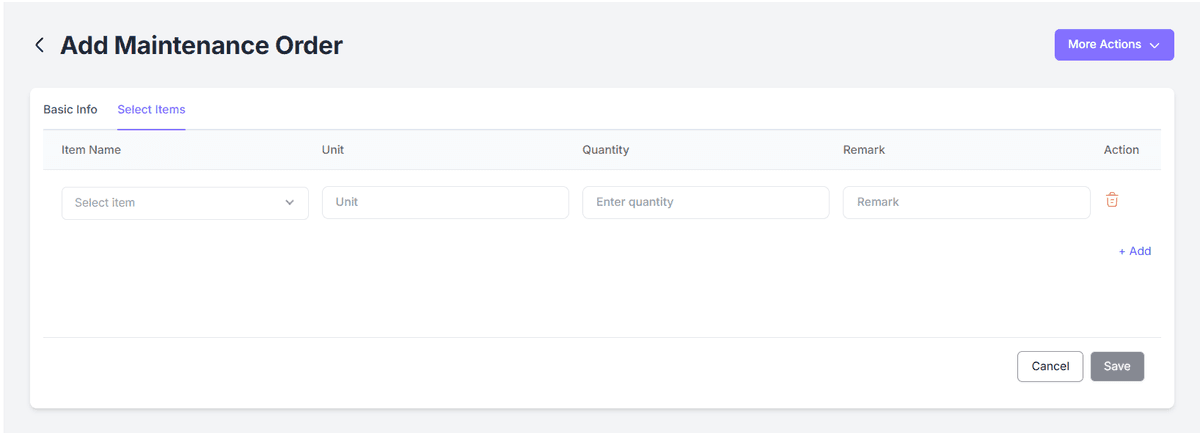
Final Submission
- Click Submit / Save to record the maintenance order.
- Track order status later in the Maintenance List section.
- Review updates and activity logs as needed.
Purpose: Ensures proper tracking, scheduling, and documentation of all maintenance operations.
Inventory
Watch Video
Inventory
- The Inventory Management module tracks all items, materials, and spare parts used in maintenance and operations.
- Keeps inventory updated for smooth maintenance processes.
Accessing the Module
- Navigate to Inventory → Items from the sidebar.
- View, add, or manage existing inventory items.
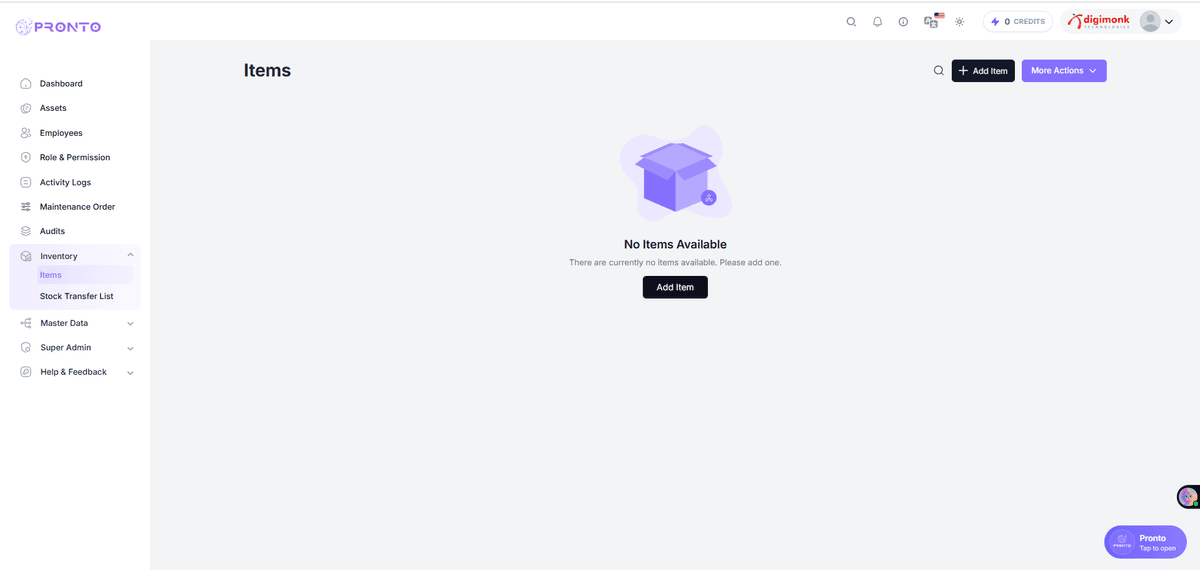
Adding a New Item
Click Add Item, then fill out all required fields.
Basic Information:
- Item Name* – e.g., Motor Oil, Gear, Screw
- Brand* – Enter or select brand name
- Category* – e.g., Electrical, Mechanical
- Unit* – e.g., Piece, Liter, Kg
- Price* – Per-unit cost
Stock & Inventory:
- Alert Quantity* – Minimum stock level for restock alert
- Opening* – Initial stock quantity
- Location* – Storage place (e.g., Warehouse A)
Additional Info:
- Description – Include extra details or supplier information.
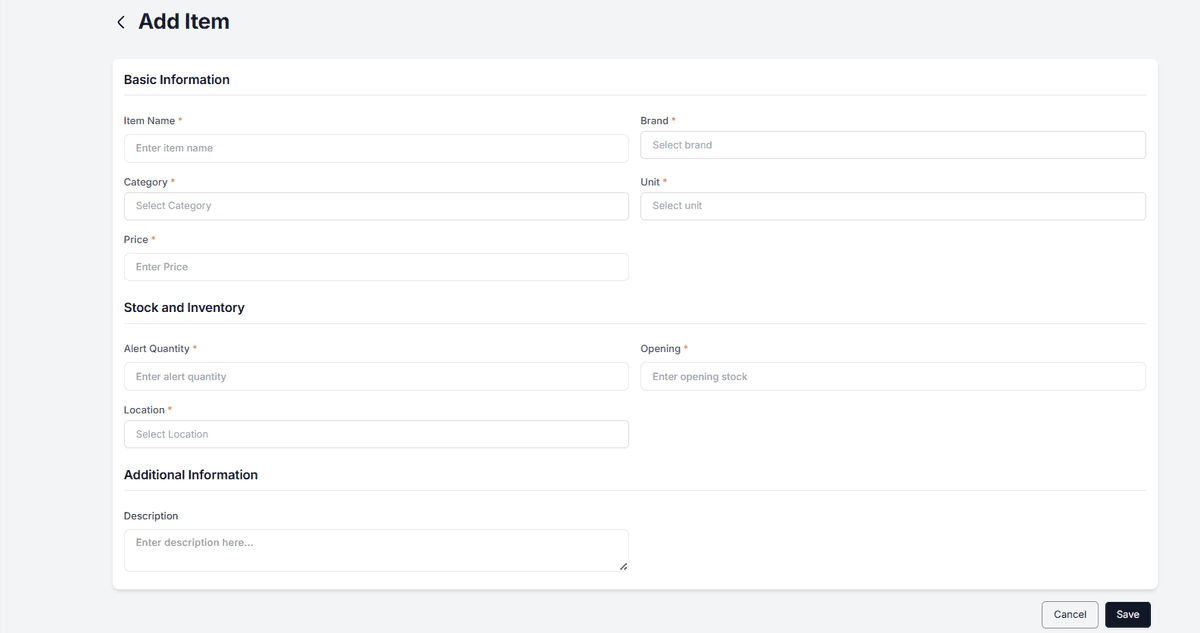
Actions
- Save: Add item to inventory.
- Cancel: Discard changes and return to list.
Tips for Users
- Keep all fields updated for accurate tracking.
- Use clear item names and correct measurement units.
- Set realistic Alert Quantities to prevent stockouts.
Purpose: Maintain a structured and accurate inventory system for effective operations.
Transfer Stock
Purpose
- Move inventory items between departments or locations.
- Ensure accurate records of stock transfers and balances.
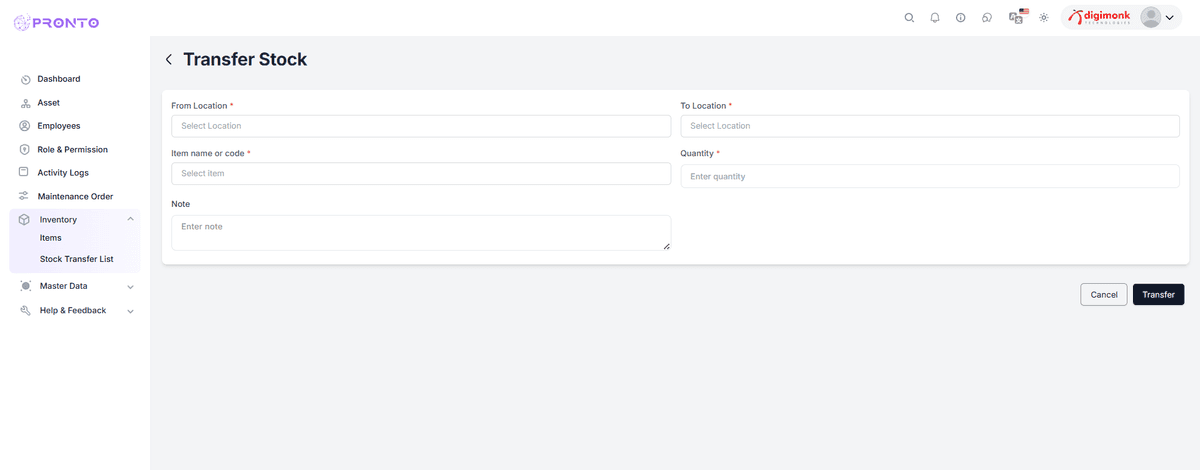
Steps to Transfer Stock
1. Navigate
- Go to Inventory → Stock Transfer List.
2. Initiate Transfer
- Click Add Stock Transfer or + New.
3. Fill Transfer Details
- Transfer From: Source location
- Transfer To: Destination location
- Item Name: Select the item to transfer
- Quantity: Enter quantity
- Remarks: Notes or transfer reason
4. Save & Confirm
- Click Save or Submit to complete transfer.
5. More Actions
- Approve/Reject: Supervisors review requests.
- Delete: Remove incorrect transfers.
- View History: Check past transfer logs.
Purpose: Enables accurate and controlled stock distribution between warehouses or departments.
Master Data
The Master Data section is the foundation of the system, where administrators can configure all essential data required for other modules to function smoothly. Below is a description of each option under Master Data.
Watch Video
Assets Category
- Left Panel: Displays list of asset categories created (e.g., Default Category).
- Right Panel: Shows subcategories, their descriptions, and available actions.
Add Category
- Click + Add Category
- Fill details: Category Name, Description
- Click Save to create
Edit Category
- Click (Edit) beside a category
- Update name or description
- Click Save
Delete Category
- Click Delete icon beside a category
- Confirm deletion
More Actions
- Use More Actions to Activate, Deactivate, or Delete multiple records
Manage Country
The Manage Country section lets you manage country data such as name, code, currency, and status.
Country List View
- Displays Country Name, Currency, Code, Flag, and Status
- Columns can be sorted and searched
Change Status
- Toggle between Active / Inactive
- Active = visible across system
- Inactive = hidden in dropdowns/forms
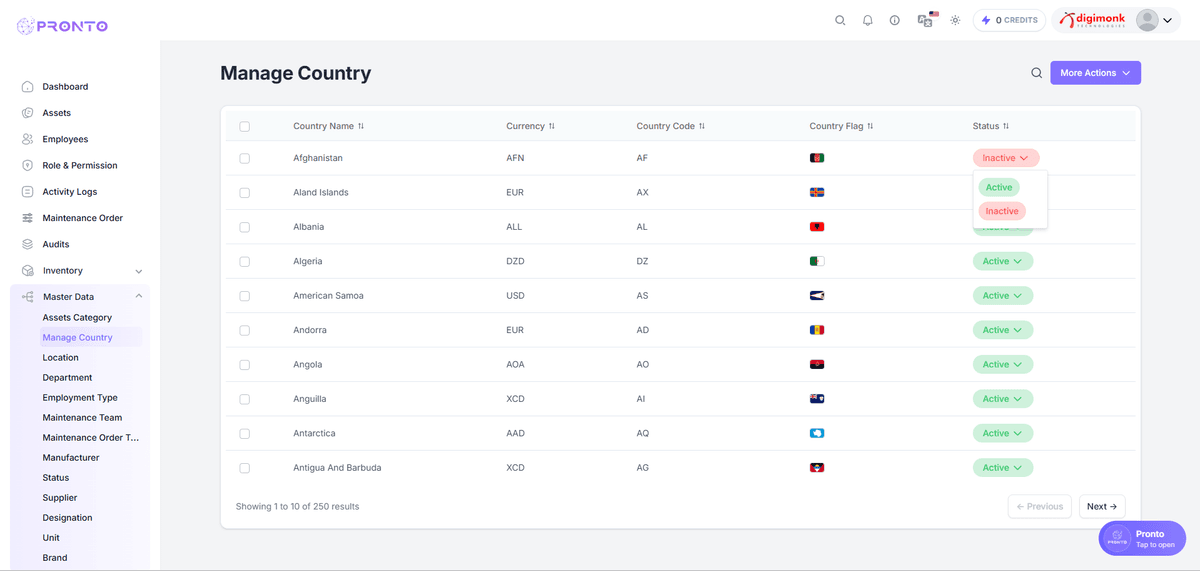
Location
Accessing the Location Module
Open the left sidebar
Go to Master Data → Location
This opens the main Location List, where you can view and manage all locations.
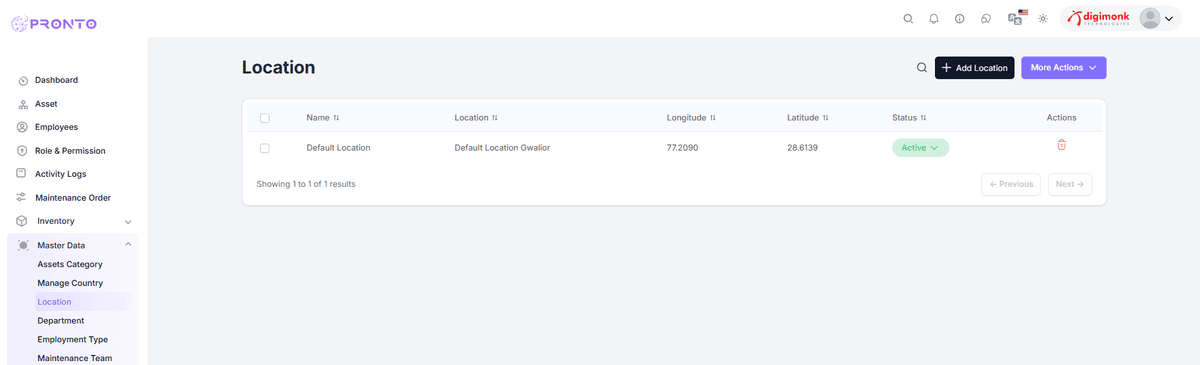
Add New Location
- Click + Add Location
- Fill: Name, Address, Latitude, Longitude, Status
- Click Save
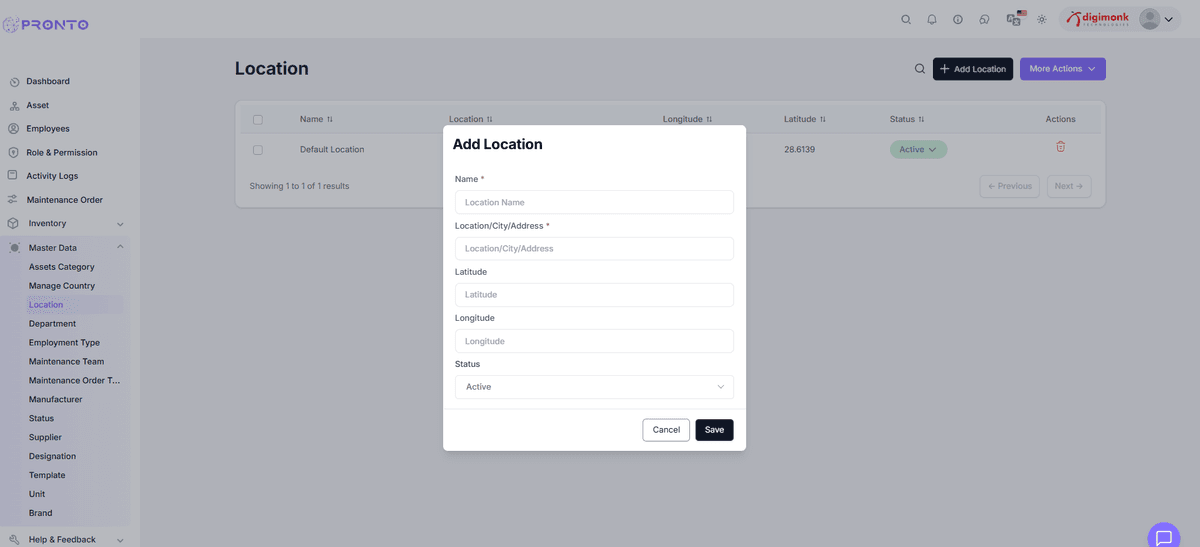
Edit / Delete Location
- Click (Edit) to update
- Click (Delete) to remove
More Actions
- Select multiple records → open More Actions dropdown
- Choose Active, Inactive, or Delete
- The More Actions menu provides access to additional options, including editing, deleting, and managing various administrative functions.
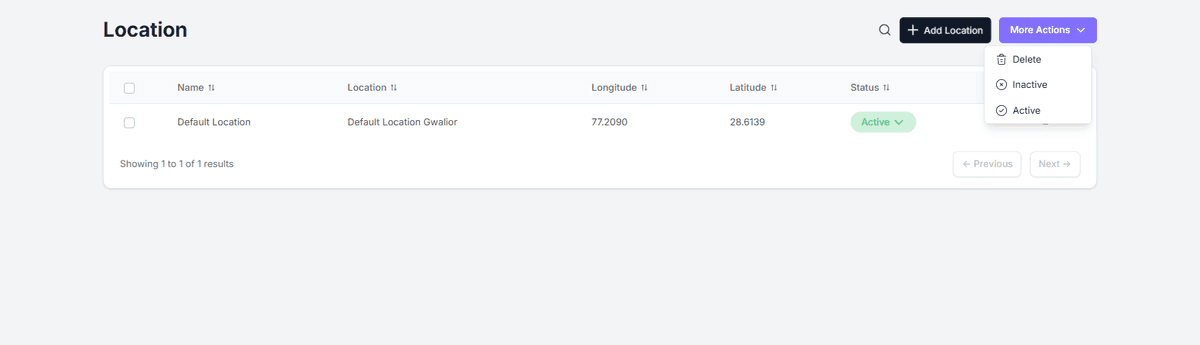
Department
The Department module manages departments like HR, IT, or Finance.
Navigation
-From the left sidebar, go to Master Data → Department.
-The Department page will display a list of all departments with their details.
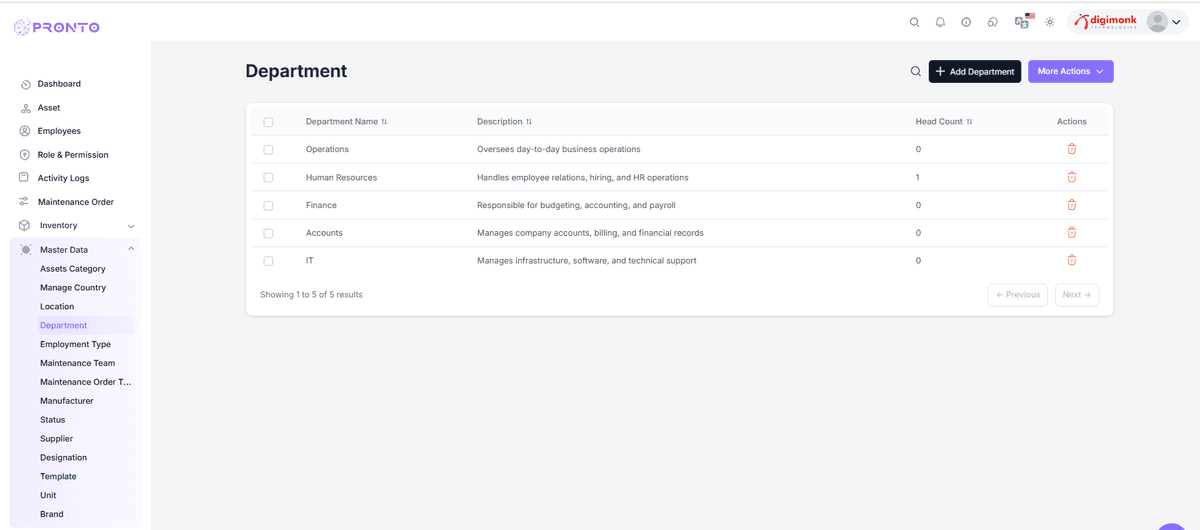
View Department List
- Shows Department Name, Description, Head Count, Actions
- Department Name: The official name of the department (e.g., HR, IT, Finance).
- Description: Short info about what the department handles.
- Head Count: Total number of employees under that department.
- Actions: Options to delete a department.
Add Department
- Click + Add Department
- Fill Name & Description
- Click Add
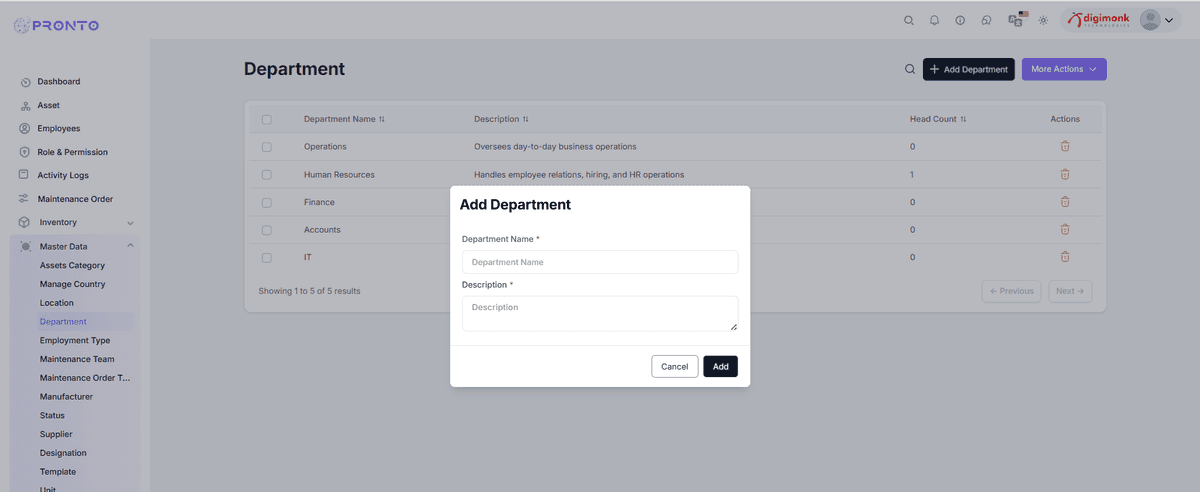
More Actions
- The More Actions menu provides access to additional options, including editing, deleting, and managing various administrative functions.
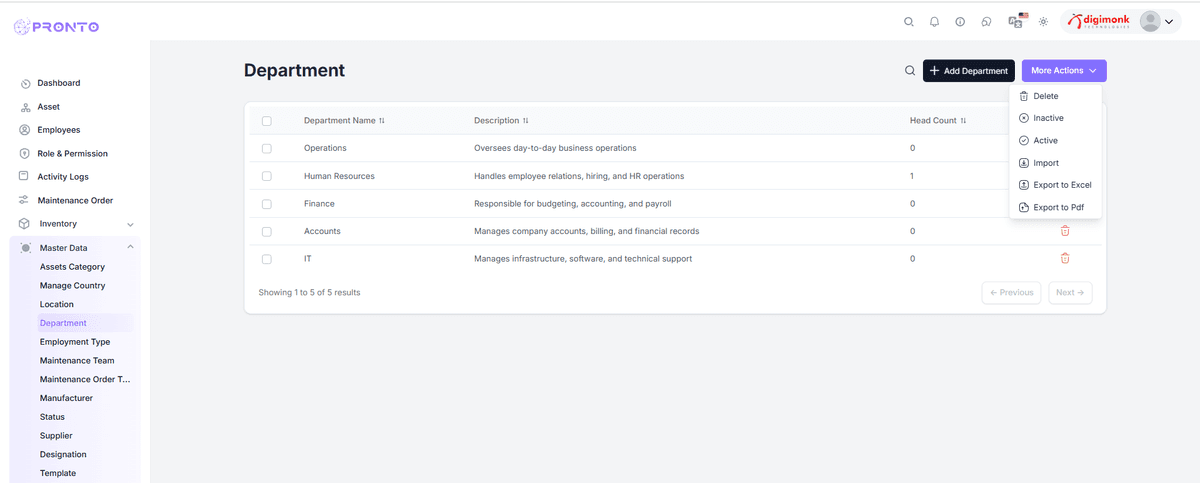
Employment Type
This module manages types of employment like Full-Time, Part-Time, or Contract.
View Employment Types
You can view a list of existing employment types such as Full Time and Part Time.
- Type – Shows the name of the employment type.
- Status – Indicates whether the type is Active or Inactive.
- Actions – Allows you to delete a specific employment type.
.png&w=1200&q=75)
Employment Type List
- Columns: Type, Status, Actions

Add Employment Type
- Click Add Employment Type
- Fill Type and Status
- Click Add
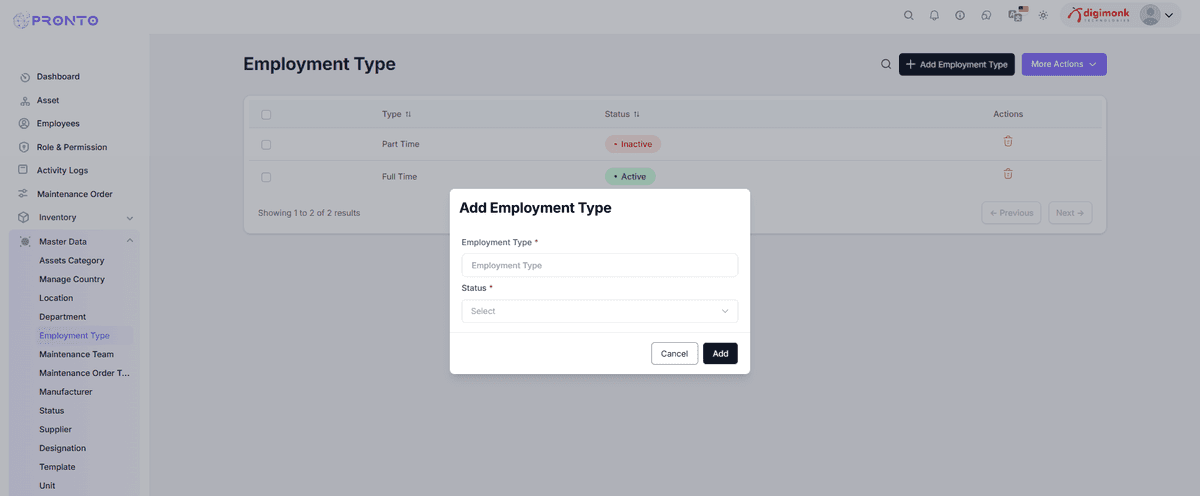
More Actions
- The More Actions menu provides access to additional options, including editing, deleting, and managing various administrative functions.
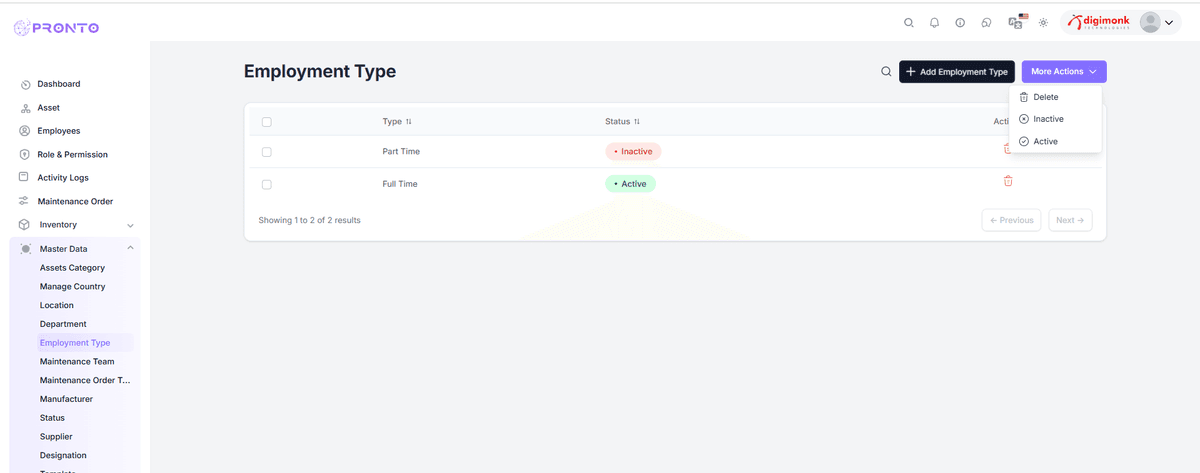
Maintenance Team
The Maintenance Team section helps users manage all maintenance teams responsible for handling repair and maintenance activities in the organization.
Add Maintenance Team
-
Click Add Maintenance Team
-
Fill in details:
- Team Name → Enter the team’s name
- Team Office → Specify the office/branch
- Location → Enter the team's location
- Email → Provide the official email
- Contact → Enter the contact number
- Remark → Add any notes or description
-
Click Add to save or Cancel to discard
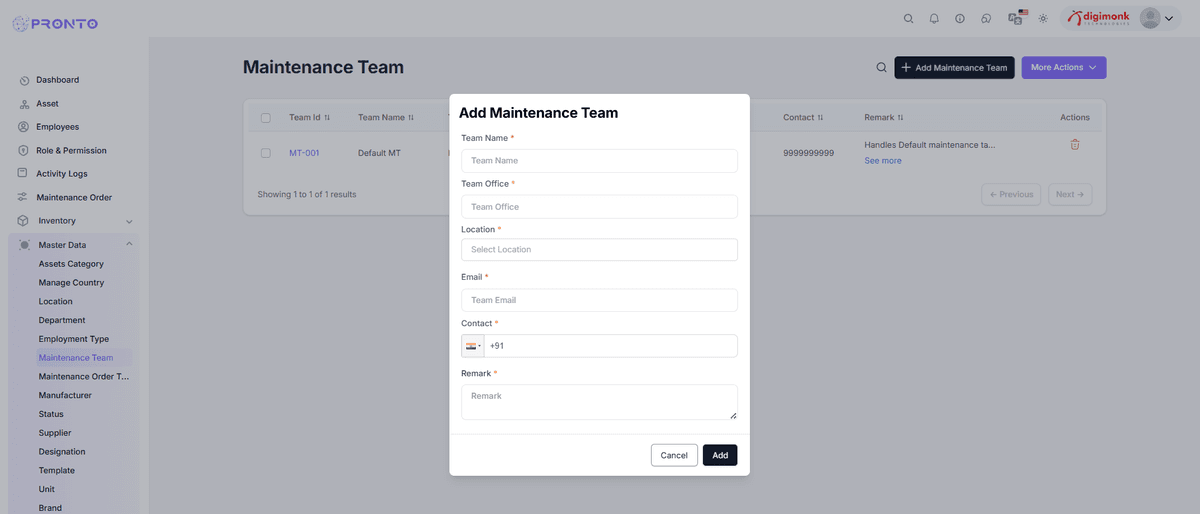
View and Manage Teams
- View all teams in a list with details (Team ID, Name, Office, etc.)
- Sort data using arrows beside column names
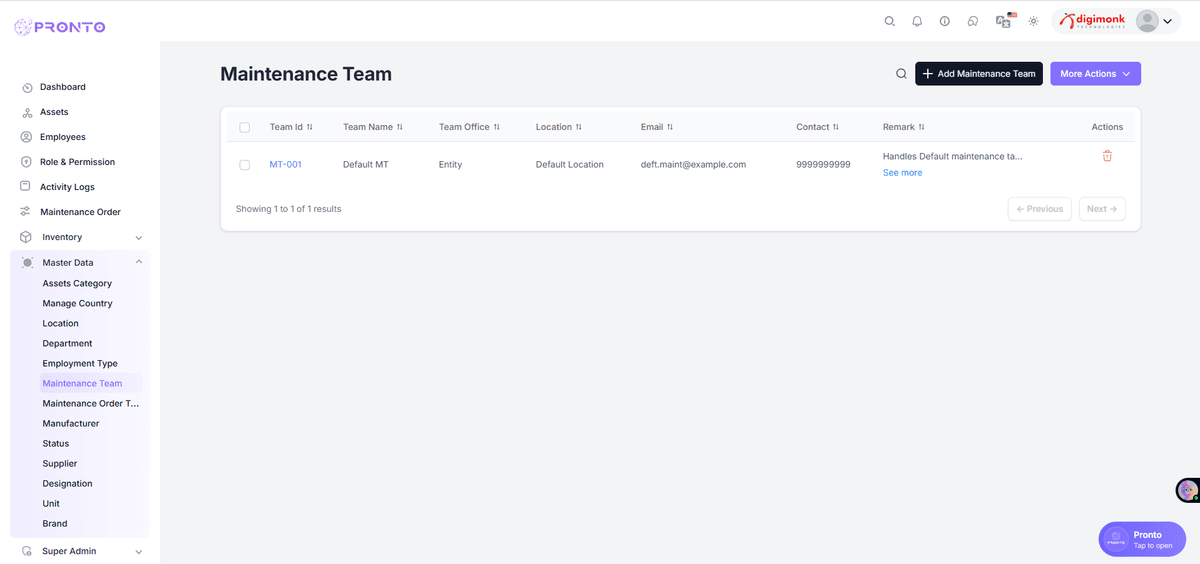
More Actions
- Active / Inactive / Delete — bulk manage via dropdown
- Select records using checkboxes before applying
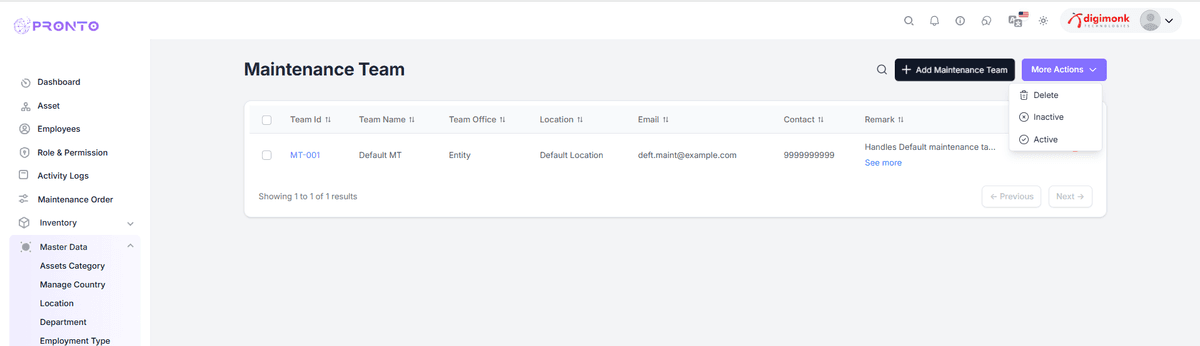
Maintenance Order Type
Manage maintenance order types like Corrective, Preventive, or Predictive.
View Maintenance Order Types
- This section displays all the maintenance order types available in the system.
- Each row includes:
- Maintenance Order Type Name
- Description
- Delete Action (trash icon) to remove the type
Examples of maintenance order types:
- Corrective
- Predictive
- Inspection
- Repair
- Preventive
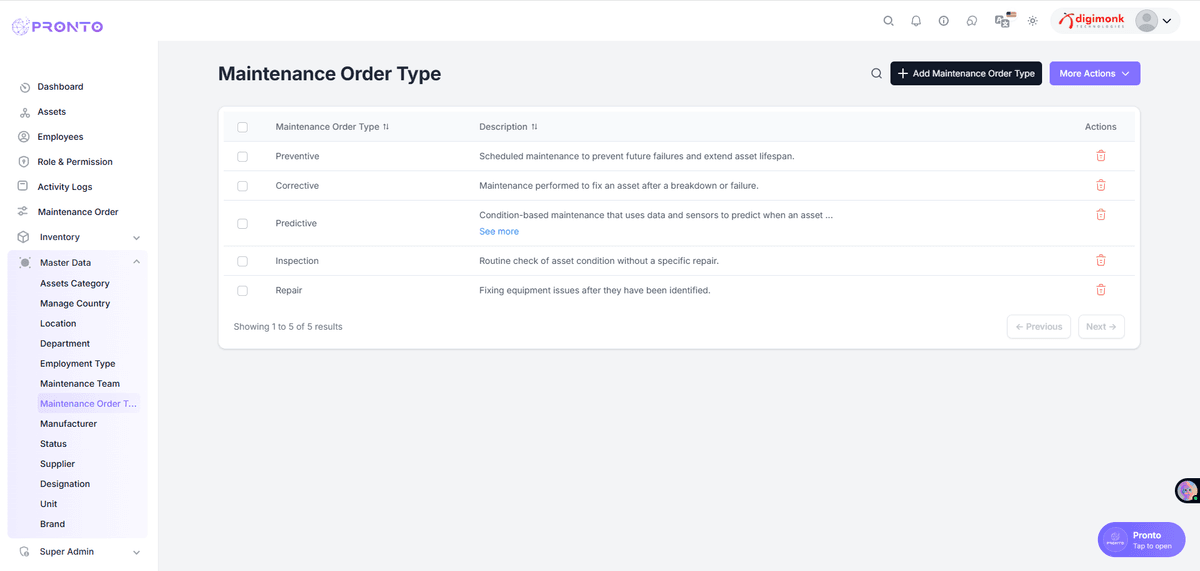
Add Maintenance Order Type
- Click Add Maintenance Order Type
- Fill:
- Type Name (e.g., Calibration)
- Description
- Click Add to save
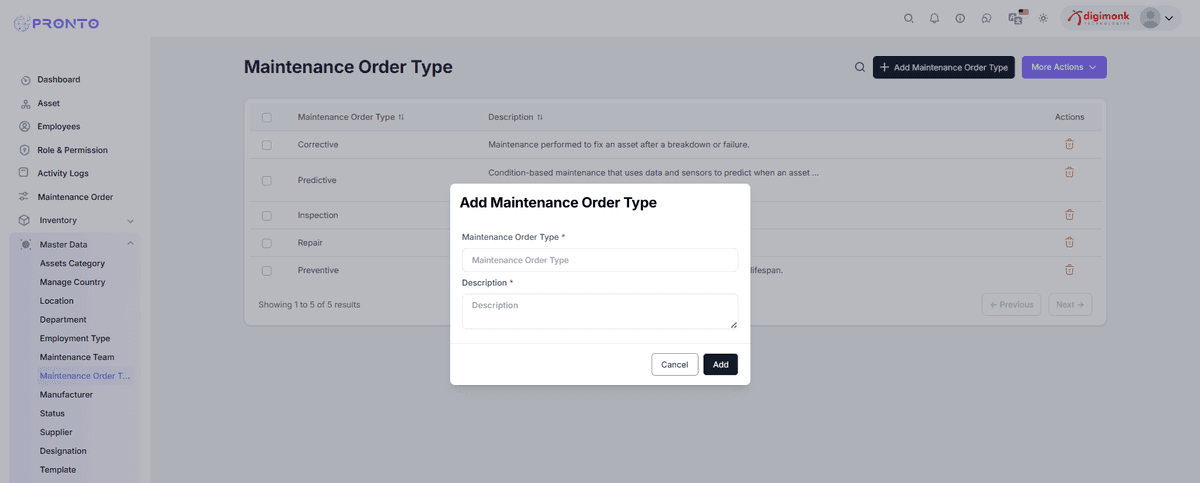
Import/Export
- Access More Actions:
- Delete
- Export (Excel / PDF)
- Import from Excel
Manufacturer
- Manages manufacturer details like name, contact, city, and country.
View Manufacturer List
- Columns:
- Name
- Contact
- Address
- City
- Country
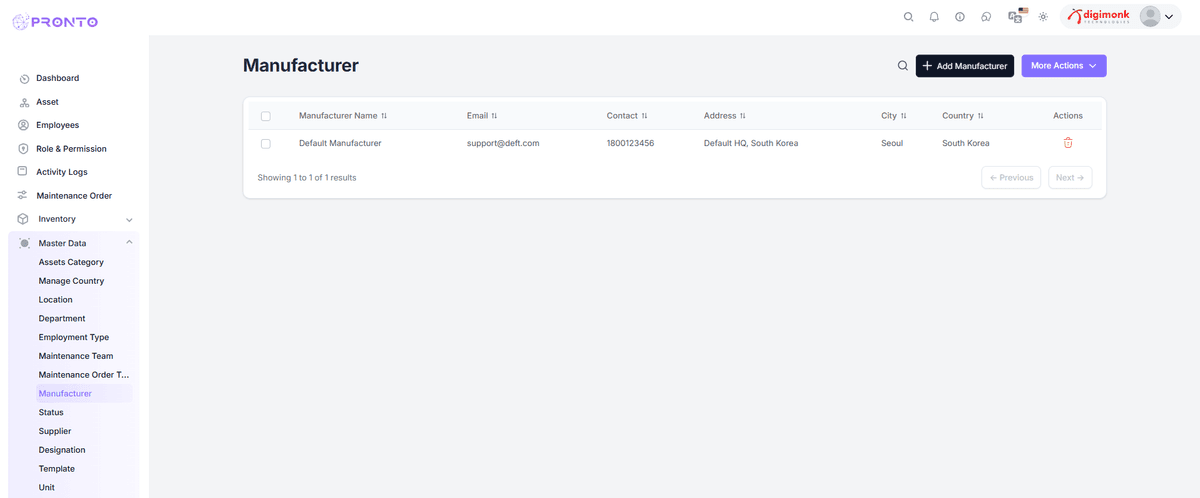
Add Manufacturer
- Click Add Manufacturer
- Fill the following details:
- Name – Enter the manufacturer/company name
- Email – Provide a valid email address
- Mobile No – Enter the contact number
- Address – Add the full address of the manufacturer
- Country – Select the country
- Click Add to save
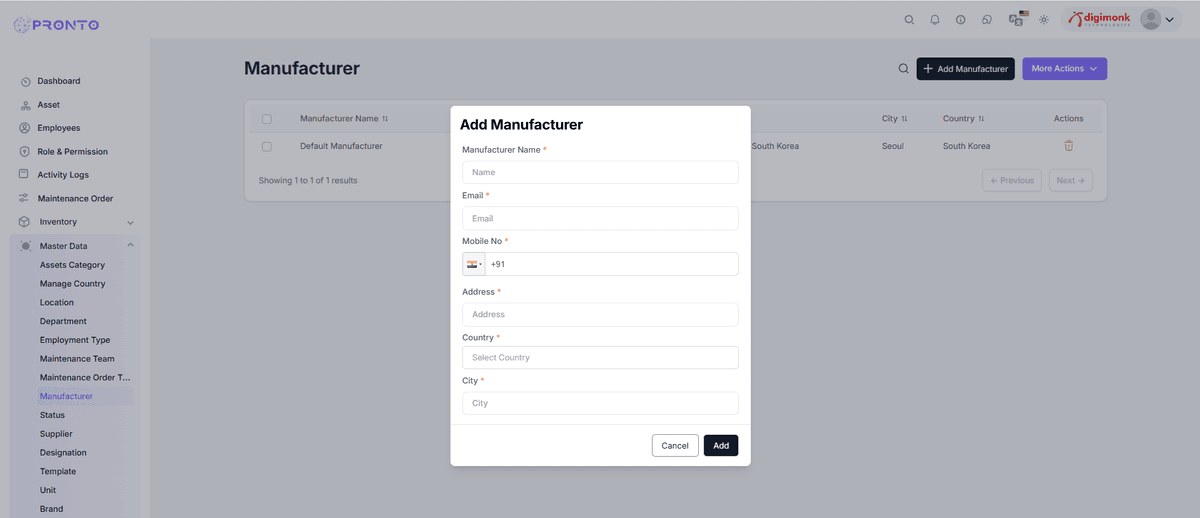
More Actions
- Filter
- Custom Table
- Delete / Inactive / Active
- Import / Export (Excel, PDF)
Pagination
- View total records
- Use Previous / Next buttons to navigate
Status
Manages asset and maintenance order statuses (Active, Inactive, Under Maintenance, etc.).
View Status List
The status list contains different asset conditions. Each row shows:
- S.No – Serial number of the entry.
- Status View – The current status of the asset.
- Description – Brief explanation of the status.
- Actions – Options to edit or delete the status.
Examples of status types:
- Inactive – Not in use
- Under Maintenance – Being serviced
- Out for Repairing – Sent for repair
- Sold Out – No longer available
- Active – Operational
Add Status
- Click Add Asset Status
- Fill:
- Name
- Description
- Color
- Click Add to save
More Actions & Pagination
- Options include:
- Delete
- Inactive / Active
- Import / Export (Excel / PDF)
- Navigate using Previous / Next buttons
Lead Source
The Lead Source module is used to define and manage the different channels through which leads enter the organization.
Lead sources help the organization understand where leads are coming from and analyze the effectiveness of different marketing and sales channels.
Navigation: Master Data → Lead Source
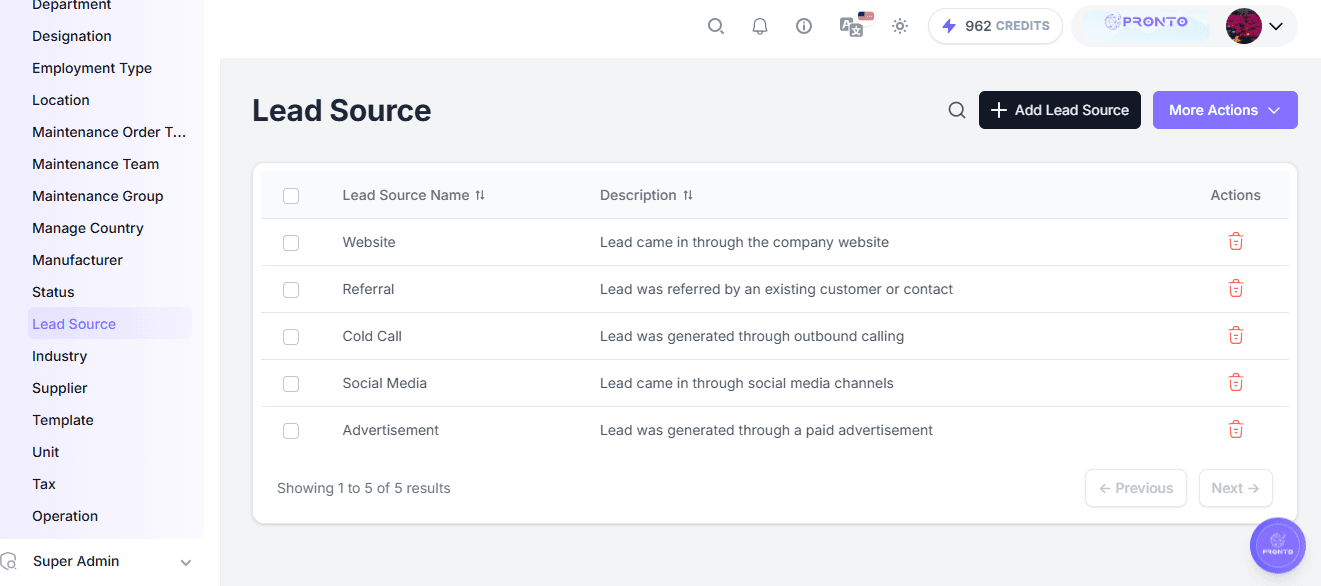
Existing Lead Sources
- Website – Lead came in through the company website.
- Referral – Lead was referred by an existing customer or contact.
- Cold Call – Lead was generated through outbound calling.
- Social Media – Lead came in through social media channels.
- Advertisement – Lead was generated through a paid advertisement.
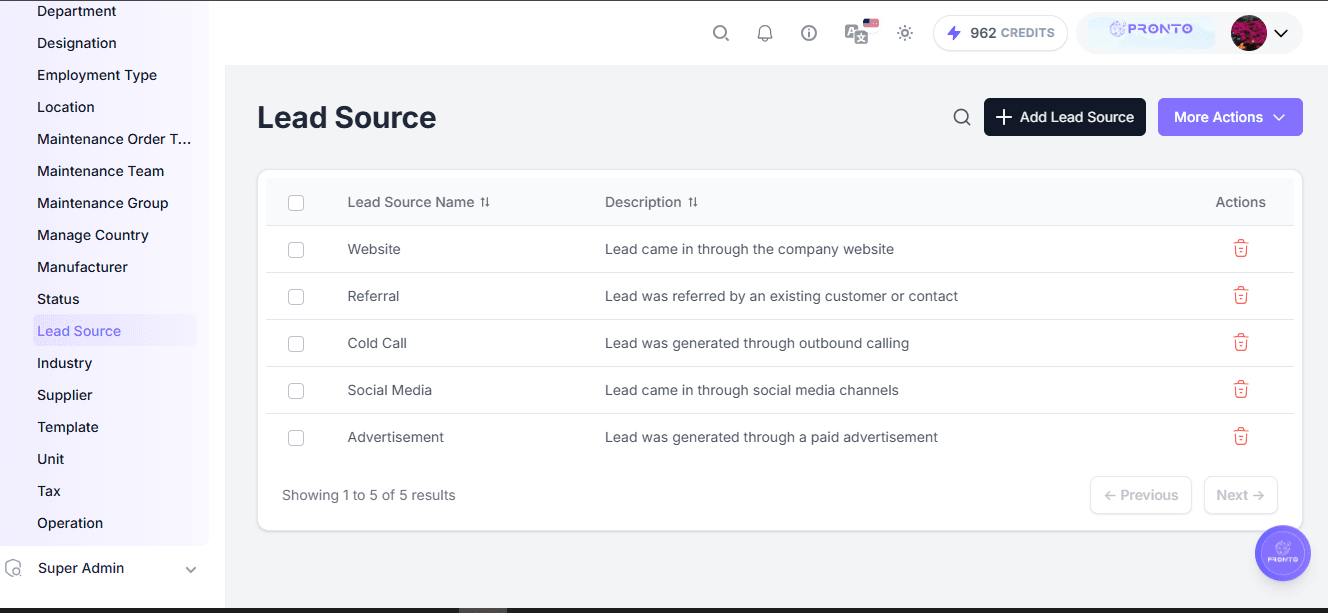
Add Lead Source
- Click + Add Lead Source.
- Enter the Lead Source Name (e.g., Email Campaign).
- Enter a Description (e.g., "Lead generated through an email marketing campaign").
- Click Save to create the source.
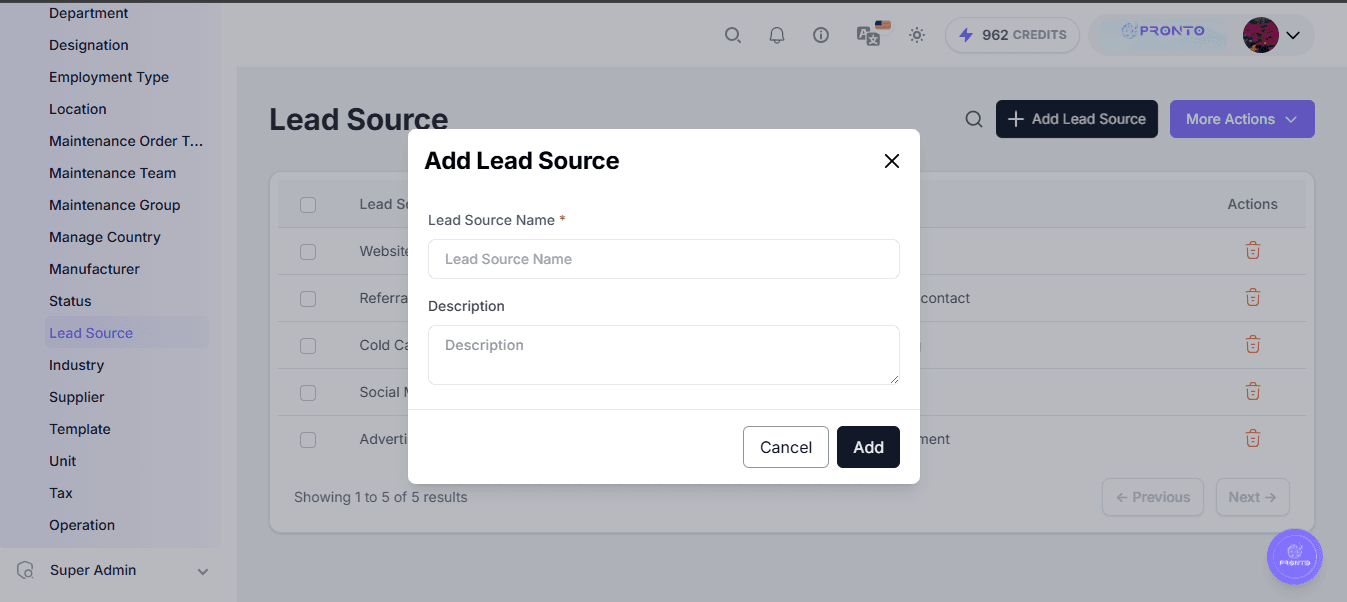
Purpose of Lead Sources
Lead Source helps the organization:
- Track where leads originate.
- Categorize incoming leads.
- Measure marketing performance.
- Identify the most effective lead-generation channels.
- Generate source-wise CRM reports.
- Analyze conversion performance by source.
More Actions
- The More Actions menu provides access to additional options, including editing, deleting, and managing lead source records.
- Use Previous / Next to navigate through multiple records when the number of records exceeds the current page size.
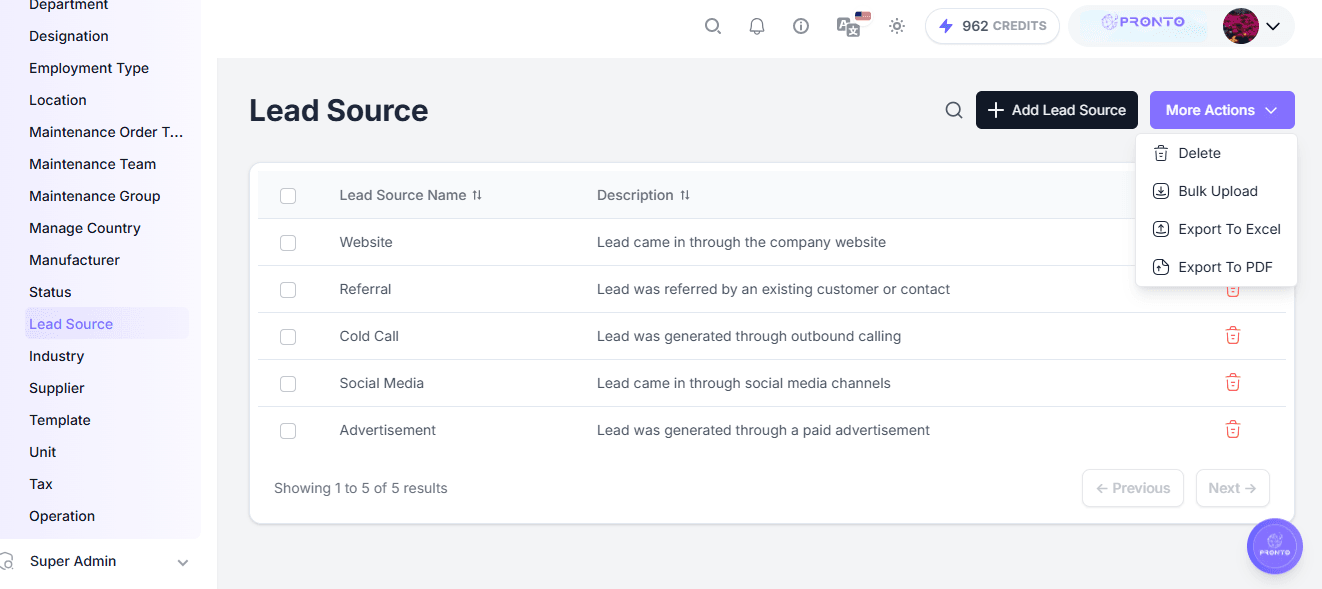
Industry
The Industry module is used to define and manage the different industries or business sectors associated with customers, leads, partners, or other business records.
Industry classification helps the organization categorize customers and leads based on their business sector and supports better CRM analysis and reporting.
Navigation: Master Data → Industry
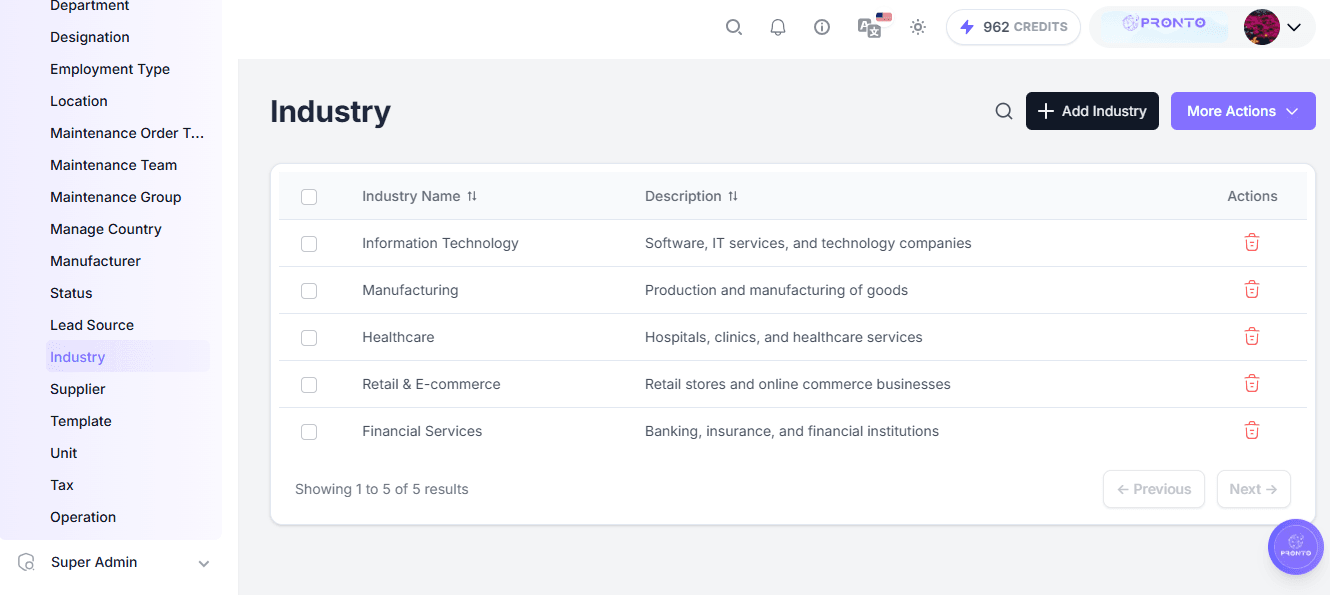
Existing Industries
- Information Technology – Software, IT services, and technology companies.
- Manufacturing – Production and manufacturing of goods.
- Healthcare – Hospitals, clinics, and healthcare services.
- Retail & E-commerce – Retail stores and online commerce businesses.
- Financial Services – Banking, insurance, and financial institutions.
Add Industry
- Click + Add Industry.
- Enter the Industry Name (e.g., Education).
- Enter a Description (e.g., "Schools, colleges, universities, and educational institutions").
- Click Save to create the industry.
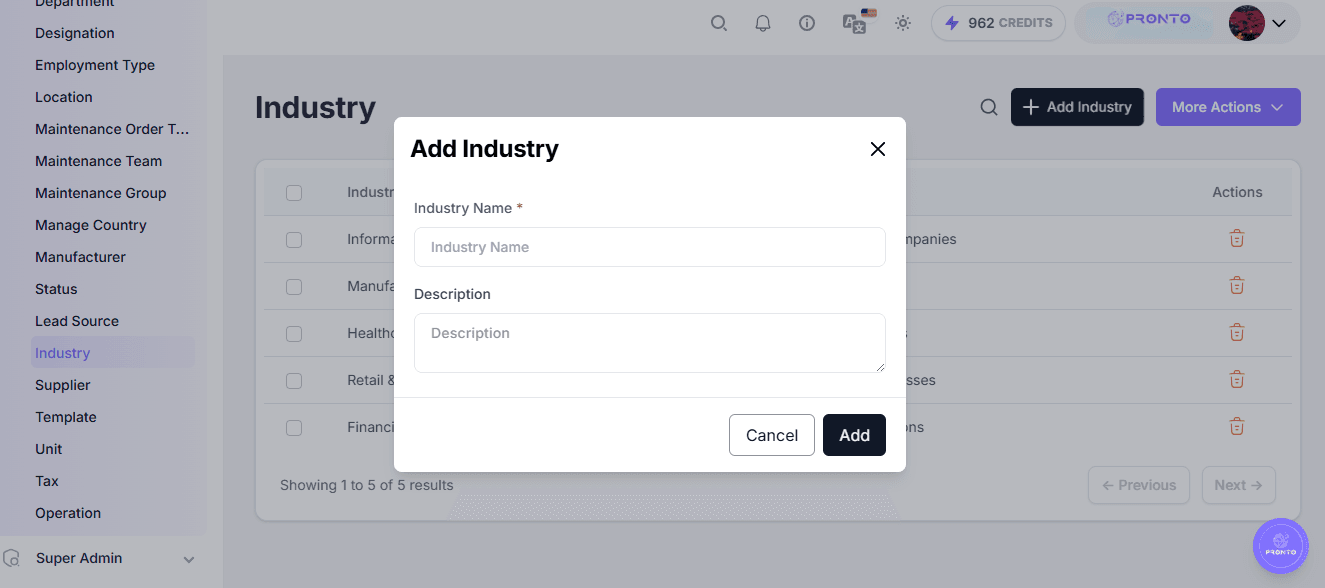
Purpose of Industry Master Data
Industry classification helps the organization:
- Categorize customers and leads.
- Identify the business sector of a customer.
- Analyze leads based on industry.
- Segment customers for sales activities.
- Generate industry-wise CRM reports.
- Understand which industries generate more business.
More Actions
- The More Actions menu provides access to additional options, including editing, deleting, and managing industry records.
- Use Previous / Next to navigate through multiple records when the number of records exceeds the current page size.
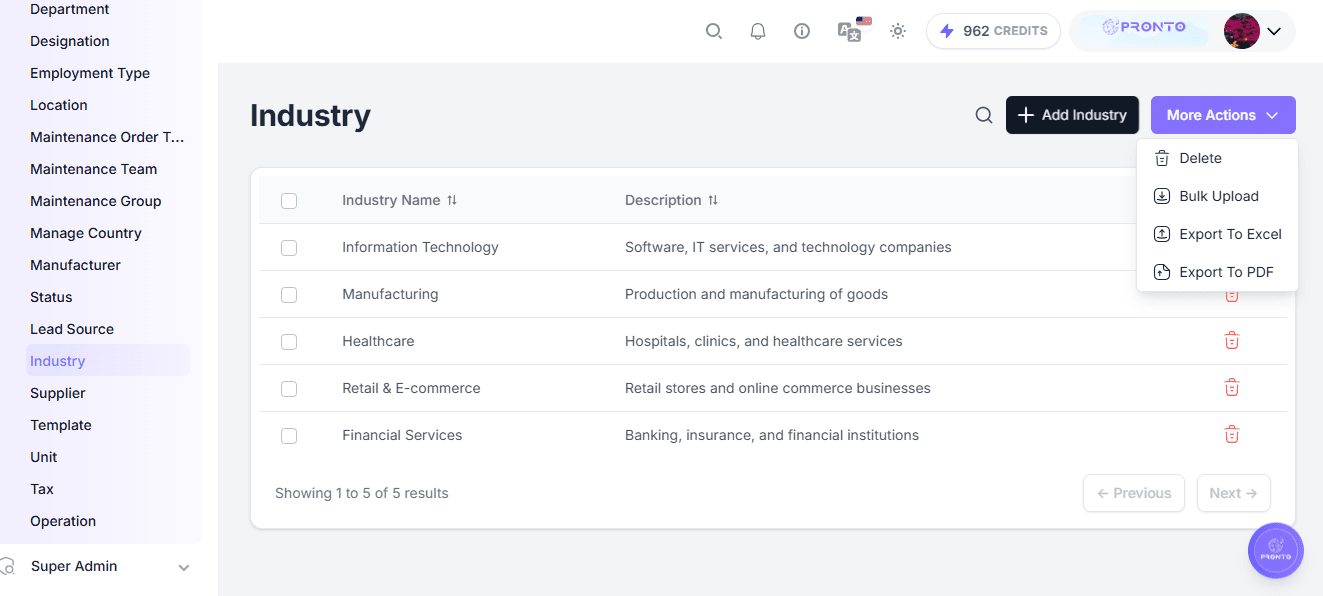
Operation
The Operation module is part of Master Data under the Manufacturing section. It is used to define and manage the operations or processes required to manufacture a product.
An operation represents a specific manufacturing activity or step that needs to be performed during production (e.g., Cutting, Drilling, Assembly, Polishing, Quality Inspection).
Navigation: Master Data → Operation
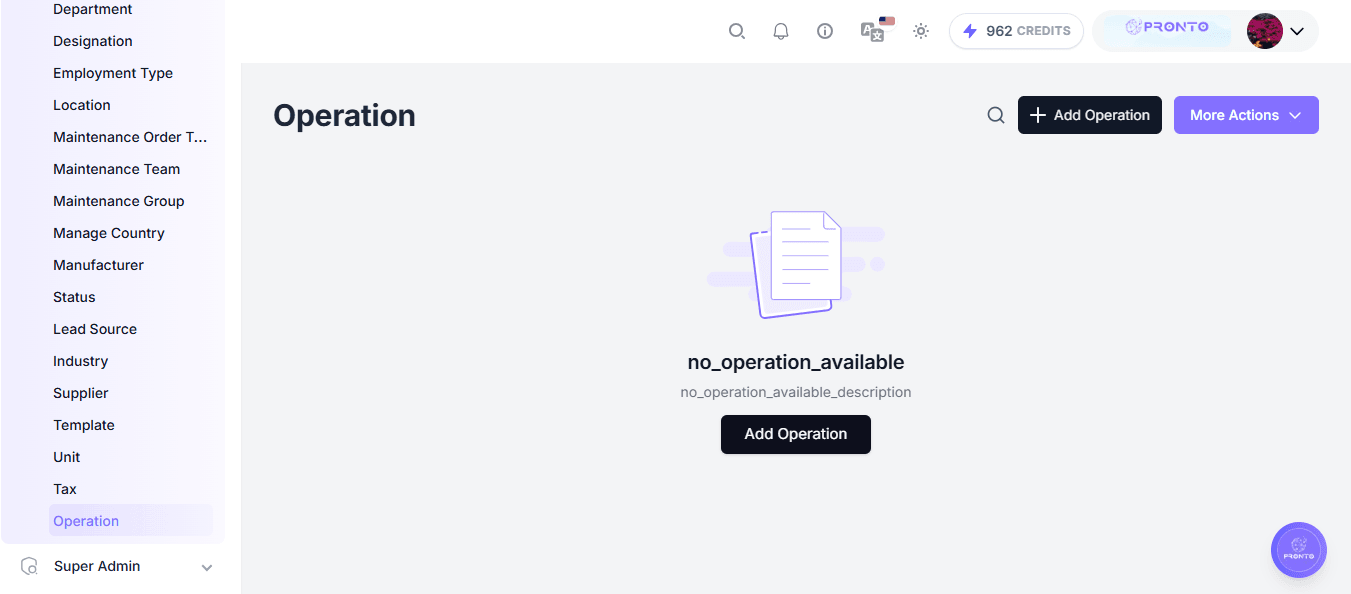
Add Operation
- Click + Add Operation.
- Enter the Operation Name.
- Enter a Description.
- Select the Work Center / Location, if applicable.
- Set the Sequence and Duration.
- Set the Active / Inactive status.
- Click Save to create the operation.
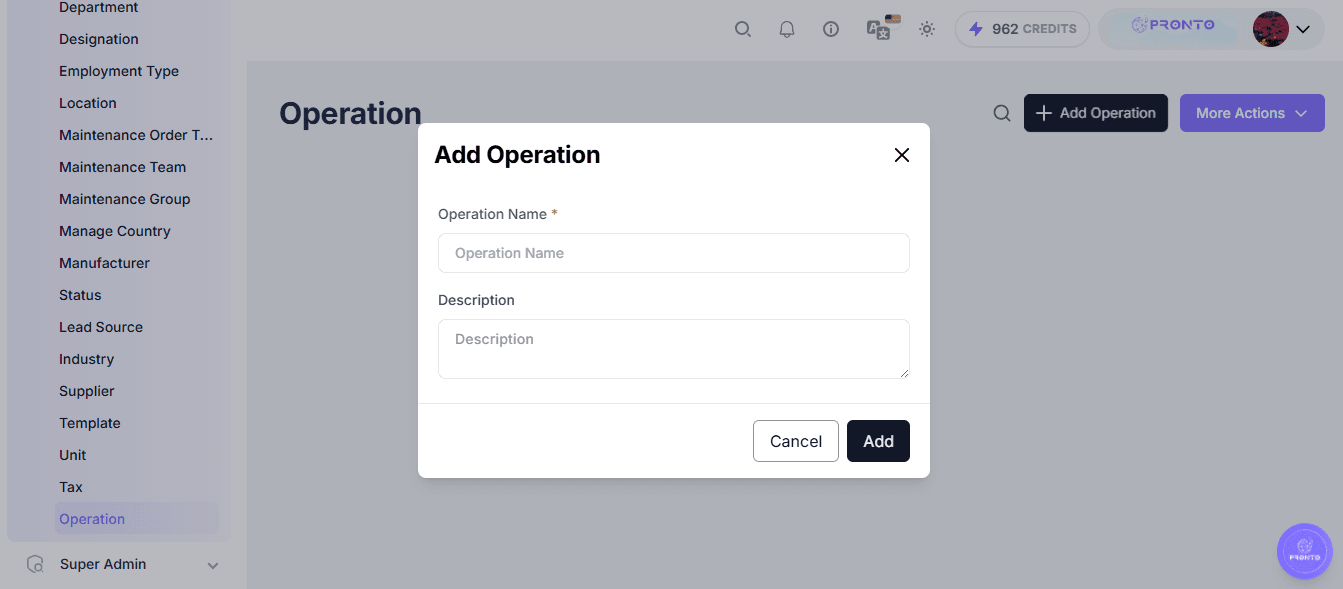
Empty State
If no operations have been created, the page displays:
No operation available
Supporting message:
No operations have been configured in the system yet.
The user can click Add Operation to create the first operation.
Relationship With Manufacturing
Operations are closely related to the Bill of Materials (BOM) and Production Orders.
Typical manufacturing flow:
Item → Bill of Materials → Operations → Production Order → Manufacturing Process → Finished Product
Example — Product: Wooden Table
- BOM: Wood, Screws, Paint
- Operations: Cutting → Drilling → Assembly → Painting
More Actions
- The More Actions menu provides access to additional options, including editing, deleting, and managing operation records.
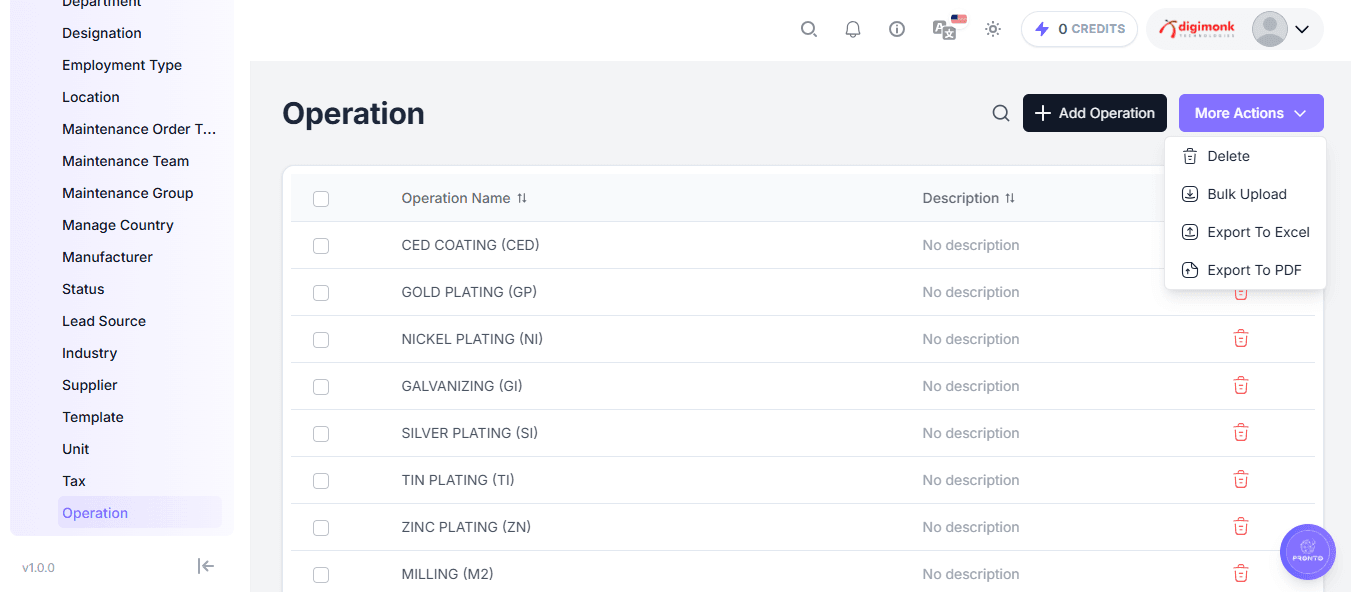
Maintenance Group
The Maintenance Group module is used to define and organize groups of maintenance-related activities, assets, or services.
Maintenance Groups help the organization maintain a structured classification of maintenance work and make it easier to manage maintenance processes consistently.
Navigation: Master Data → Maintenance Group
Add Maintenance Group
- Click + Add Maintenance Group.
- Enter a clear and meaningful Group Name that represents the category of maintenance work.
- Click Save to create the group.
Example: Electrical Maintenance – used to organize maintenance activities related to electrical equipment and systems.
Other examples:
- Mechanical Maintenance
- Preventive Maintenance
- HVAC Maintenance
- Equipment Maintenance
- Facility Maintenance
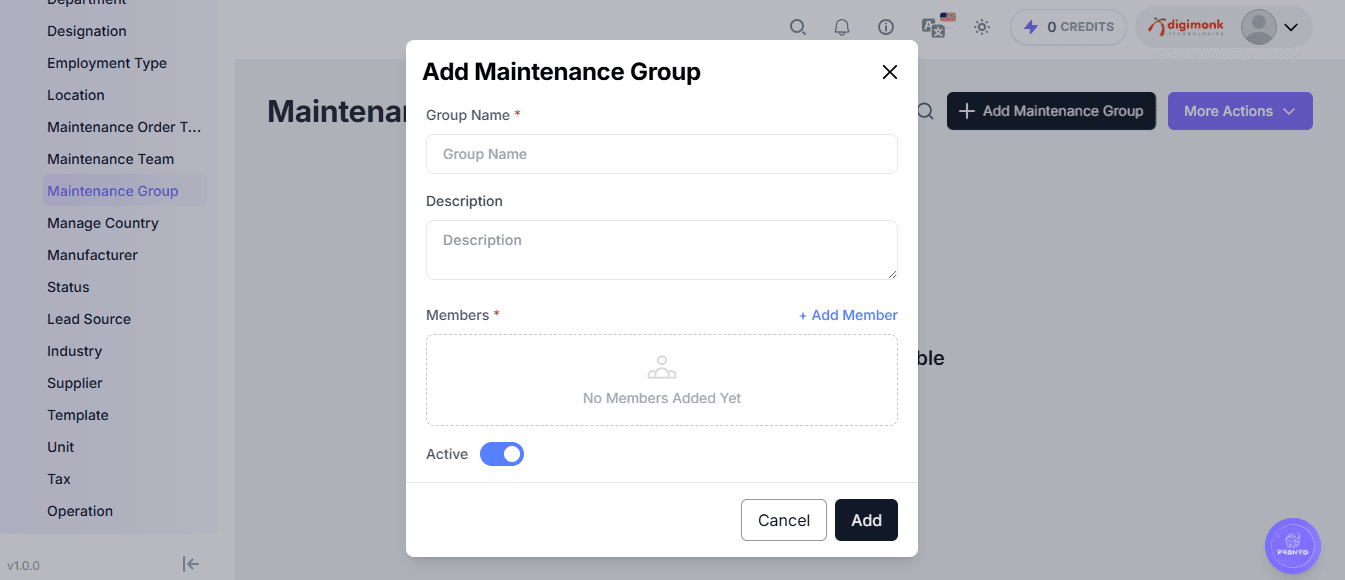
Empty State
If no maintenance groups have been configured, the page displays:
No Maintenance Group Available
Supporting message:
No Maintenance Group Description
The user can click Add Maintenance Group directly from the empty state to create the first group.
Purpose of Maintenance Groups
Maintenance Groups help organizations:
- Categorize maintenance activities.
- Organize maintenance work systematically.
- Group similar maintenance requirements.
- Improve maintenance planning and tracking.
- Maintain consistent maintenance classifications.
- Support efficient maintenance management.
Relationship With Maintenance
A Maintenance Group acts as a classification layer within the maintenance process:
Maintenance Group → Maintenance Activity → Maintenance Order → Maintenance Execution → Maintenance History
Example:
Mechanical Maintenance → Machine Inspection → Maintenance Order → Repair / Service → Maintenance Record
More Actions
- The More Actions menu provides access to additional options, including editing, deleting, and managing maintenance group records.
- Keeping maintenance groups standardized helps prevent duplicate or inconsistent classifications across the system.
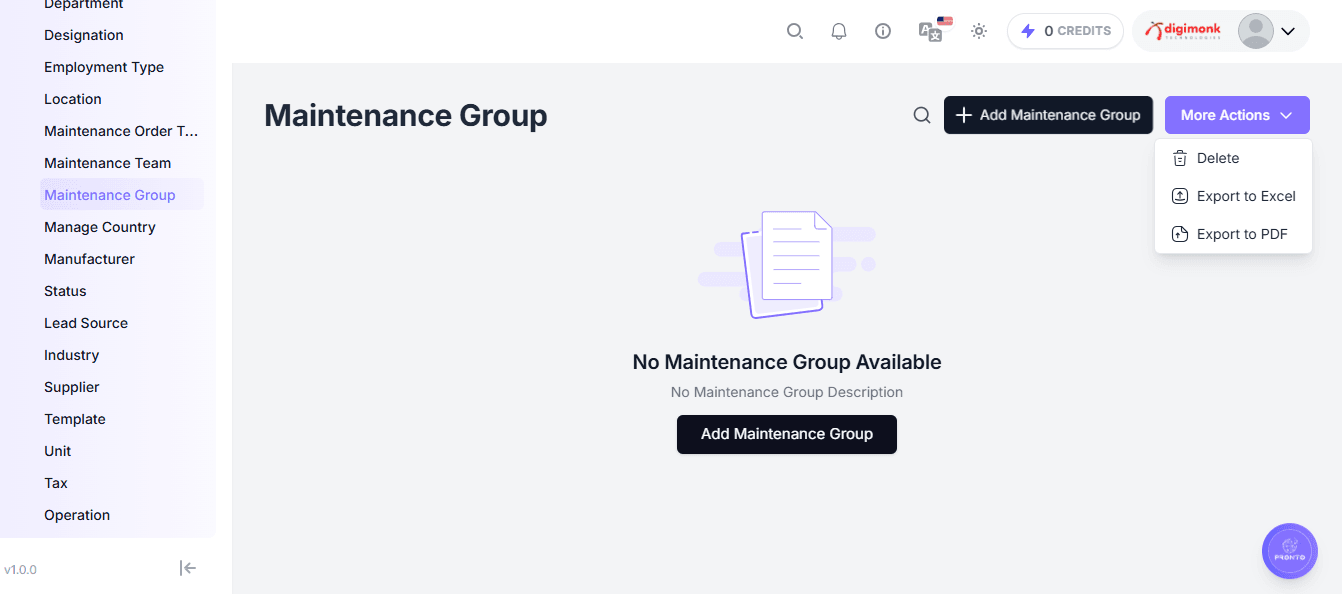
Template
The Template module is used to manage predefined templates that can be reused for business requests and processes.
Templates help standardize recurring documents or requests so that users do not have to create the same structure repeatedly.
Navigation: Master Data → Template
This page is titled Request Template and displays a template list with the following columns: Name and Status.
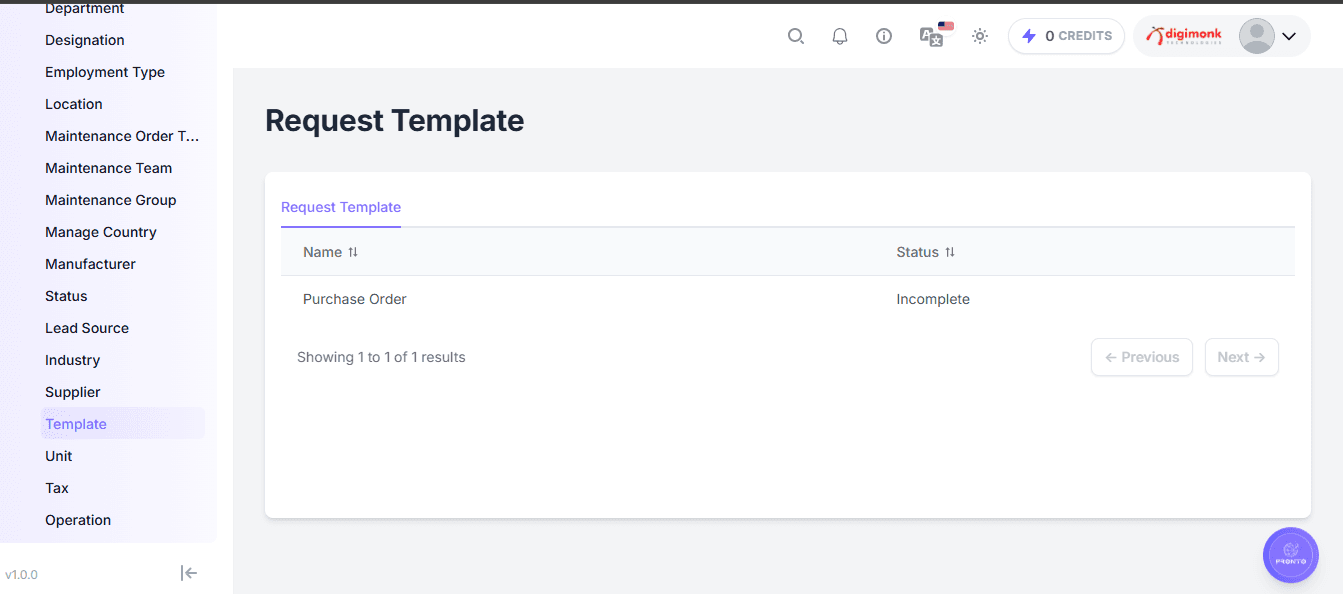
Request Template
A Request Template provides a predefined structure for a particular type of request.
Example: Purchase Order → Request Template
This allows the organization to maintain a standardized format for purchase-order-related requests.
Template Status
Templates can show a status such as:
- Incomplete – The template has not yet been fully configured or completed.
Configure Request Template
The Configure Request Template page is used to define the structure and approval workflow of a request template.
The configuration page is divided into two sections:
- Form Configuration – Used to define the basic information and additional details required for the request.
- Approval Workflow – Used to configure the approval process associated with the request template.
Navigation: Master Data → Template → Select a Request Template
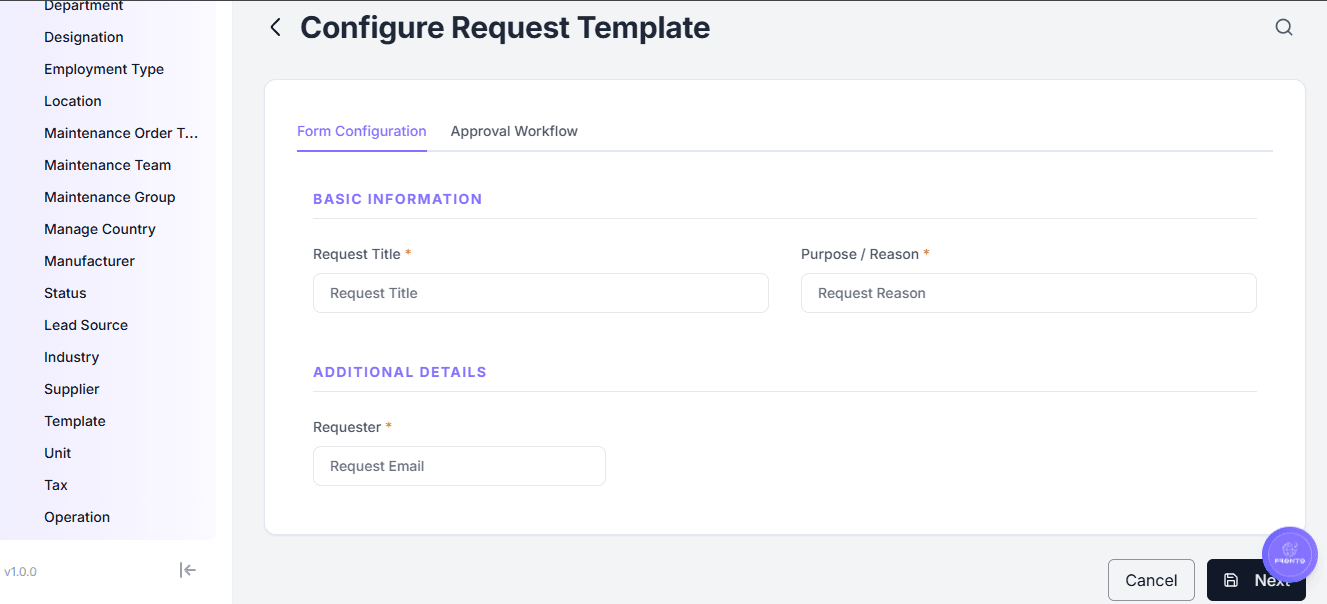
Form Configuration
The Form Configuration tab defines the information that users need to provide when submitting a request.
Basic Information
The Basic Information section contains:
- Request Title* – Defines the title of the request.
- Purpose / Reason* – Specifies the purpose or reason for creating the request.
Fields marked with an asterisk (*) are required.
Additional Details
The Additional Details section contains:
- Requester* – Specifies the requester's email address.
The requester field is required.
Approval Workflow
The Approval Workflow tab is used to configure the approval process associated with the request template.
Users can switch between Form Configuration and Approval Workflow to manage different aspects of the request template.
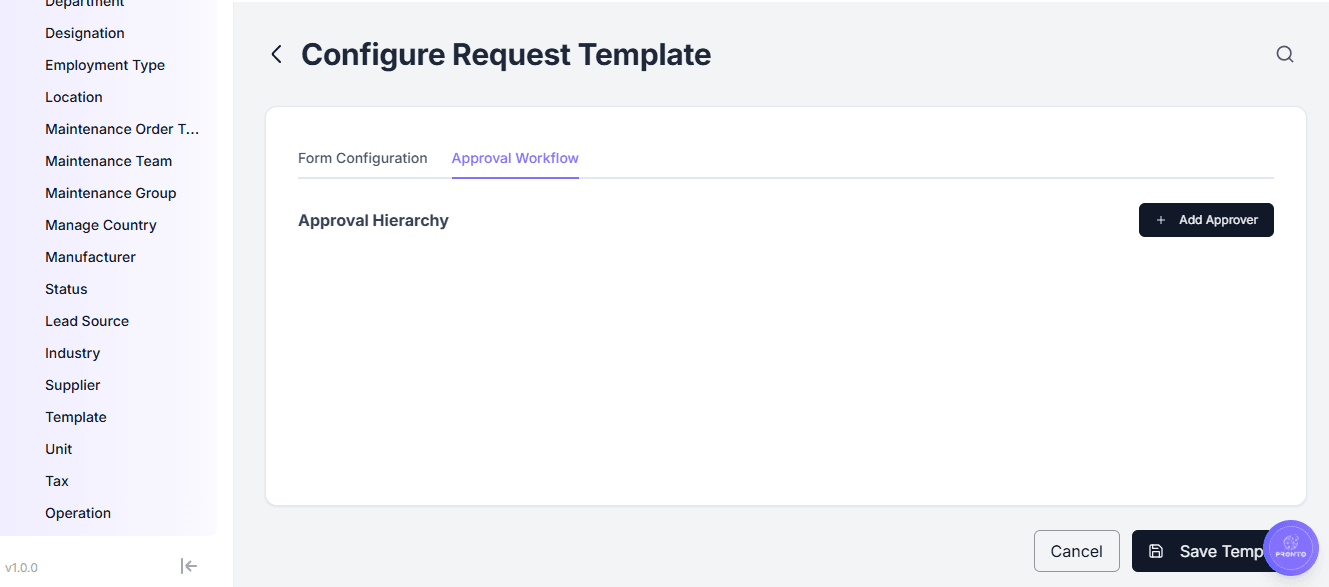
Request Template Configuration Flow
A request template can be configured through the following process:
Request Template → Form Configuration → Define Request Details → Approval Workflow → Request Processing
This provides a structured way to define the information required for a request and the workflow used to process it.
Purpose of Templates
Templates help organizations:
- Standardize recurring requests.
- Reduce repetitive data entry.
- Maintain consistent request formats.
- Improve process efficiency.
- Reduce errors caused by manually creating similar requests.
- Provide reusable structures for business processes.
Example flow:
Purchase Order → Use predefined template → Enter required transaction details → Submit request
Template Management
- View available request templates.
- Review template names.
- Check template status.
- Navigate through template records using Previous / Next.
- Maintain standardized request structures.
Tax
The Tax module is used to configure tax rules that can be applied to business transactions.
Tax configuration supports consistent tax calculation across transactional modules such as Quotations, Sales Orders, Invoices, and Proforma Invoices.
Navigation: Master Data → Tax
The page provides:
- Search – Locate tax records.
- Add Tax – Create a new tax configuration.
- More Actions – Additional available operations.
Add Tax
- Click + Add Tax.
- Enter the Tax Name (e.g., GST 18%).
- Enter the Tax Rate / Percentage.
- Enter a Description, if needed.
- Set the Active / Inactive status.
- Click Save to create the tax configuration.
Empty State
If no tax records have been configured, the page displays:
No tax available
Supporting message:
No tax available description
The user can click Add Tax directly from the empty state to create the first tax record.
Relationship With Sales and Billing
Tax master data supports the sales and billing workflow:
Tax Master → Quotation → Sales Order → Invoice / Proforma Invoice → Tax Calculation → Final Transaction Amount
Example: If a transaction has a taxable amount of ₹10,000 and an applicable tax rate of 18%:
| Amount | Value |
|---|---|
| Taxable Amount | ₹10,000 |
| Tax @ 18% | ₹1,800 |
| Total | ₹11,800 |
More Actions
- The More Actions menu provides access to additional options, including editing, deleting, and managing tax records.
Supplier
- The Supplier module manages vendor and supplier details used throughout the system.
Upon opening the Supplier module, a table appears displaying the existing supplier records.
Table Columns:
- Supplier Name – Name of the supplier or vendor
- Email – Contact email address of the supplier
- Contact – Supplier's mobile or phone number
- Address – Physical address of the supplier
- City – City where the supplier is located
- Country – Country of the supplier
- Actions – Delete icon to remove a supplier record
At the bottom, pagination controls are available — Previous and Next — to navigate between pages if multiple records exist.
Add Supplier
Click Add Supplier and fill in the required details such as:
- Name
- Mobile No
- Address
- Country
- City
After filling in all fields, click Add to save the supplier details.
More Actions
Access bulk options: Filters, Custom Table, Delete, Inactive, Active, Import, Export (Excel/PDF).
Designation
Defines roles or job titles like Manager, Technician, or Supervisor.
Location
Dashboard → Master Data → Designation
Navigate to the Designation module from the Master Data section in the left sidebar.
View Designations
View all designations with columns for Designation Name, Description, and Actions (🗑️ Delete).
Add Designation
Click Add Designation → Fill Name and Description → Add to save.
Edit or Delete
Click to remove a designation or edit details as needed.
More Actions
- Use options for Delete, Inactive, Active, Import, Export (Excel/PDF).
- The More Actions menu provides access to additional options, including editing, deleting, and managing various administrative functions.
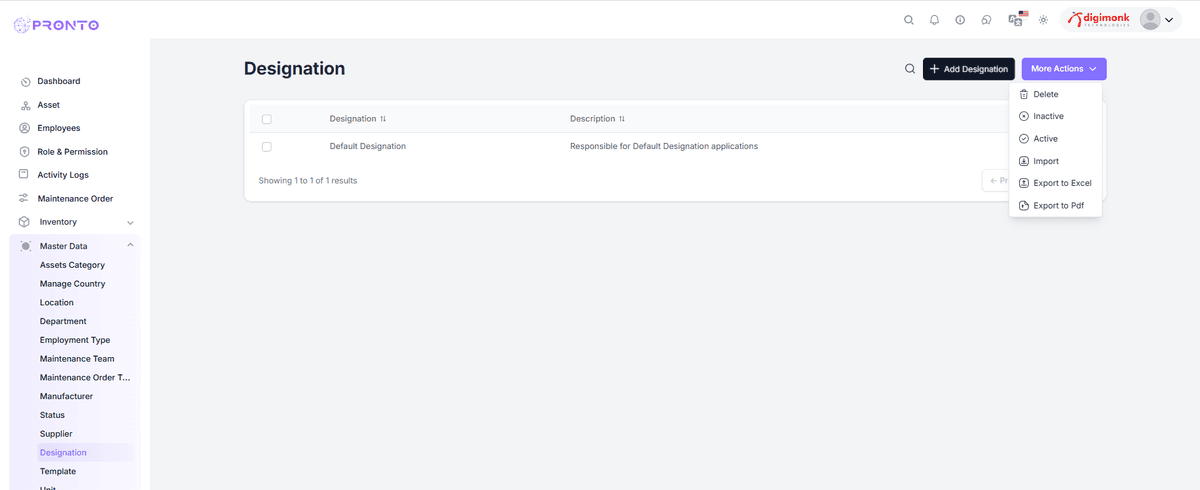
Unit
- Manages measurement units like Kilogram, Meter, or Liter.
View all units with columns: S.No, Unit Name, Unit Code, Status, Description, and Actions.
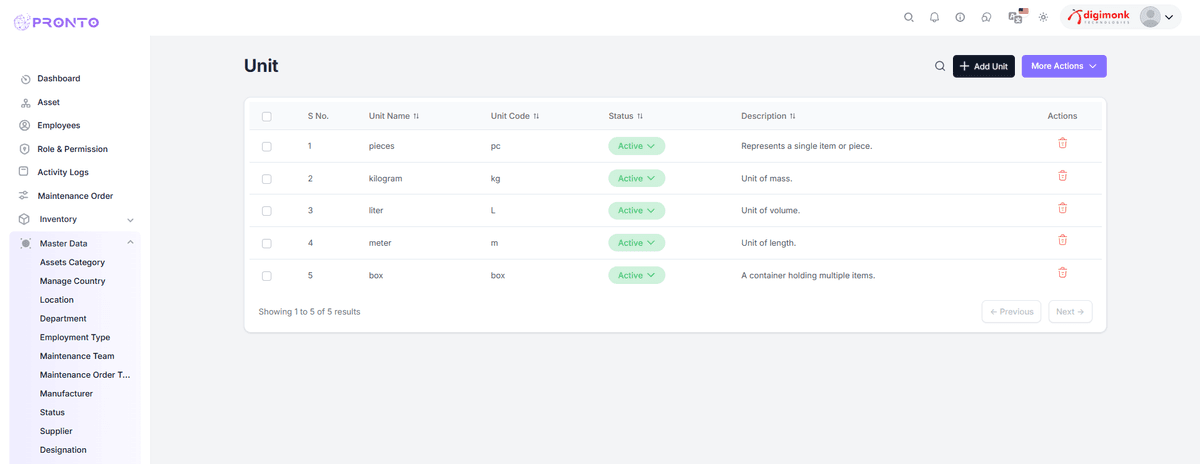
Add Unit
Click + Add Unit → Enter Unit Name, Code, Status, and Description → Save.
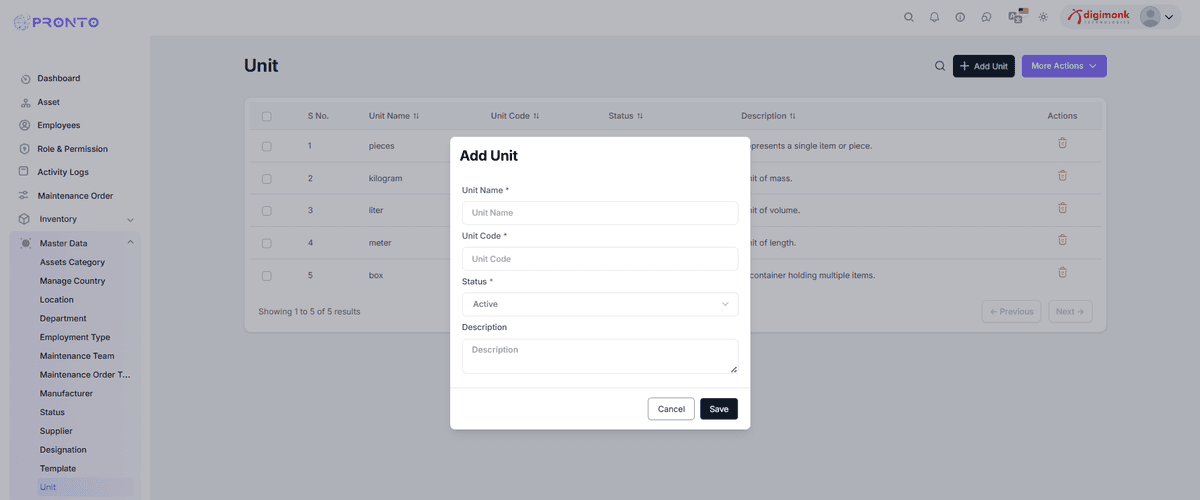
More Actions
Bulk manage using Delete, Inactive, or Active options.
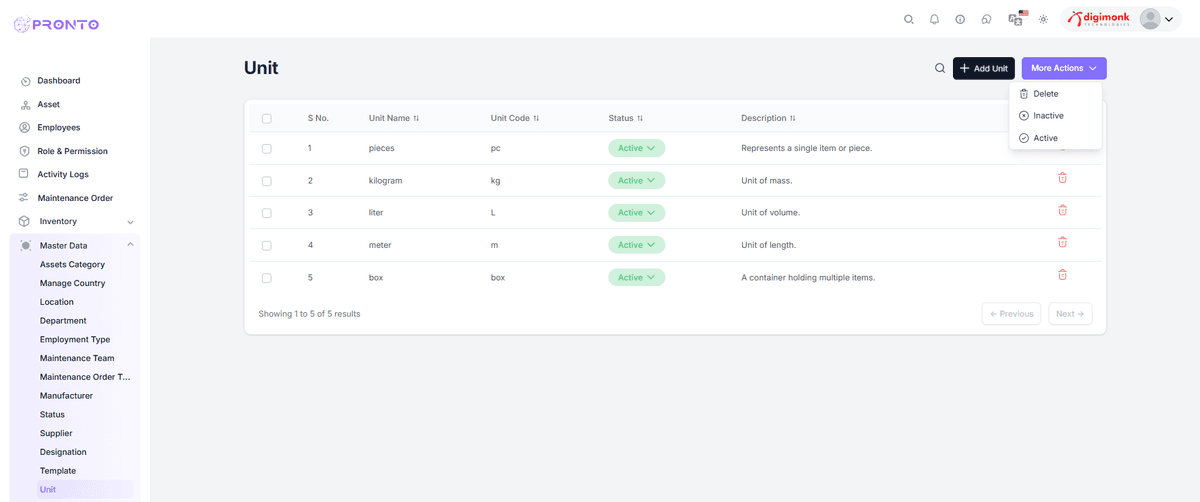
Brand
Manages brand information.
Accessing Brand Page
Go to Master Data → Brand.
Columns: S.No, Brand Name, Category, Status, Description, and Actions.
.png&w=1200&q=75)
Add Brand
Click Add Brand → Fill details → Save.
Manage Status or Delete
Use More Actions dropdown to Delete, Inactivate, or Activate Multiple brands.
Purpose
The Purpose of Master Data is to maintain uniformity, consistency, and centralized configuration of base information across all modules.
This ensures smooth data management and reduces redundancy throughout the application.
Super Admin
The Super Admin Module is designed for platform-level administrators who manage global settings, app content, system configurations, and user-level permissions across the entire Pronto AI system. Super Admin has full access to all advanced controls such as user subscriptions, coupons, translations, blog manager, languages, activities, and platform plans. This module is not visible to regular users — only to system-level administrators.
Super Admin
Below is the list of all pages under the Super Admin section in the left sidebar:
Reviews – Manage all customer reviews.
User Subscription – View and control subscription plans of all users.
Coupon – Create & manage discount coupons.
Translation – Add or update language translations for the system.
Contact – View contact form submissions.
Language – Add or modify system languages.
Blog Manager – Manage blog posts and announcements.
Incomplete Activity – Track incomplete user actions inside the system.
Plan Management – Create and manage platform pricing plans.
Reviews & Bugs
The Reviews & Bugs module allows the Super Admin to manage all platform reviews submitted by users and track reported bugs for quick resolution.
Navigation
Go to:
Sidebar → Super Admin → Reviews
This module contains two main tabs:
- Reviews & Feedback – view user reviews, ratings, and feedback
- Bug Reports – track bugs submitted by companies or employees
Reviews & Feedback
This section displays all user reviews submitted for the system. It includes details like:
- Review ID
- Company ID
- Rating (stars)
- Review Title
- Submitted By
- Review Summary
- Action buttons (Delete)
Use this page to monitor user experience and maintain service quality.
Bug Reports
This section allows the Super Admin to manage all bug reports submitted by users.
Each bug report contains:
- Bug ID
- Company ID
- Bug Title
- Submitted By
- Severity (Low / Medium / High)
- Status (Opened / Fixed / Closed)
- Actions (Delete)
You can also update the bug status using the status dropdown.
Report Bug — More Actions
- The More Actions menu allows the admin to download the full bug report list in multiple formats.
- This helps in maintaining records, sharing data, and analyzing bug logs offline.
Available export options:
- Download as Excel
- Download as PDF
- Download as ZIP (if enabled)
These formats ensure smooth data portability for audits and management reporting.
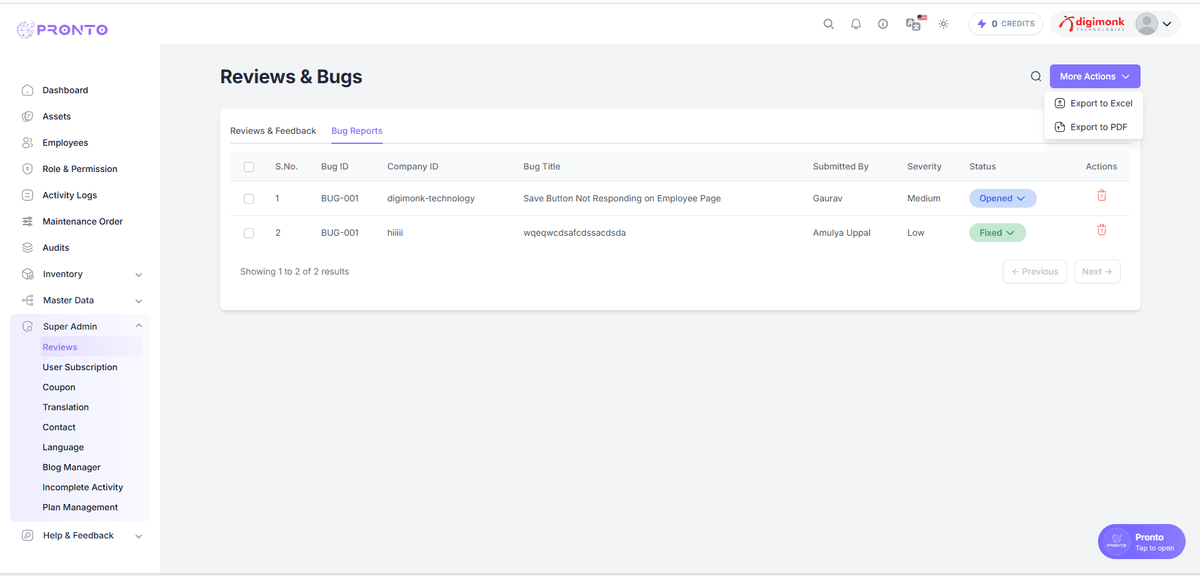
How to Use More Actions
- Go to Super Admin → Report Bug.
- Click the More Actions button (three-dots icon) in the top-right corner of the table.
- A dropdown will appear with export options:
- Excel
- (Optional) ZIP
- Select the format you want.
- The file will begin downloading automatically.
This is helpful for teams who require offline access or need to share reports with QA or management.
User Subscription
The User Subscription module allows the Super Admin to manage all registered companies, their subscription plans, trial period details, and user activity.
Navigation
Go to:
Sidebar → Super Admin → User Subscription
User Subscription
This page displays a complete list of companies signed up on the platform.
Details shown in the table:
- Name
- Company Name
- Mobile Number
- Signed Up Date
- Trial End Date
- Employee Count
- Plan (Free / Pro)
- Status (Active / Incomplete)
- Last Signed In
This helps admins monitor subscription usage and company activity.
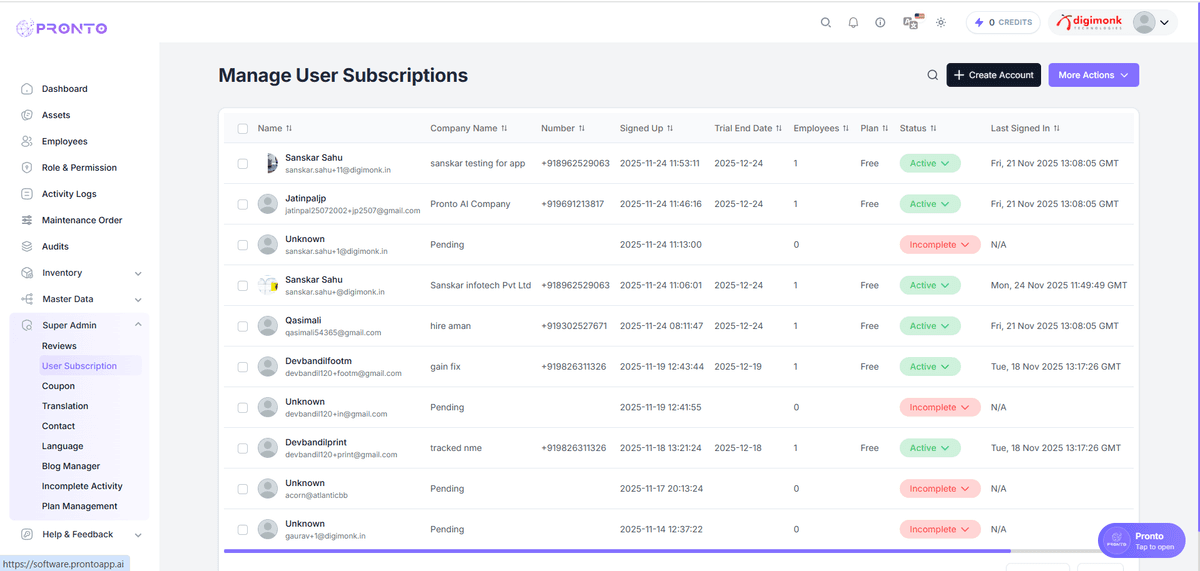
Create Account
The admin can manually create a new company subscription.
Fields included:
- Company Name
- Plan (Free / Paid)
- Recurring Type
- Contact Number
Click Create Account to add the company to the system.
Useful for manual onboarding or pre-account setup.
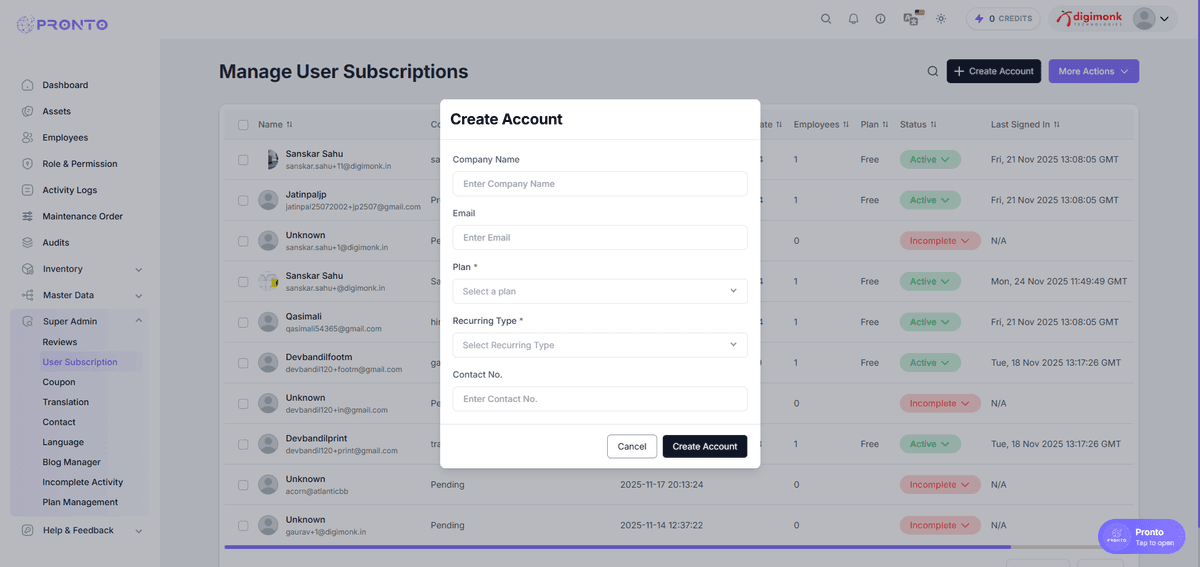
More Actions
The More Actions menu helps admins customize the table or export subscription data.
Options include:
- Filters — Filter companies by plan, status, or date
- Export — Download subscription records
- Custom Table — Show or hide table columns
These tools help in reporting, auditing, and viewing data in a customized way.
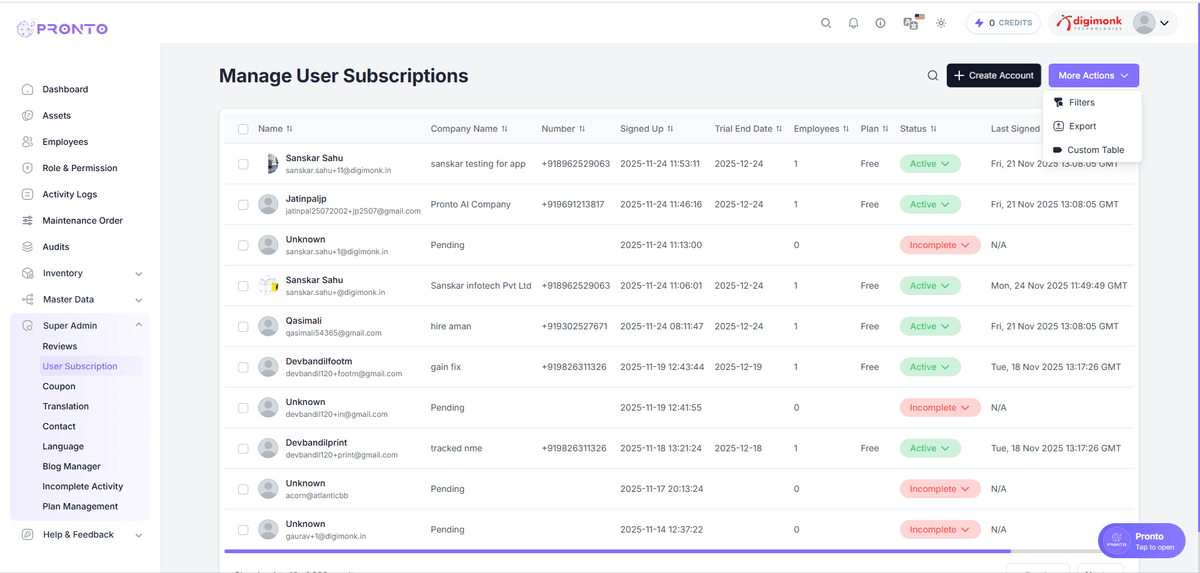
How to Use More Actions
- Go to Super Admin → User Subscription
- Click the More Actions (three dots) button
- Choose from:
- Filters
- Export
- Custom Table
- Apply filters or download the file as needed
This helps teams manage subscription data easily and access offline reports.
Coupon
The Coupon Management section allows admins to create, update, and monitor discount coupons within the system. You can define coupon codes, set discount types (percentage or fixed amount), specify validity dates, usage limits, and assign coupons to specific products or user groups. This module helps ensure smooth promotional campaigns by tracking coupon performance, preventing misuse, and maintaining full control over active and expired offers.
Navigate to Coupon Section
Go to Super Admin → Coupon
This will open the Manage Coupons page.
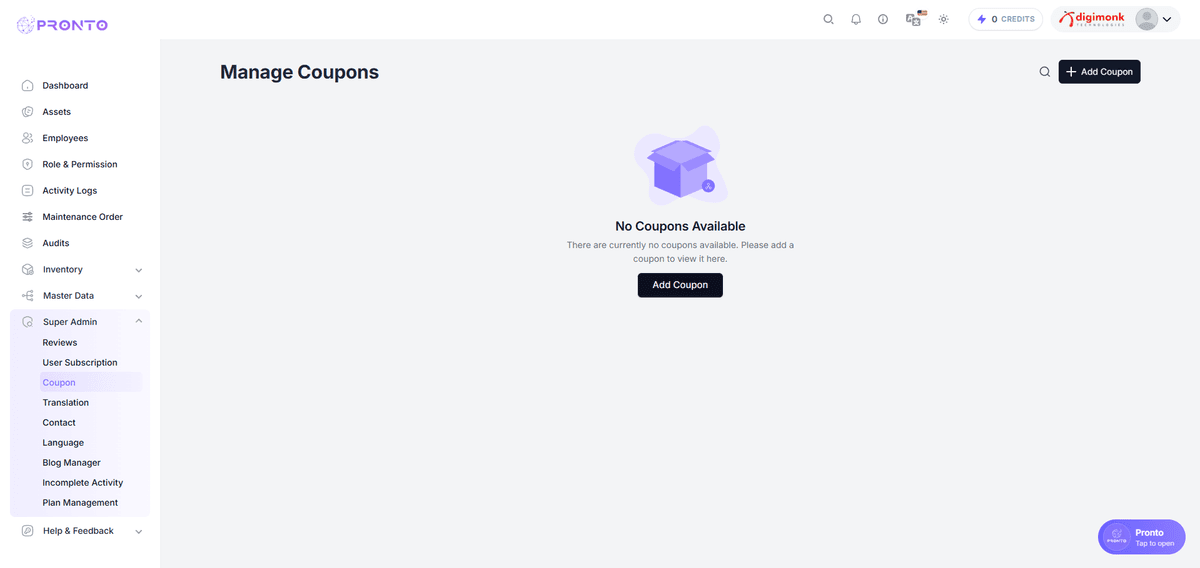
Add a New Coupon
Click on the Add Coupon button located at the top-right corner. A popup form will appear. Enter the required fields as described below:
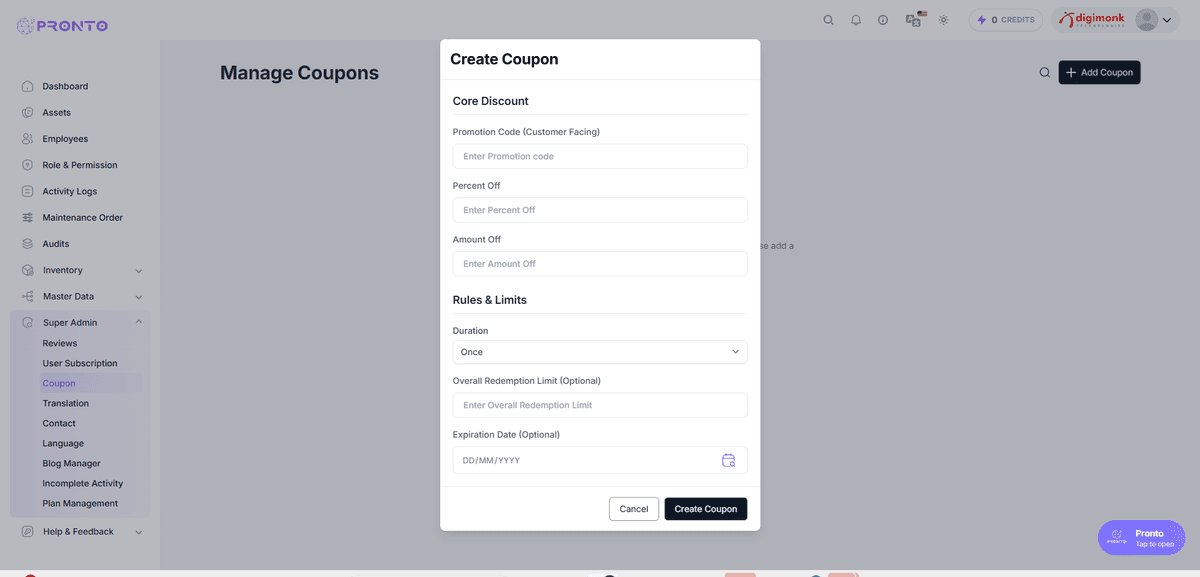
Core Discount
Promotion Code → A unique code for customers
Percent Off → Enter percentage discount (optional)
Amount Off → Enter fixed amount discount (optional)
Rules & Limits
Duration → Choose how many times coupon can be used
Overall Redemption Limit → Optional limit on total redemptions
Expiration Date → Select validity date (optional)
Once done, click Create Coupon.
Coupon List View
After creating a coupon, it will appear in the Manage Coupons list.You can View all coupons Search coupons Add more coupons.
Translation
The Translation Management module allows Super Admins to manage multilingual content across the entire application. You can add new translation keys, update existing values, and import or export translations for bulk operations.
View Translation Keys
The Translation page displays all existing language keys along with their translated values.
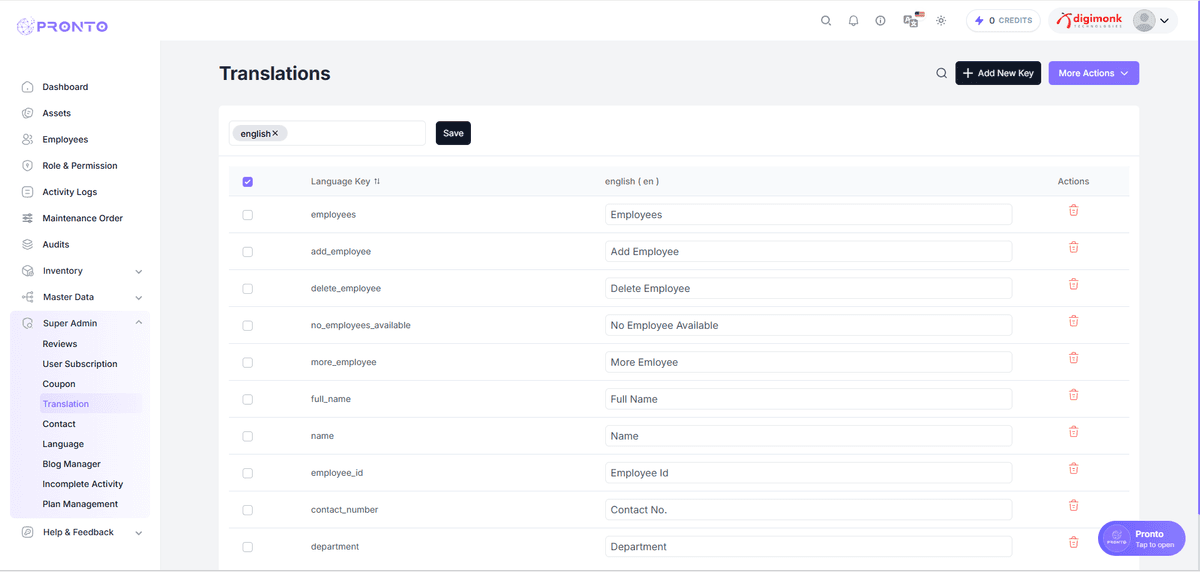
Add a New Translation Key
To add a new translation key:
- Click on Add New Key.
- A modal will open.
- Select a language.
- Enter a language key (e.g.
welcome_message). - Enter its initial English value.
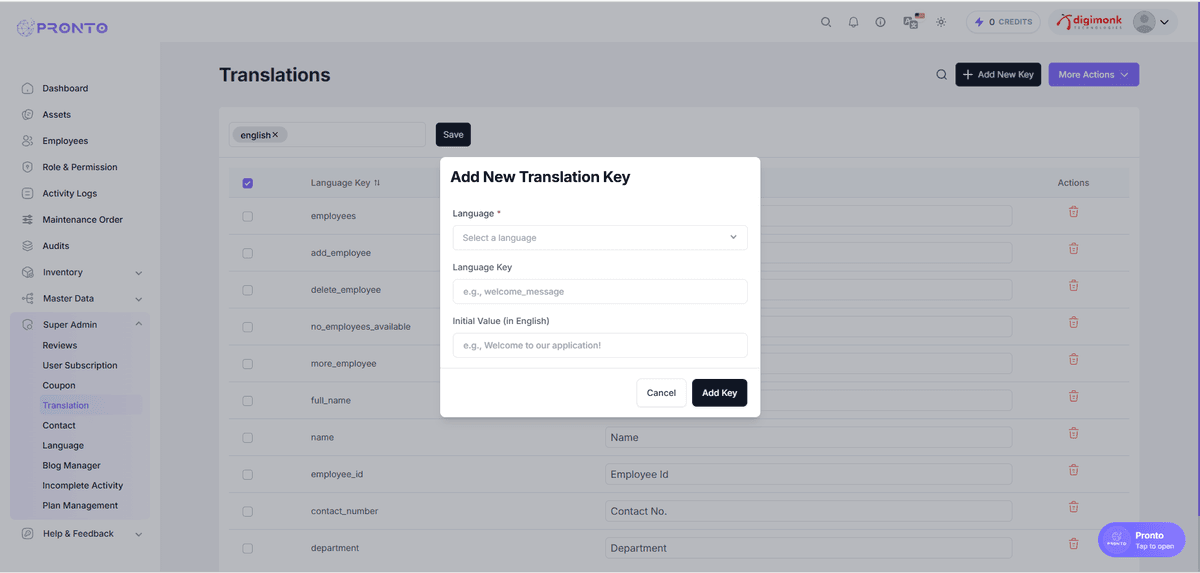
More Actions
In the More Actions dropdown, admins can:
- Import translation files
- Export all translation keys to Excel
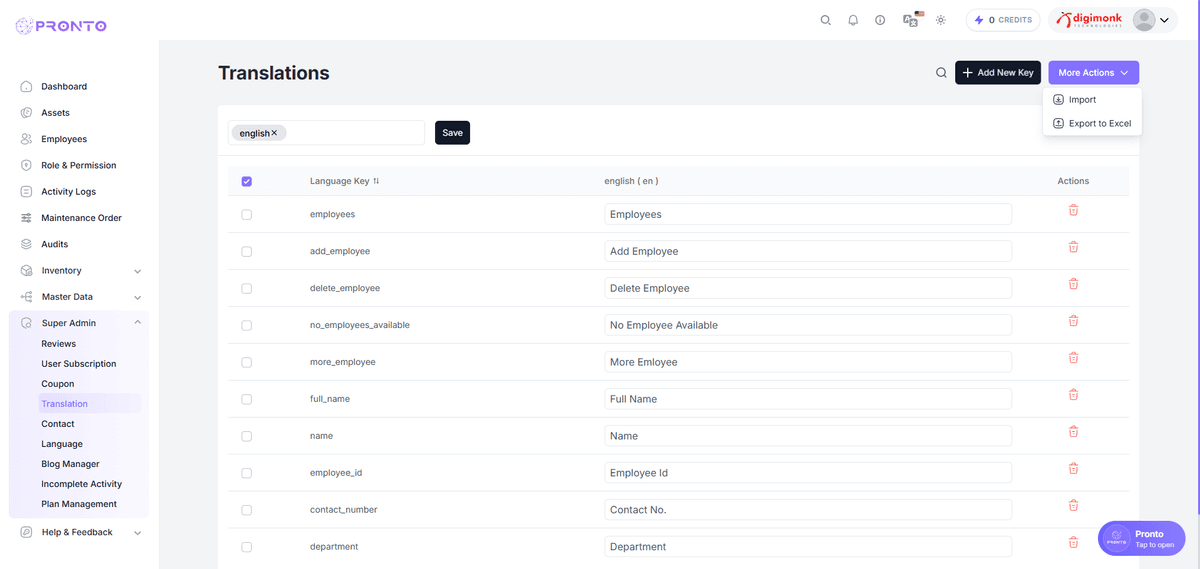
Editing Translation Values
Admins can update translations directly inside the input fields for each key and click Save to apply the changes.
Contact
The Contact Management module allows Super Admins to view and manage all user inquiries, blog subscribers, and chatbot contacts.
Contact Us
This tab shows all messages submitted via the website Contact form. Admins can view:
Long messages include a See more option.
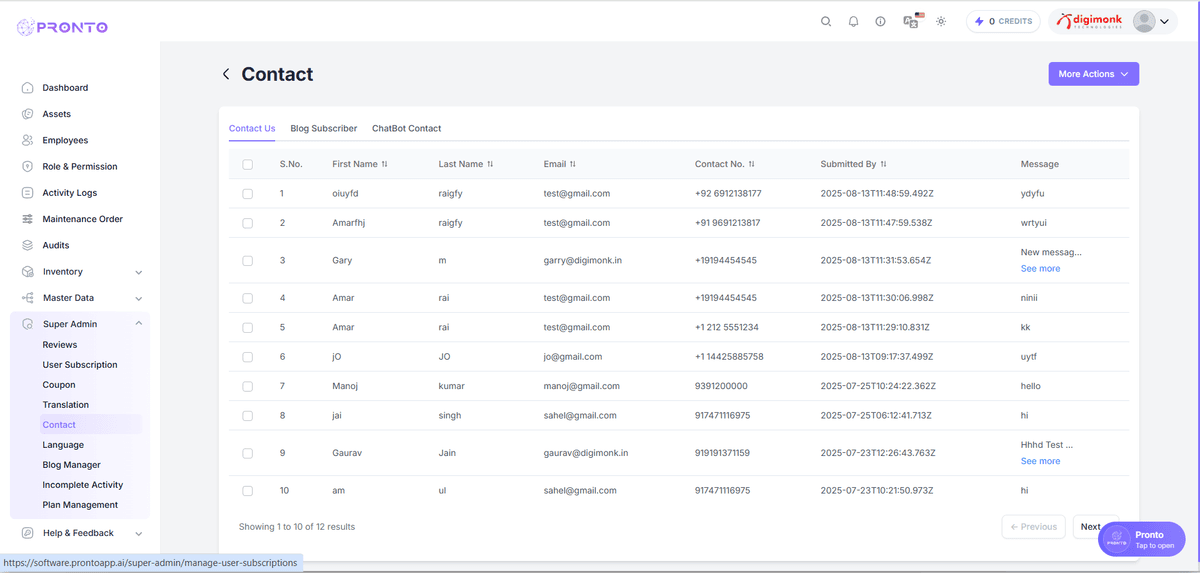
Blog Subscriber
This tab displays all users who subscribed to receive blog updates.
Each entry includes:
This helps admins track engagement and interest.
ChatBot Contact
The ChatBot Contact tab lists all inquiries generated through the chatbot system.
Admins can view:
This helps track leads coming specifically from chatbot interactions.
More Actions
- The More Actions menu provides access to additional options, including editing, deleting, and managing various administrative functions.
• Export all contacts to Excel• Export all contacts to PDF
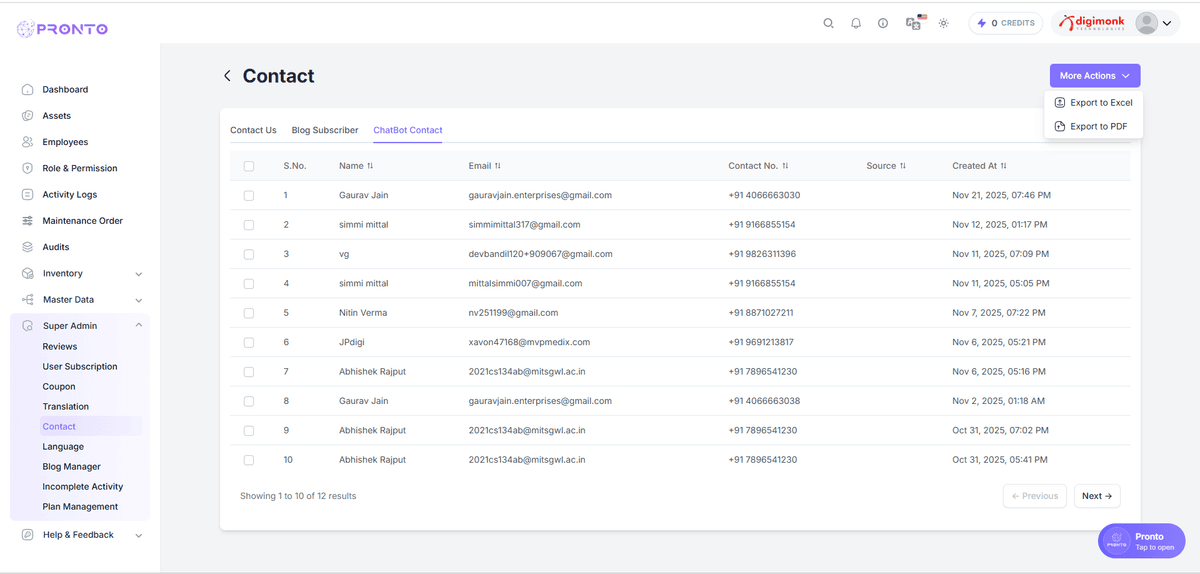
Language Management
The Language Management section allows Super Admins to add, view, and delete languages supported by the system. Each language includes a name and a flag icon for easy identification.
View Languages
This page displays a list of all active languages in the system. For each language, you can see:
Flag
Language Name
Delete Action
You can also navigate between pages using the pagination buttons.
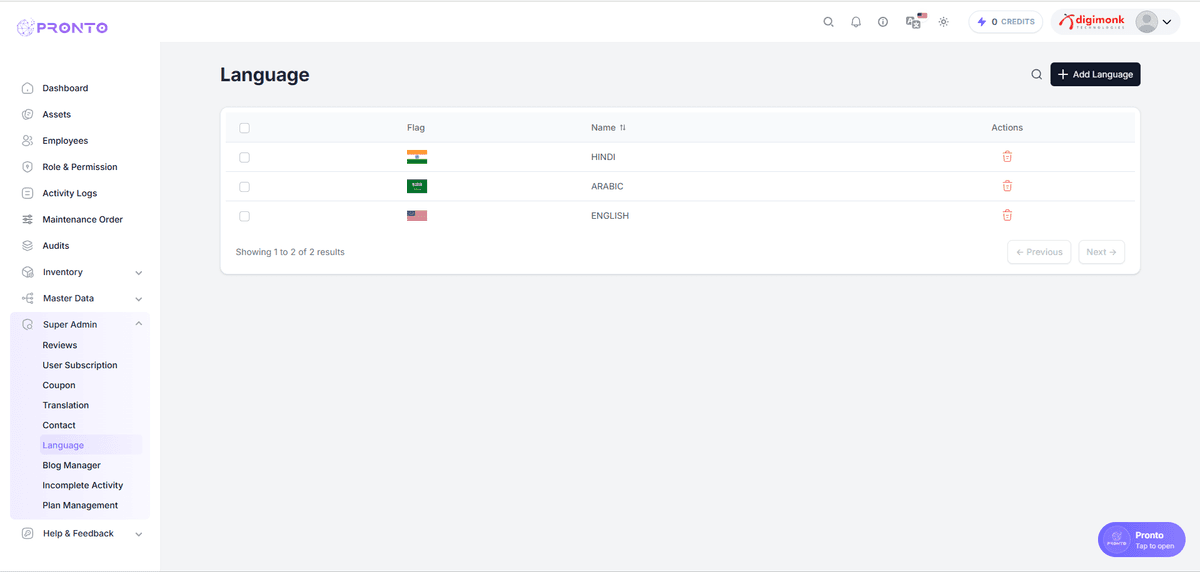
Add a New Language
To add a new language:
Click on the Add Language button.
A modal will open.
Enter the Language Name (e.g., English).
Enter the Language Code (ISO 639-1) (e.g., en).
Click the Add Language button to submit.
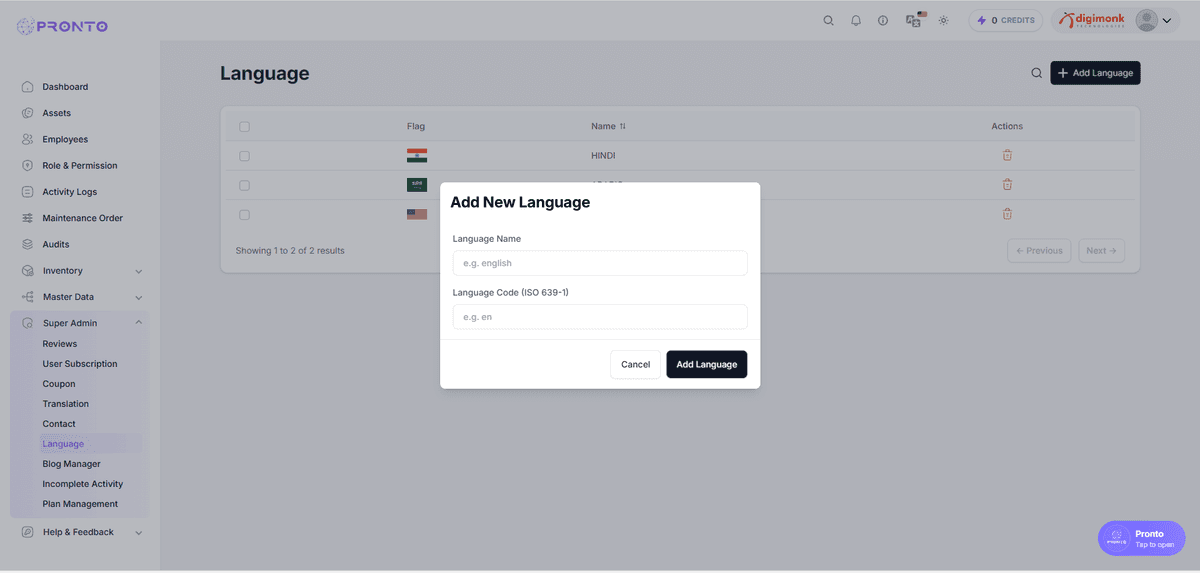
Blog Manager
The Blog Manager lists all blogs created by admins. It displays:
Blog Image
Title
Status (Draft / Published)
Created Date
Admins can:
Edit blog
Delete blog
View blog
Create new blog
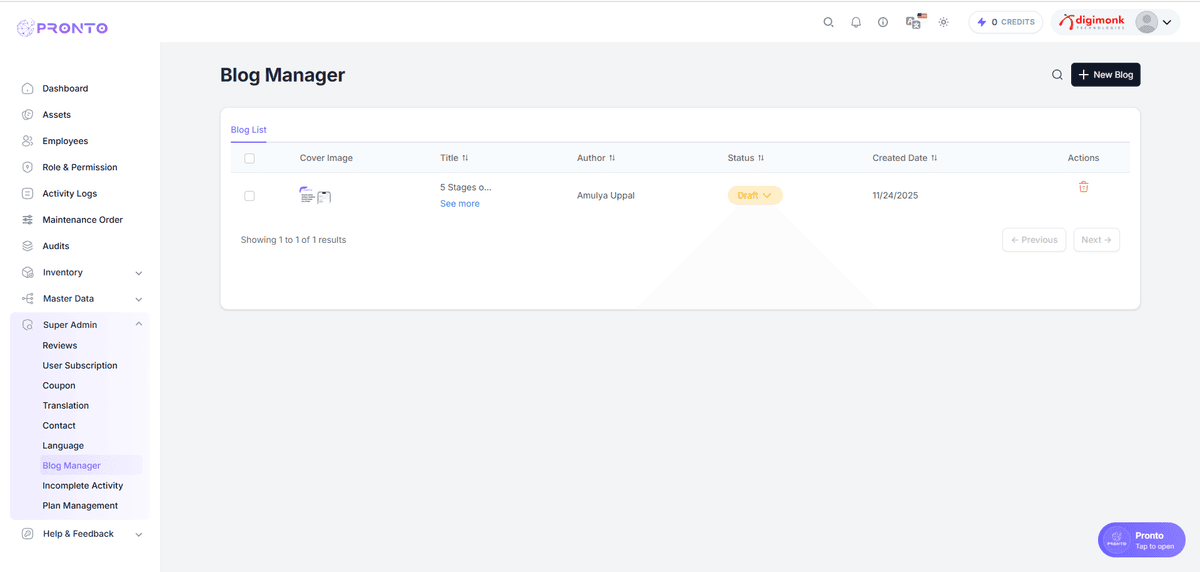
Create New Blog
The Create New Blog page allows admins to add and publish new blogs. You can enter:
Blog Title
Subtitle
Short Description
Tags
Blog Content
This section is used to create and prepare a blog before publishing.
Upload Blog Cover Image
Here, admins can upload the featured blog image. Supported formats include JPG, PNG, WebP. This image appears on both the Blog List and Blog Detail pages.
Add Blog Content Blocks
Admins can add different blog blocks such as:
Headings
Text paragraphs
Images
Custom content sections
This helps create a well-structured and detailed blog post.
SEO & Content Blocks
Admins can add:
Headings
Paragraphs
Images
Custom content blocks
SEO settings include:
Slug
Meta Title
Meta Description
Keywords
Admins can Save, Preview, or Publish blogs.
Plan Management
The Plan Management module allows Super Admins to create, update, and manage subscription plans for the application. Each plan contains:
A Plan Name
A Plan ID
Resource Limits (e.g., number of employees, storage, etc.)
Feature Toggles (enabling/disabling features)
Edit option to modify an existing plan
View All Plans
The Plan List displays all active plans along with:
Plan Name
Plan ID
Number of Resource Limits defined
Number of Features enabled
Admins can click the Edit button to modify a plan anytime.
Create a New Plan
To create a new subscription plan:
Click the Create New Plan button.
A pop-up form will appear where you can enter the plan details:
Plan Name
Plan ID
Add Resource Limits (optional)
Add Feature Toggles (optional)
Click Create Plan to save.
This feature helps admins define custom plans tailored to different pricing or access tiers.
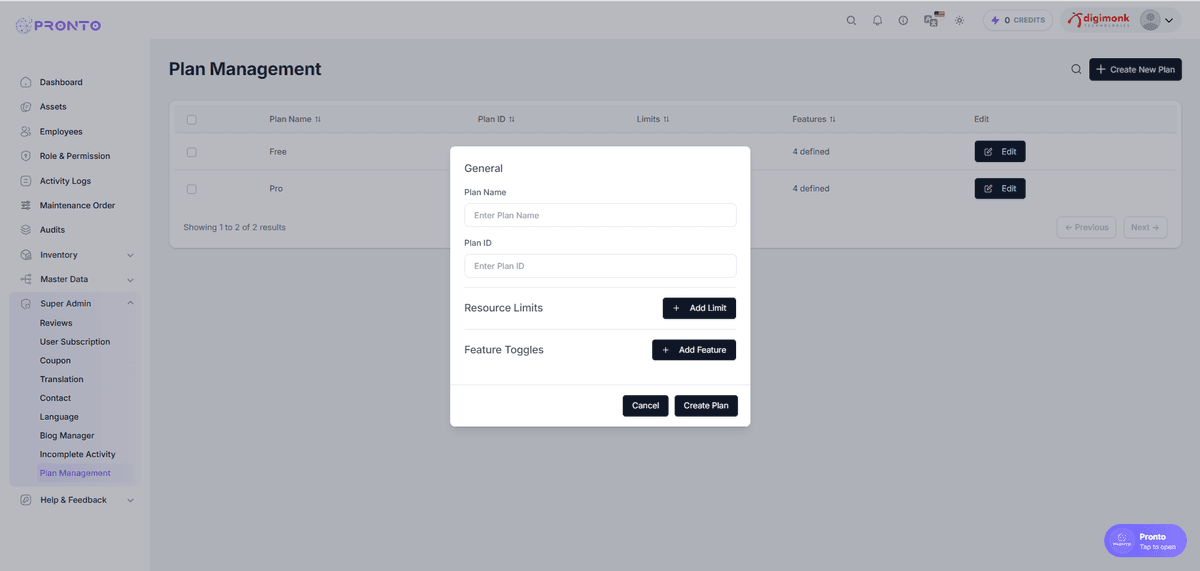
Edit Existing Plans
Admins can update:
Plan Name
Plan ID
Add or remove Resource Limits
Add or remove Feature Toggles
Editing helps keep plan structures updated as new features or rules are introduced.
Incomplete Activity
The Incomplete Activity module displays all user actions that were started but not fully completed in the application. Super Admins can view a detailed history log showing what action was triggered, who performed it, and when it occurred.
Activity List
This section shows a complete list of incomplete or partial user activities. Each row displays:
Activity Type (e.g., Sent Email, Filled Basic Info, Viewed Plan Page)
Action By (User email or identifier)
Timestamp (Date and time when activity occurred)
Admins can scroll through the table or use pagination controls to move between pages.
This helps track user behavior and identify where the onboarding or interaction flow may be breaking.
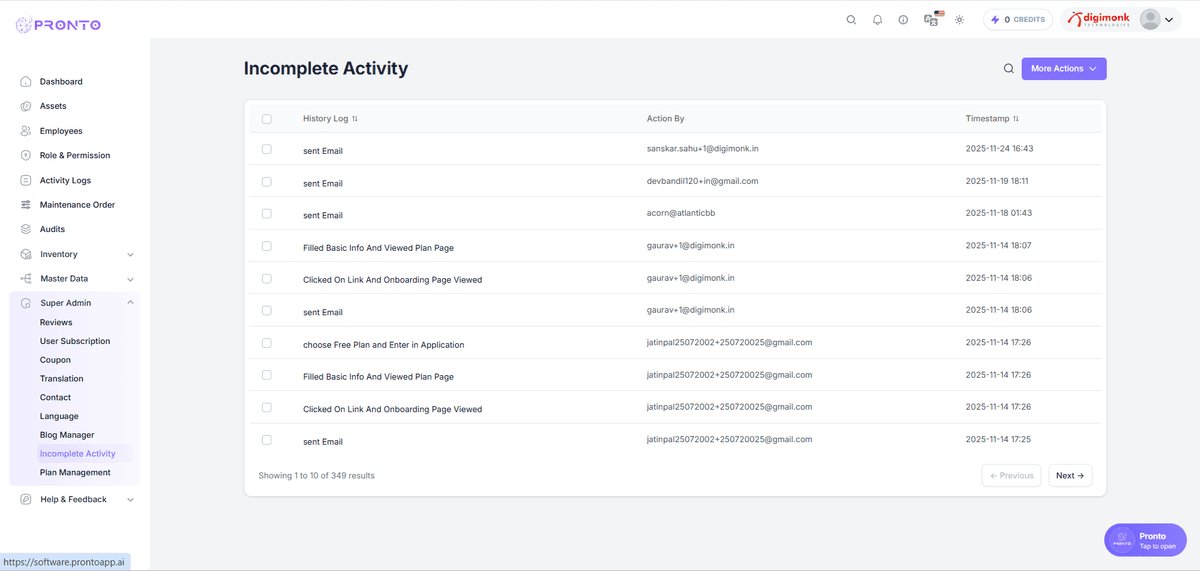
More Actions Menu Incomplete Activity.
The More Actions dropdown provides export options for downloading activity logs.
Admins can:
Export activity data to Excel
Export activity data to PDF
These exports help in offline analysis, auditing, and internal reporting.
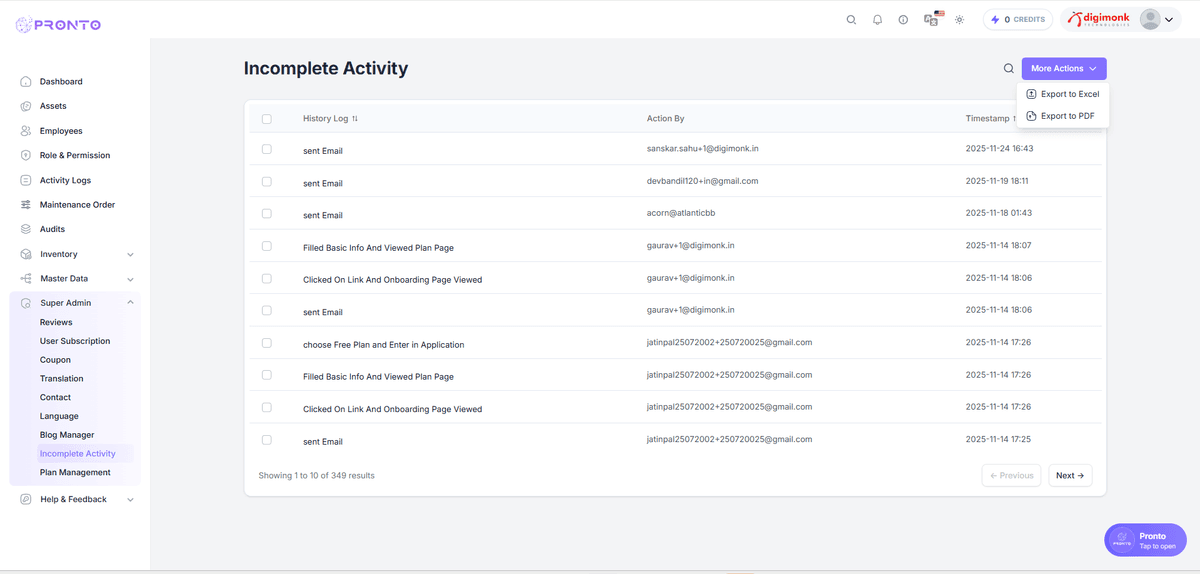
Help & Feedback
Watch Video
Report a Bug
The Report a Bug section helps users identify, document, and submit any technical or functional issues encountered in the application.
Navigating to the Page
Go to the left sidebar and click:
Help & Feedback → Report a BugThis will open the bug reporting dashboard.
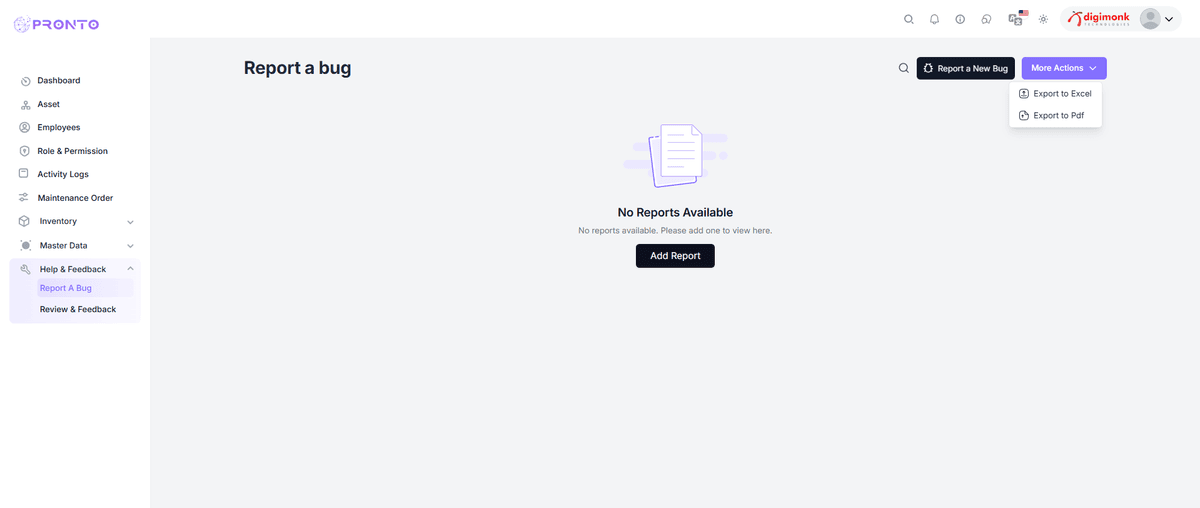
Report a Bug
The main page displays all previously submitted bug reports.
If no reports are available, a message will appear:
"No Reports Available."
Click Add Report or Report a New Bug (top-right) to create a new entry.
Adding a New Bug Report
When you click Add Report, a form will appear with the following fields:
- Bug Title* – Enter a short, descriptive title.
- Page URL* – Enter the exact page link where the issue occurred.
- Description* – Describe the issue clearly.
- Steps to Reproduce* – Steps to re-create the bug.
- Attachment – Add screenshots or files.
- Severity* – Low, Medium, High, Critical.
- Device Type – Desktop, Mobile, Tablet.
After completing all required fields, click Submit Report.
To stop the process, click Cancel.
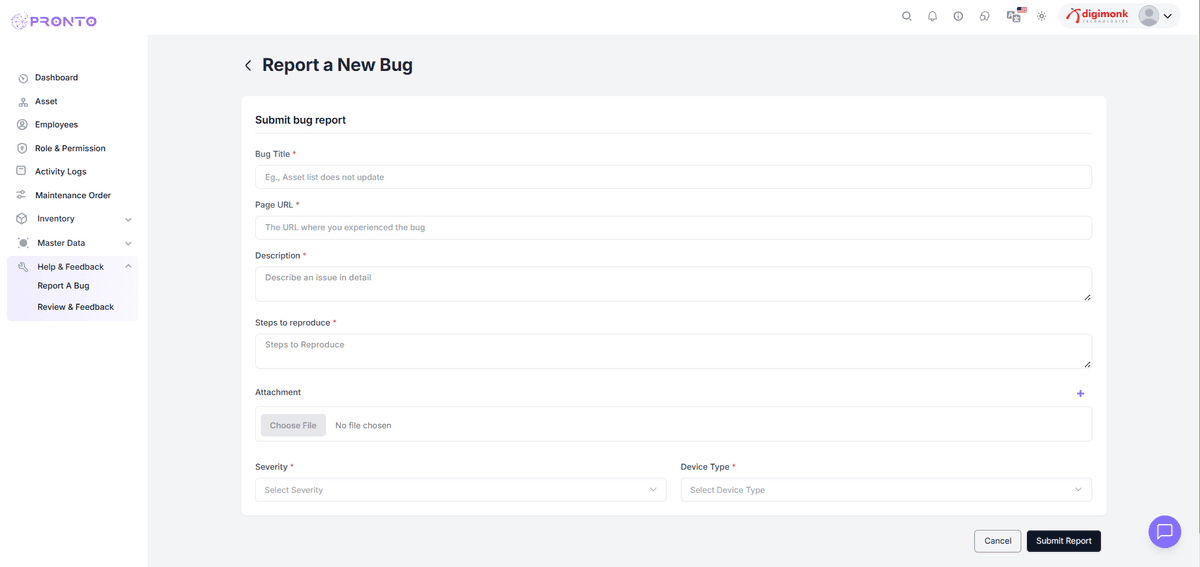
Viewing & Managing Reports
After submission:
- All reports will appear in a structured list.
- Use the Search Bar to filter reports.
- Use Pagination to navigate multiple pages.
More Actions Menu
The More Actions menu provides:
- Export to Excel (.xlsx)
- Export to PDF
Review & Feedback Module
Navigation Path
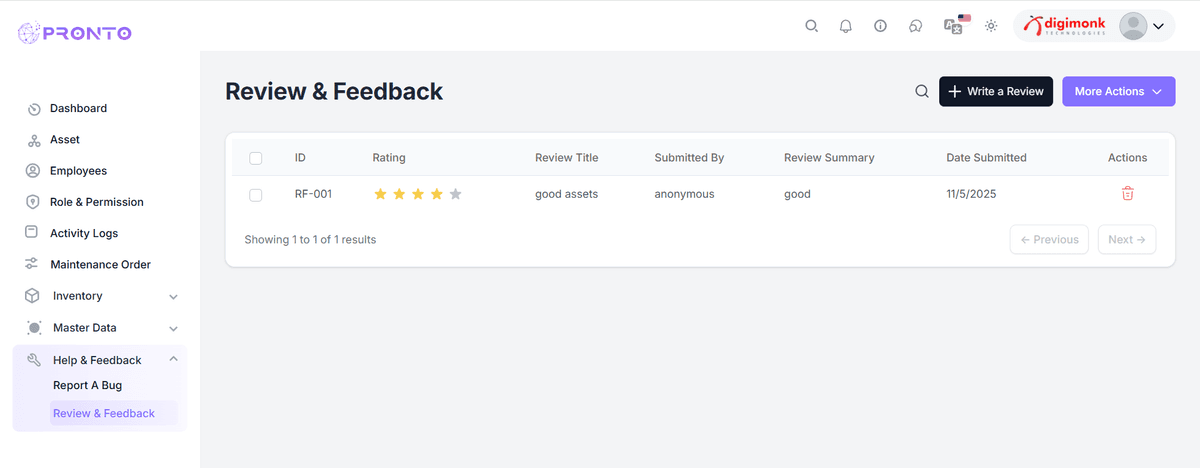
Review & Feedback Listing Page
- ID (e.g., RF-001)
- Rating (1–5)
- Review Title
- Submitted By
- Review Summary
- Date Submitted
- Actions (delete)
- Search bar for filtering
- Pagination for multiple pages
Writing a New Review
Steps:
- Click Write a Review
- Enter Rating, Title, Review Text
- Enable Submit Anonymously if needed
- Click Submit Review
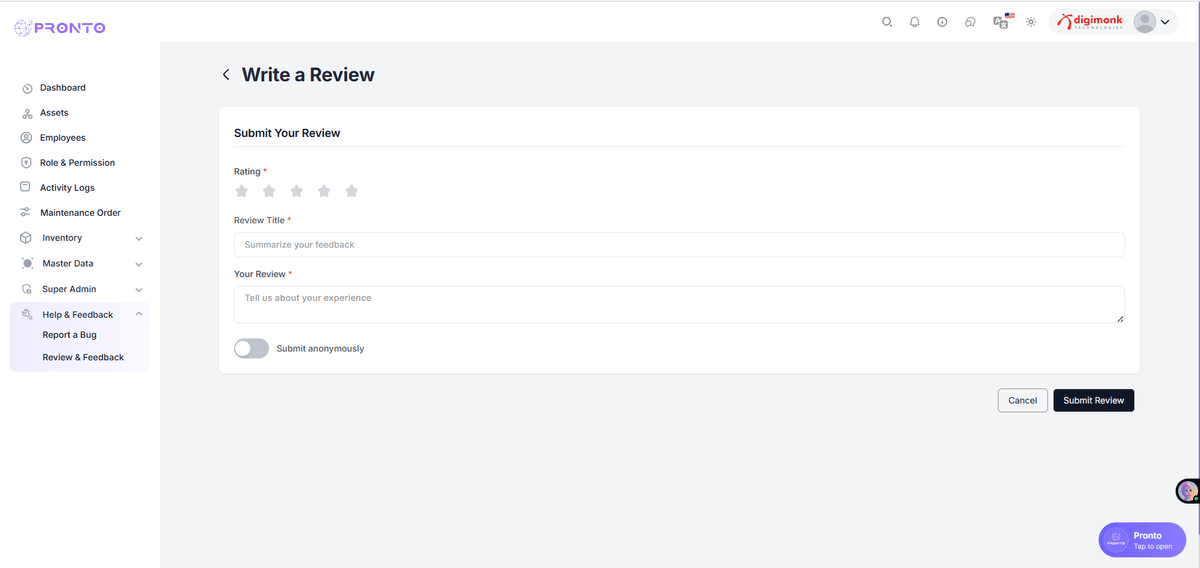
More Actions Menu
- The More Actions menu provides access to additional options, including editing, deleting, and managing various administrative functions.
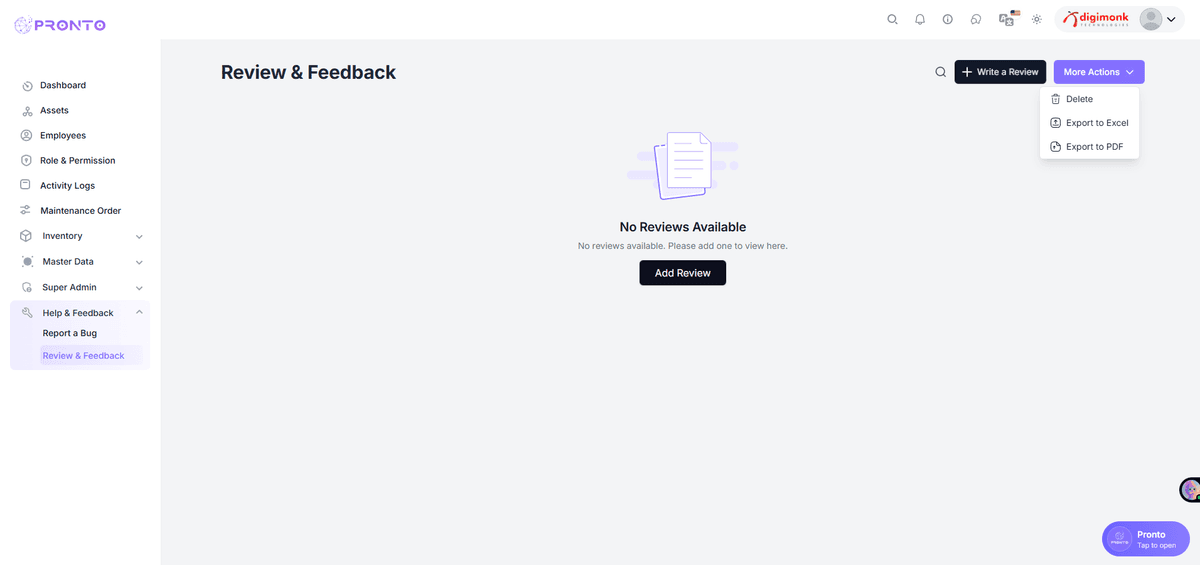
Language
Watch Video
The Language Switcher allows users to change the entire system’s language instantly.
Currently, the supported languages are:
- 🇮🇳 Hindi
- 🇸🇦 Arabic
- 🇺🇸 English
This feature helps multilingual teams access the dashboard in their preferred language.
How to Change Language
- Go to the top navigation bar.
- Click on the Language Icon (flag icon).
- A dropdown menu will appear with available languages:
- Hindi
- Arabic
- English
- Click on the language you want to switch to.
- The dashboard UI will refresh and load in the selected language.
Where to Find It
The Language Switcher is located on the top-right corner of the dashboard navbar, next to:
- Notifications
- Theme switcher
- User profile menu
Support
The Help & Support Center is designed to provide users with quick access to technical assistance and detailed documentation to ensure a smooth experience with the PRONTO system.
Managing Support Tickets
- Create New Ticket: Click "Go to Create New Ticket" to submit a formal request for technical help, report a bug, or send a service inquiry.
- View My Tickets: Click "Go to View My Tickets" to monitor the progress of active requests, read updates from the support team, and review resolution history.
- Self-Service: Use the "Documentation" link within the info dropdown for instant access to feature guides and FAQs.
Quick Chat Assistance
A floating "Pronto - Tap to open" button is always available in the bottom-right corner of the dashboard. This provides a direct line to our AI assistant or live support agents for real-time troubleshooting.
Billing
Manage your organization's subscription details, payment methods, and financial records within the Account Settings section.
Billing & Invoices
- Billing Information: Update your preferred Payment Method, select your Billing Interval, and enter your VAT/GST Number for tax compliance.
- Company Address: Edit your Your Address and Billing Address to ensure all financial documents are legally accurate.
- Invoice History: The Invoices table lists all past transactions, including the Date, Plan name, and Amount paid. You can track your payment history directly here.
- Saving Changes: Always click the "Save" button at the bottom right after updating any billing or address details.
Tip: Keeping your VAT/GST information updated ensures that your invoices are generated with the correct tax deductions for your region.
Subscription Plans
- Plan Comparison:
- Free Plan: Suitable for getting started, supporting up to 20 users and 500 assets.
- Pro Plan: Designed for professionals, offering unlimited users, unlimited assets, and 24/7 dedicated support.
- Billing Cycles: Use the Monthly/Yearly Toggle at the top of the screen to choose your payment frequency. Opting for a Yearly plan can save your organization up to 50%.
- Selection: Click "Start Free" or "Start 30-Day Free Trial" to activate or upgrade your workspace.